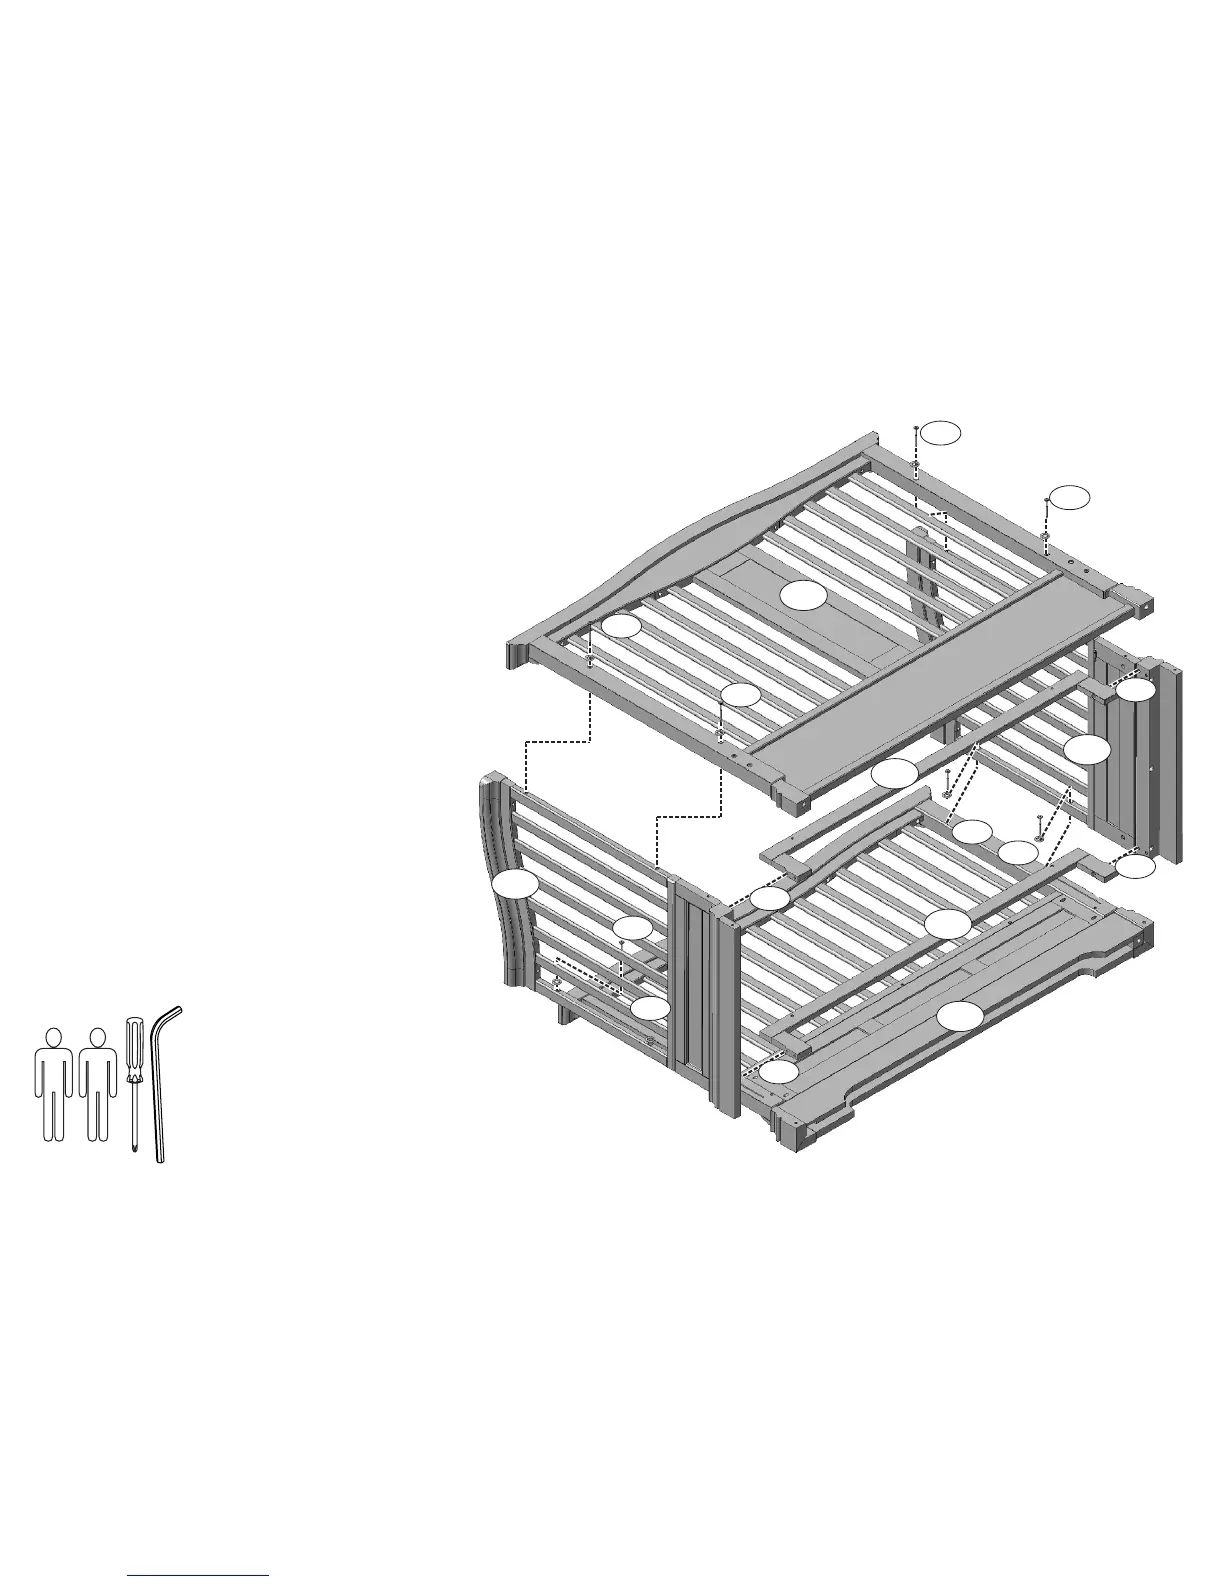
FIGURE 1
HB
FB
RP
LP
SB
SB
REQUIRED
4+10
4+10
4+10
4+10
4+10
4+10
4+10
4+10
NOTE: THE STYLE OF YOUR
CRIB, HEADBOARD OR OF
YOUR MATTRESS SUPPORT
MAY VARY FROM WHAT IS
P I C T U R E D I N T H E
INSTRUCTION SHEET
3+10
3+10
3+10
3+10
STEP 1 (Two adults are required to complete this step)
Take the footboard of your crib (FB) and carefully place it on the floor
with the drilled side on top, taking care not to scratch its finish.
Align the tenons attached at the end of the stabilizing bars (SB) with
the lower holes existing on the inner faces of the left and right panels
of the crib (LP) & (RP).
Be sure that the metallic inserts faces of the stabilizing bars are facing
towards the inside of the crib (follow the instructions attached to the
stabilizing bar).
Attach the stabilizing bars (SB) to the left and right panels using all
smaller Allen bolts (3), 4 washers (10) and the Allen wrench supplied
(1).
Do not completely tighten the bolts at this step, you will be asked to do
this later.
Carefully, take the assemble consisting of left an right panels and both
stabilizing bars (LP + SB + SB + RP) and put it over the footboard
(FB).
Using 4 bigger Allen bolts (4), 4 washers (10) and the Allen wrench
supplied (1), fix the right and left panels (RP) & (LP) to the footboard
(FB).
Take the headboard (HB) and carefully place it over the part of your
crib as resulted after completing the above steps.
Using 4 bigger Allen bolts (4) , 4 washers (10) and the Allen wrench
supplied (1), fix the headboard to the right and left panels (RP) & (LP).
Always start the threads by hand to assure you don't strip the
threads.
Do not completely tighten the bolts at this step, you will be asked
to do this later.
 Loading...