11
FRANÇAIS
ENGLISH
070709
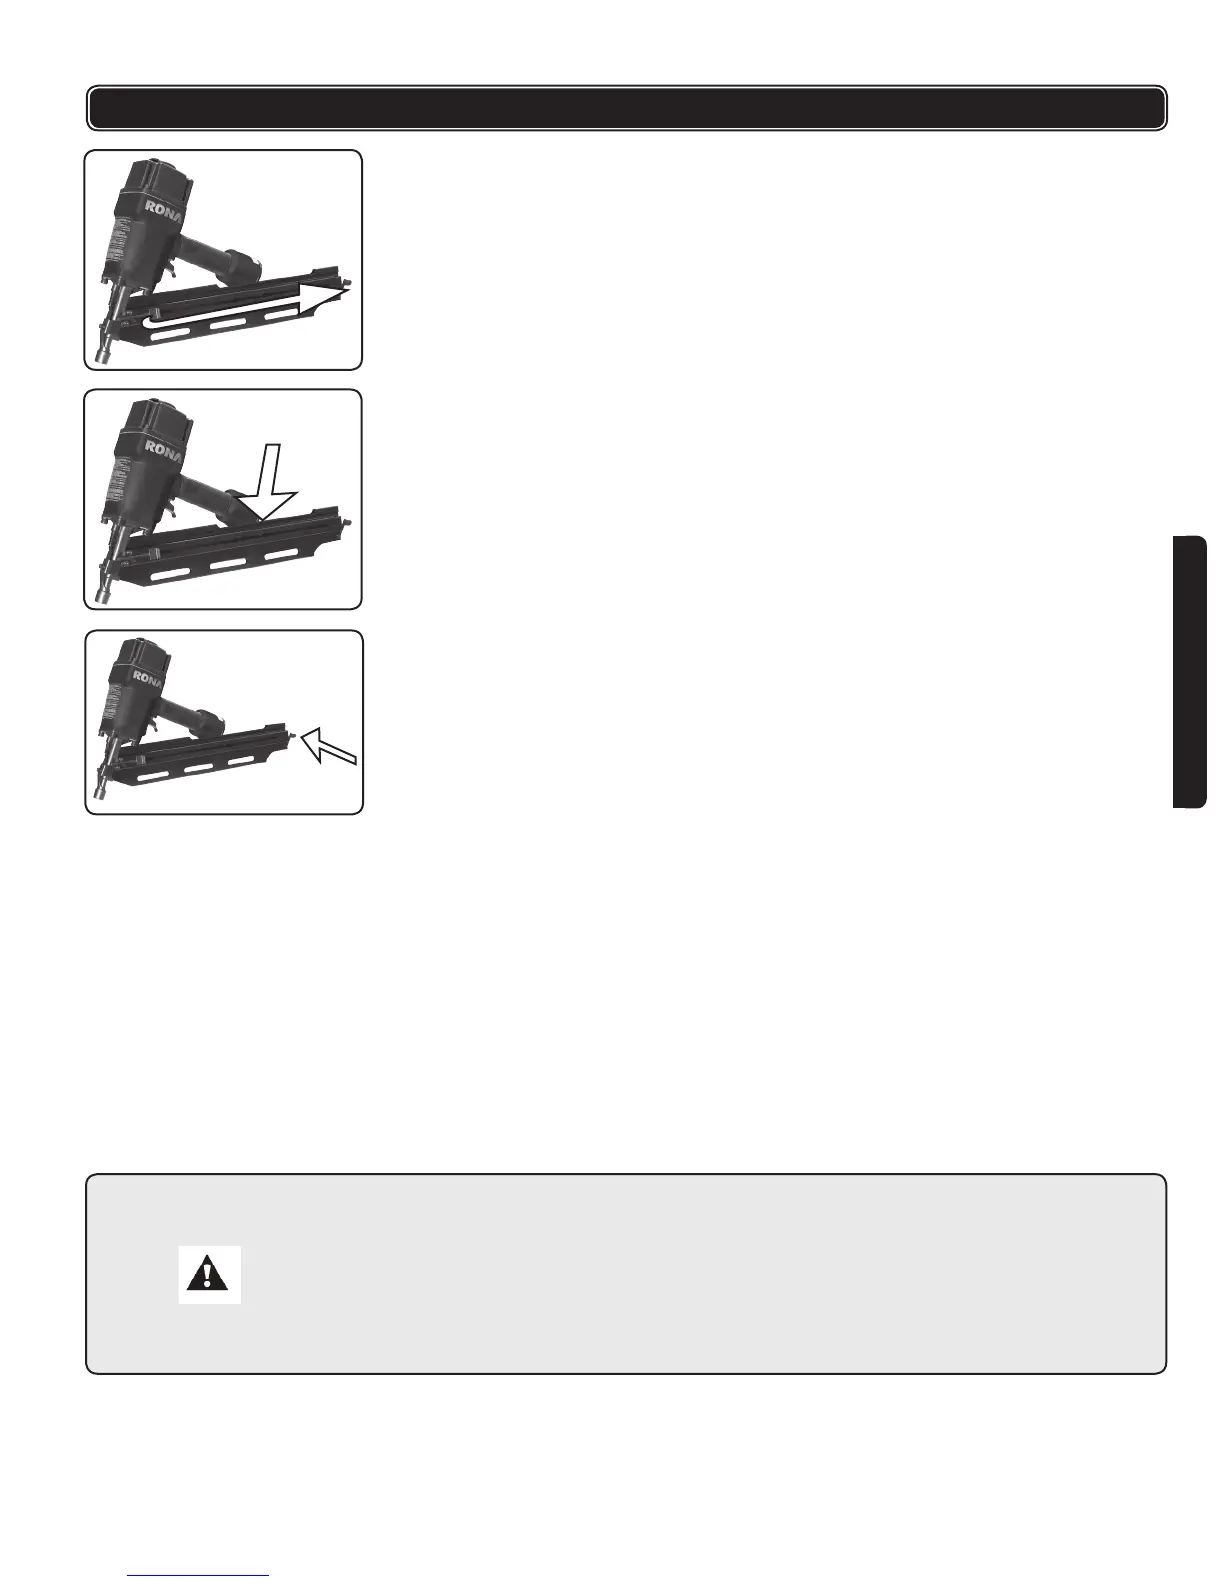
2. Pull feeder shoe all the way to the rear, until it latches .
3. Line up a strip of nails with points down and drop into the magazine.
4. Slide the nails forward in the magazine. The magazine will hold 100 nails at
28 degrees.
5. Push the lock forward and allow the feeder shoe to slide forward against nails.
6. Rotate the exhaust cover (RFNS-001-4), so that the exhaust air blast will be directed
away from the operator: Grasp the deector and rotate it to the desired position.
USING THE TOOL
Complete all the steps for preparing the tool before using. This tool can be red in two
different ways:
1. Put the nose of the tool on the working surface; lightly push the tool toward the
working surface until the safe bracket is pressed, and press the trigger to drive the
fasteners. This “trigger re” method provides the most accurate fastener placement.
In this method, the safety bracket can be adjusted with the knob to avoid striking two
nails at one time.
2. Another method to ring the gun is bump re. Keep the trigger pressed, then push the
safety bracket to the working surface. Once the bracket is pushed back enough, the
nail will re.
CAUTION:
Remove your nger from the trigger when not driving fasteners.
Never carry the tool with your nger on the trigger: the tool will re a fastener if the
safety is bumped.
Keep the tool pointed in a safe direction at all times.
Never attempt to drive a fastener into material that is too hard, at too steep an angle,
or near the edge of the work piece. The fastener can ricochet causing personal
injury.
• Clean and inspect the tool daily.
• Carefully check for proper operation of the trigger and safety.
• Do not use the tool unless both the trigger and the safety mechanism are functional,
or if the tool is leaking air or needs any other repair.
OPERATING INSTRUCTIONS
Fig. 2
Fig. 3
Fig. 4