Do you have a question about the Ronco EZ-Store and is the answer not in the manual?
To protect against electrical hazards, do not immerse cord, plug or appliance itself in water or other liquids.
Do not touch hot surfaces and turn off/unplug if smoke or fire occurs; never use water.
Use only on stable surfaces, maintain clearance, ensure adult supervision, and use as intended.
Unplug when not in use, cool before handling parts, and use only manufacturer-recommended accessories.
Prepare the unit before first use, including washing parts and attaching the glass door.
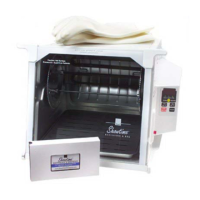
Clean the rotisserie after use, replace the light bulb, and care for non-stick surfaces.
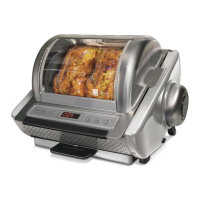
Specific instructions for cleaning stainless steel models of the rotisserie.
Information on obtaining repairs and contacting customer service for assistance.
Details on dimensions and cooking capacity for the 5250, 5260, 5270 series models.
Step-by-step guide on how to unpack the rotisserie and remove protective packaging.
Identification of all parts included with the rotisserie package.
Follow these steps to set up your rotisserie, including deploying legs and installing components.
Assemble the spit rods and safely load food onto them.
Properly load food into the basket and ensure it is securely fastened to prevent movement.
Tips for attaching the basket, monitoring food, and safe removal.
Learn how to properly tie chickens for rotisserie cooking using one or two ties.
Essential steps for securely tying turkeys with heavy string or twine for safe cooking.
Guide on how to pierce poultry with the spit rods, ensuring it's centered and secure.
Instructions on using the carving platform to load poultry onto the spit rods for even distribution.
Understand how to use Position A and B for different food sizes and the speed basket.
Tips for cooking multiple small chickens or game hens side-by-side in the rotisserie.
Proper techniques for centering and loading poultry, roasts, and other meats onto the spit rods.
Instructions on how to set cooking time using the hour and minute buttons and the ON/OFF function.
Learn about the oven light heat indicator and its relation to the timer being active.
Use the ROAST setting for normal rotisserie cooking with heat and rotation.
Utilize the NO HEAT function for rotation without heat to distribute juices after cooking.
Employ the SEAR function for browning food directly in front of the heating element without rotation.
Utilize the carving platform to hold the spit rod assembly vertically for carving or to re-brown meat.
A comprehensive chart providing estimated cooking times and internal temperatures for various foods.
Details on using the optional liquid flavor injector to add marinades and flavors to food.
Instructions for using the solid flavor injector to add herbs, spices, and other small food pieces.
How to load and use the kabob rods for cooking skewers in the rotisserie.
Information on using the large multipurpose basket for thicker foods like turkey breasts or lobsters.
Description of the all-purpose carving knife and its uses for slicing and serving.
Detailed instructions for preparing and cooking ribs using the round BBQ rib basket.
Avoid aerosol sprays, oversized foods, unauthorized items, moving a hot unit, and keep away from children.
Understand grease flicker, fire safety, clearance, handling hot parts, and emptying the hot drip tray.
Learn techniques like using foil for burnt edges, monitoring rotation, and effective basting.
Proper food preparation, including seasoning, temperature, size limits, and securing items.
A list of suggested poultry and game dishes to prepare with the rotisserie.
Recommended beef and pork dishes suitable for cooking in the rotisserie.
Suggestions for lamb, fish, seafood, and vegetable preparations for the rotisserie.
Ideas for creating kabobs and skewers with various meats, seafood, and vegetables.
Key dimensions of the rotisserie oven and baskets to ensure proper food fit.
A recipe for preparing a whole chicken with a lemon herb rub using the rotisserie.
Instructions for cooking a roast beef with a four peppercorn crust in the rotisserie.
Recipe for marinating and cooking pork tenderloins with a Jamaican Jerk flavor.
A recipe for preparing salmon steaks with lemon and dill in the rotisserie basket.
Recipe for creating balsamic basil marinated vegetable skewers cooked in the rotisserie.
Instructions for marinating and cooking a leg of lamb in Merlot with herbs.
Recipe for pork chops glazed with mustard and brown sugar, cooked in the basket.
Recipe for game hens glazed with apricot and orange, cooked to a specific temperature.
Instructions for marinating and cooking BBQ beef kabobs on the spit rods.
A recipe for preparing two whole chickens with a spice rub and onions in the cavity.
Wash the chicken, remove excess parts, and tie wings and legs securely as per previous instructions.
Center the chicken on the spit rods, distribute weight evenly, and attach the gear wheel.
Place the spit rod assembly in position A or B and close the glass lid.
Set the timer for 15 minutes per pound and select the ROAST function for cooking.
Address problems like food touching the heating element by turning off, cooling, adjusting, and resetting.
Serve immediately or use the NO HEAT function to keep juices distributed during resting.
Safely remove the chicken from the rotisserie using oven gloves and serving utensils.
Understand the one-year limited warranty and the process for registering your product.
Learn the procedures for returning the product for service, including authorization and shipping.
Details on consumer rights, liability limitations, and the return policy.