13
RootsScrub E Series
OPERATION SQUEEGEE
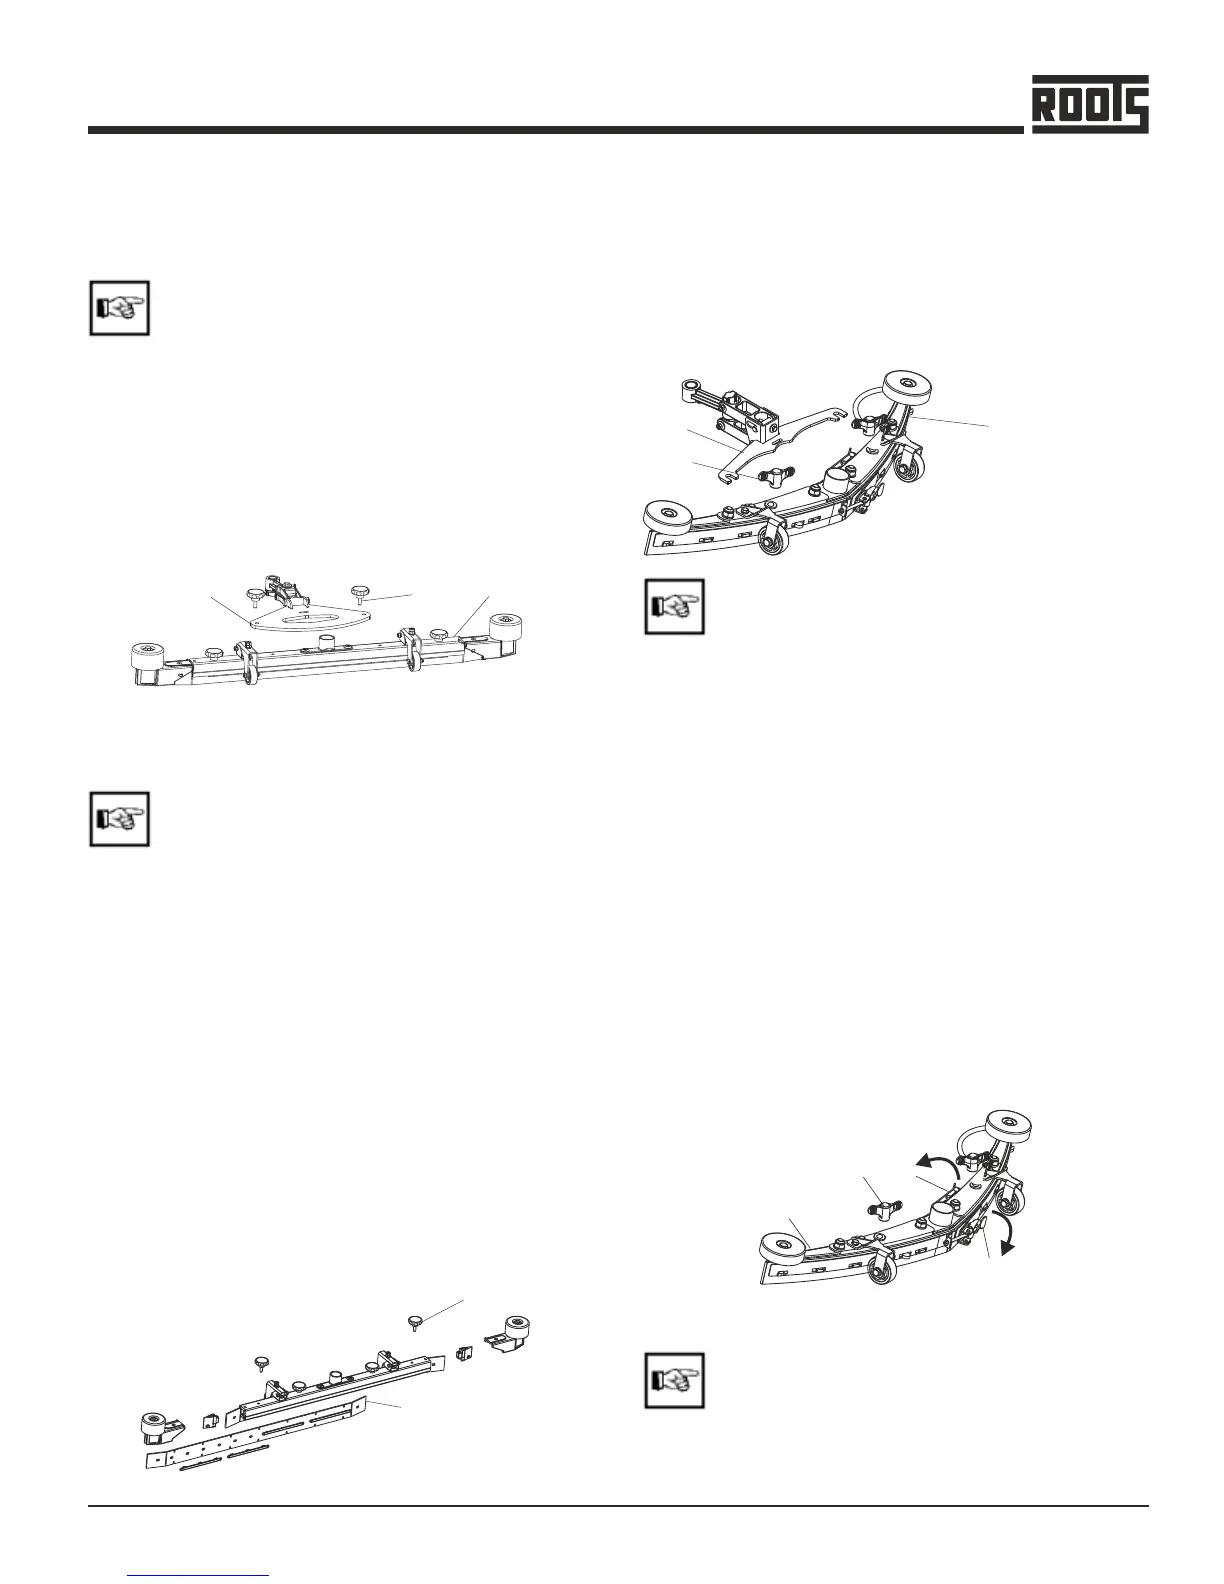
Mounting of Squeegee (first time)
Ÿ Lift squeegee bracket group (3)
Ÿ Mount squeegee (1) to squeegee bracket group (3)
and screw the knobs (2) as shown in figure.
Ÿ Attach suction hose to the tubular socket of the
squeegee.
The supporting wheel under the squeegee
bracket group has been adjusted by the factory.
Ÿ Lift squeegee.
Ÿ Unscrew the squeegee knob (2).
Ÿ Remove the squeegee towards the bottom side.
Ÿ Detach suction hose from the tubular socket of the
squeegee.
Removal of Squeegee
Parabolic Squeegee
1
2
3
1. Squeegee
2. Squeegee Knob
3. Squeegee Bracket group
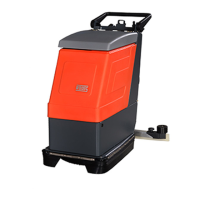
The sealing strips can be removed without any need of
tools, as follows:
Ÿ Remove the squeegee.
Ÿ Remove the squeegee knobs.(1)
Ÿ Release the Inner(3) and Outer clamps(4).
Ÿ Pull the sealing strips (2).
Ÿ Mount the new sealing strips by inverse sequence
of operation.
Replacement of Sealing Strips
1
3
4
2
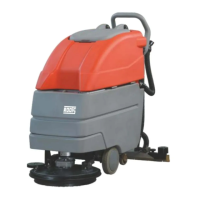
The squeegee bracket group fixed to the machine,
allowing swiveling and the oscillating movements. The
squeegee, protruding at the side, evades obstacles in
the machines path and is made swivel backwards.
Straight Squeegee
Before staring to work, check the squeegee for
possible collection of foreign matter and for
proper condition.
Mounting of Squeegee (first time)
Ÿ Lift squeegee bracket group (3)
Ÿ Mount squeegee (1) to squeegee bracket group (3)
and screw the knobs (2) as shown in figure.
Ÿ Attach suction hose to the tubular socket of the
squeegee.
The supporting wheel under the squeegee
bracket group has been adjusted by the factory.
Ÿ Lift squeegee.
Ÿ Unscrew the squeegee nut (1).
Ÿ Remove the squeegee towards the bottom side.
Ÿ Detach suction hose from the tubular socket of the
squeegee.
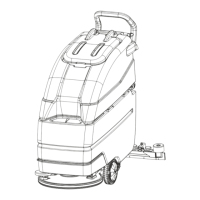
Replacement of Sealing Strips
The sealing strips can be removed without any need of
tools, as follows:
Ÿ Remove the squeegee.
Ÿ Remove the knob at the deflector area.(1)
Ÿ Pull the sealing strips (2).
Ÿ Mount the new sealing strips by inverse sequence of
operation.
Removal of Squeegee
1. Squeegee
2. Squeegee Knob
3. Squeegee Bracket group
2
1
1
2
3
Ÿ If worn, the rear sealing strip can be turned at
the front side edge.
Ÿ The supporting strip may modify the sealing
strip effect, hard-soft, and thus be adapted to
different floor conditions.