Customer S ervices, Roper Rhodes Ltd, Brassmill Lane Trading Estate, Bath, BA1 3JF
TEL: 01225 303 900 | FAX: 01225 448 877
Email: sales@roperrhodes.co.uk | Web: www.roperrhodes.co.uk
HAMPTON
SEMI-COUNTERTOP FITTING INSTRUCTIONS
Please retain for future reference
Important Installation Notes
*It is essential that any surfaces of the unit which are cut during installation are re-sealed using an appropriate waterproof sealant, varnish
or oil based paint. Failure to re-seal cut surfaces will invalidate the product warranty and may result in water damage.
Joining Units
This unit can be joined to other units with furniture fixing bolts (not provided). It is recommended that units are joined before they are fixed to the wall.
Clamp the units together using suitable clamps, ensuring they are flush and level with each other. Drill out the 4 pilot holes in the side of the
unit and using the bolts, join units together. Remove clamps and fix the assembly to the wall as required using corner brackets (not supplied).
Fitting the Semi Countertop Basin
To insert a semi countertop basin it will be necessary to cut both the worktop and the unit fascia. It is much easier to do this before the
worktop is fixed in position. The following instructions assume that the basin is supplied with a cutting template.
1. Position the worktop accurately on the base unit, but don't secure it.
2. Position the cutting template (supplied with the basin) and mark out the cut line on the worktop and fascia.
3. Remove the worktop and cut. Note: if using a jig saw on laminate worktops it is recommended that the top is cut with the finished side face down. To
do this it will be necessary to mark the basin cut line on the underside of the worktop.
4. It is easier to cut the fascia by removing it from the unit. Simply pull forward to remove fascia.
5. IMPORTANT NOTE: Re-seal all cut edges using waterproof sealant, varnish or oil based paint.
6. Refit fascia and secure the worktop in position. Note: with some semi countertop basins it is easier to fit the basin to the worktop before fitting the
worktop to the base unit.
7. Fit the semi countertop basin according to manufacturer's instructions. It is always easier to fit the basin waste and taps before securing the basin
to the worktop. Make sure that any screws used to secure the basin are not too long; otherwise they may go right through the worktop. Always seal the
mating surfaces between basin, worktop and fascia with silicone sealant. This prevents water seeping under the basin rim and damaging the worktop.
8. Connect plumbing services as necessary.
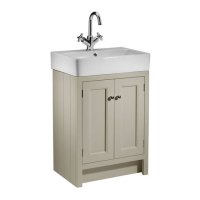
Worktop
Fascia
Semi Countertop basin
(not included)
RR-HAM-SCT REV : 091012