SAFETY NOTICE
The unit and basin should be fully secured to a suitably reinforced wall to ensure stability. The wall plugs supplied are only suitable for solid
stone/brick walls. For plasterboard walls use specialist wall plugs along with supplementary wall strengthening as units can be very heavy.
Seek advice from a specialist about the suitability of fixings to be used.
Wear suitable eye protection when drilling. Take care when using power tools near water - the use of a residual current device (RCD) is
recommended. Beware of hidden pipes or cables. Take care when drilling tiled surfaces as the drill might slip. Use a piece of masking tape
to prevent the drill from wandering.
Ensure to follow these instructions to the end, acknowledging final instruction of siliconing basin in position.
Customer Services, Roper Rhodes Ltd, Brassmill Lane Trading Estate, Bath, BA1 3JF
Tel:01225 303 900 | Fax: 01225 448 877
Email: sales@roperrhodes.co.uk | Web: www.roperrhodes.co.uk
SYSTEM
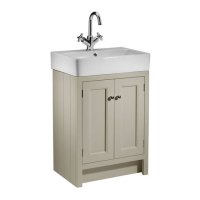
WALL MOUNTED UNIT
Please retain for future use
PAGE 1 OF 4
RR-SYSWM REV : KA/11/2017
Replacement Components
Should you require any replacement components for this product please contact Roper Rhodes using the contact details below.
FURNITURE AFTERCARE INSTRUCTIONS
As with all wooden furniture, this product should be treated with care.
We recommend...
Wipe away any water splashes or condensa-
tion after use. Excessive exposure to water will
deteriorate the furniture.
All bathrooms should be well ventilated with a
suitable extractor fan.
Clean with a soft damp cloth only.
For removal of lime scale deposits use a
suitable proprietary cleaner. If necessary test
on an inconspicuous area first.
WIPE AWAY
Please DO NOT...
BLEACH
CLEANER
CREAM
CLEANER
Do not scrub or scour
Do not use abrasive cleaning agents