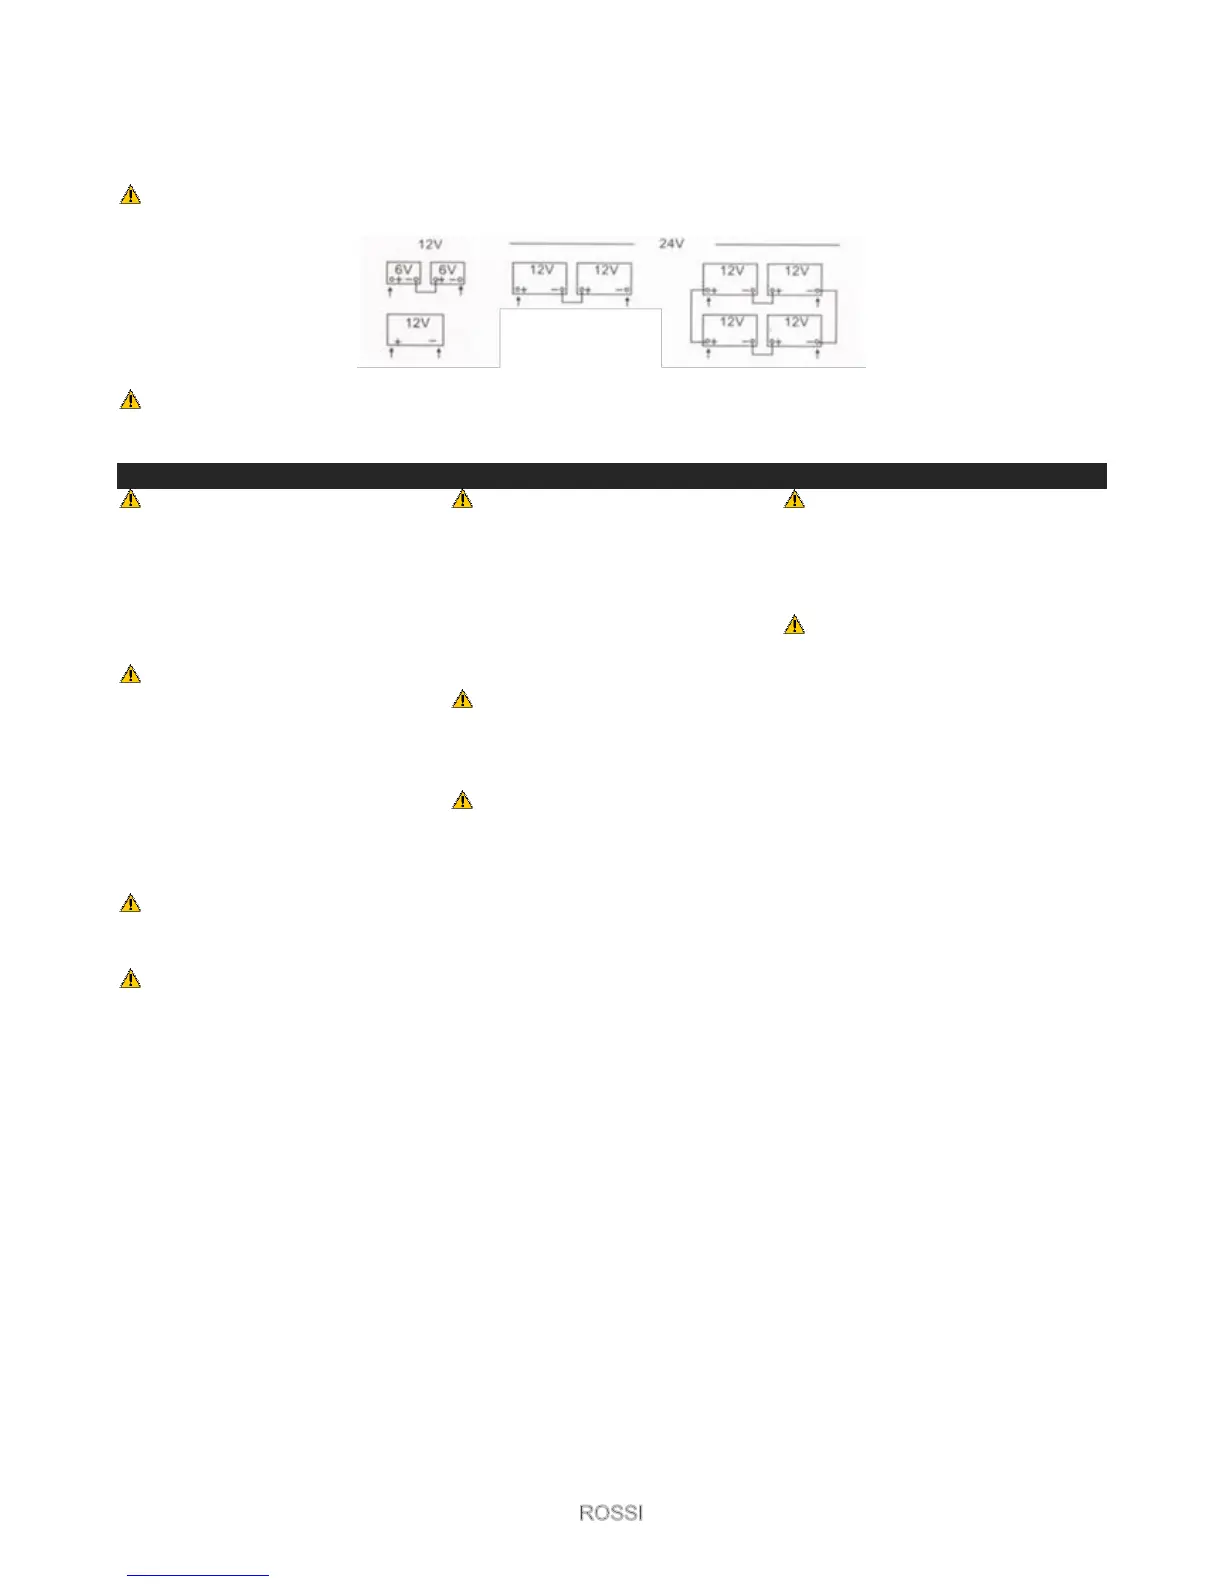
You may select the output voltages of 12 or 24 volts for charging the batteries of those voltages or battery
combinations connected in series (not parallel) in which the sum of the battery voltages adds up to the range selected.
IMPORTANT! Consult an alternative power expert before using this charger to charge multi battery
installations.
WARNING! This is a manual battery charger. Charging must be monitored often to prevent overcharging
of the battery. Overcharging a battery could cause personal injury and/or property damage.
Battery is installed in a vehicle
IMPORTANT! To reduce the risk
of a spark near the battery,
position the ac and dc cables to
reduce the risk of damage by the
hood, door and moving or hot
engine parts.
IMPORTANT! Check the polarity
of the battery posts. The positive
(POS, p, +) battery post
sometimes have a larger diameter
than the negative (NEG, n, -) post.
Determine which post of the
battery is grounded (connected)
to the chassis.
NOTE! Always leave the bonnet
open during charging to ensure
the bonnet does not touch the
metal part of the battery clips.
Stay clear of fan blades, belts,
pulleys and other parts that can
cause injury.
WARNING! Do not connect the
clip to the carburettor, fuel lines or
sheet-metal body parts.
WARNING! A spark near the
battery may cause a battery
explosion.
WARNING! Make sure that the
vehicles are not touching each
other and that the jumper lead
clamps do not touch each other.
NEVER! Remove the Clamps
while an engine is running, there
is a risk of damaging delicate
computers in a vehicle as well as
risk of battery explosion.
Before proceeding ensure that the ignition of both vehicles and anything that could cause an electrical
load i.e. headlights, interior light etc., are turned off, and keys are removed from the ignition of both
vehicles.
Before charging or jump starting always consult the vehicle manufacturer or your Vehicles manual for
more advice and techniques on how to jump start your vehicle to reduce and risk to electrical equipment /
computers.
For a negative-grounded vehicle:
a. Connect the POSITIVE (RED) clip from the battery charger to the POSITIVE (POS, P, +) ungrounded post of
the battery.
b. Connect the NEGATIVE (BLACK, NEG, N, -) clip to the vehicle chassis or engine block away from the battery.
c. Connect to a heavy gauge metal part of the frame or engine block.
d. Connect charger AC supply cord to electrical outlet. When disconnecting the charger, disconnect the AC cord,
remove the clip from the vehicle chassis and then remove the clip from the battery terminal.
For a positive-grounded vehicle:
a. Connect the NEGATIVE (BLACK) clip from the battery charger to the NEGATIVE (NEG, N, -) ungrounded
post of the battery.
b. Connect the POSITIVE (RED) clip to the vehicle chassis or engine block away from the battery.
c. Connect to a heavy gauge metal part of the frame or engine block.
d. Connect charger AC supply cord to electrical outlet. When disconnecting the charger, disconnect the AC
cord, remove the clip from the vehicle chassis and then remove the clip from the battery terminal.