Using your Charger
WARNING! Monitor the charging progress and stop it when the battery is charged. Not doing so may
cause damage to your battery or may cause other personal property damage or personal injury.
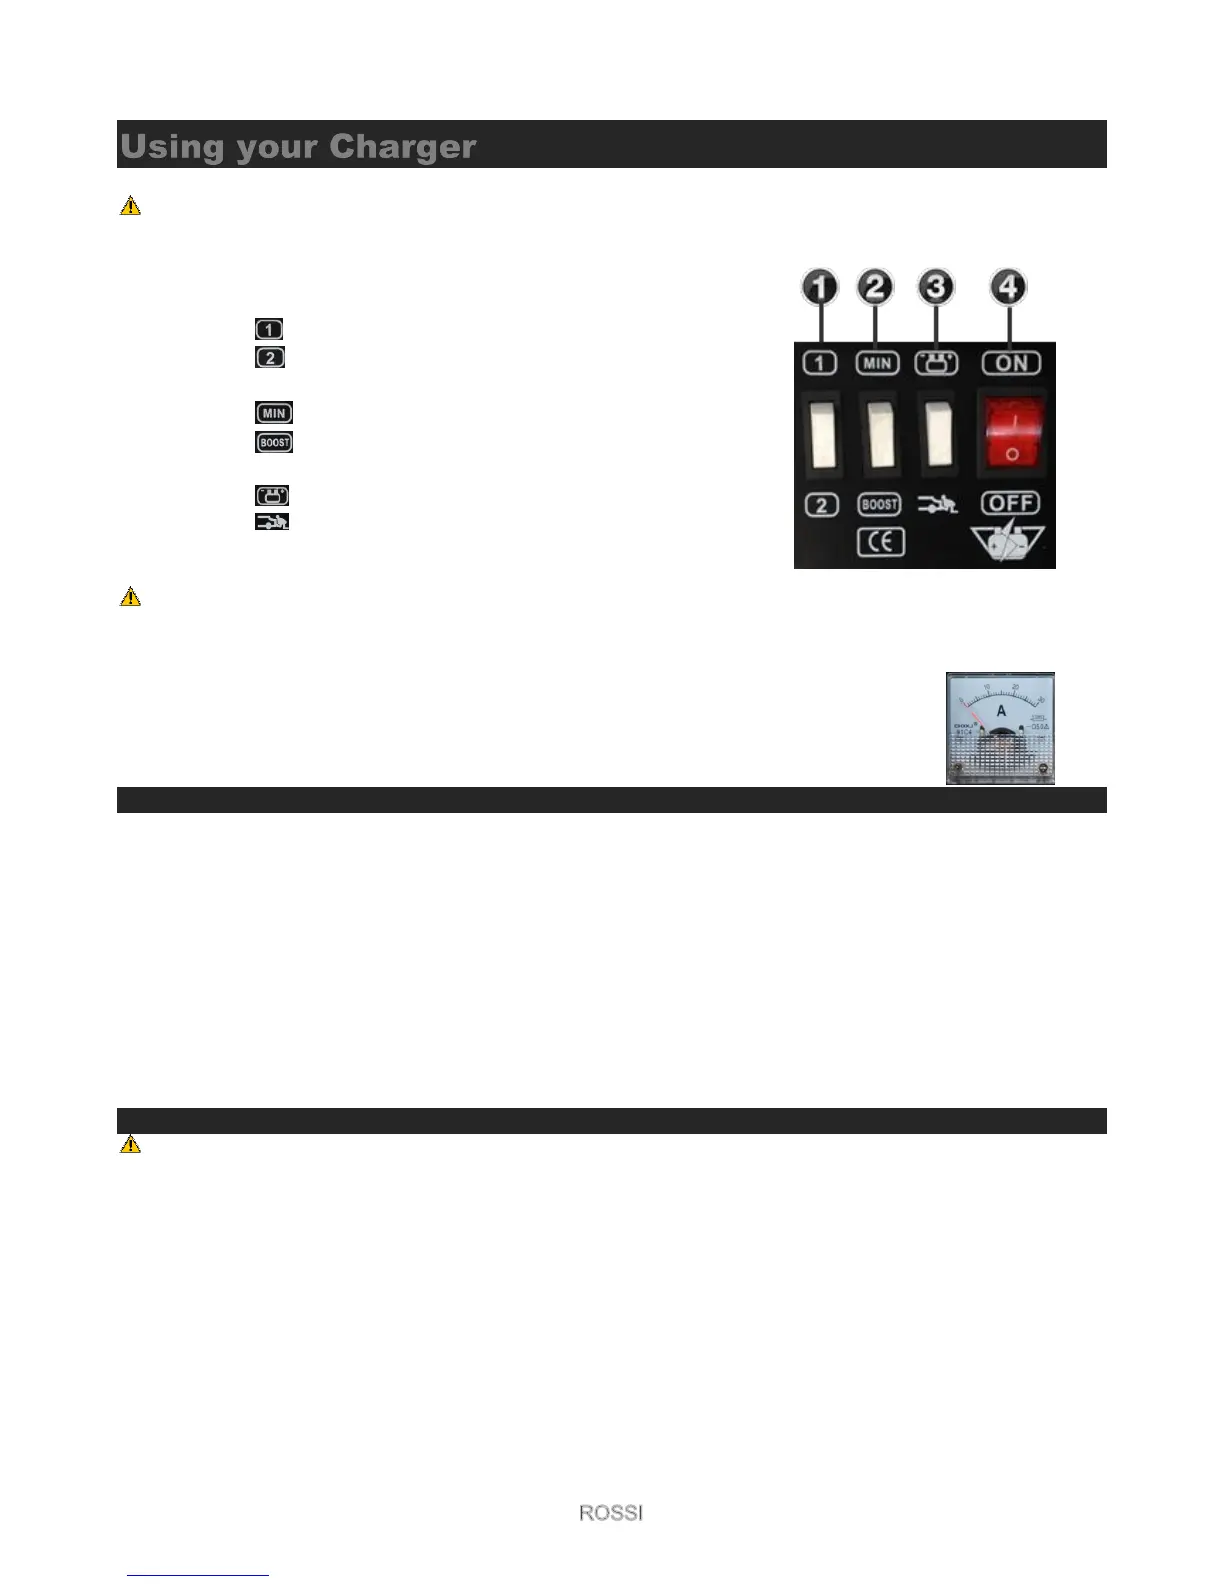
1. 1 (min charge and 2 (max charge) under “Trickle charge mode”
(disabled if Boost is selected)
a. Low “trickle charge” mode.
b. High “trickle charge” mode.
2. Boost (full power) / Min (trickle charge)
a. Trickle charge mode
b. Boost Charge mode
3. Mode Select
a. Battery Charge
b. Jump Start
4. On / Off Switch
NOTE! Some batteries can be very sensitive and damaged if charged with too high an input; consult your battery
manufacturer for support.
Ammeter
The Ammeter indicates the amount of current, measured in amps, that is being drawn by the
battery. As a battery takes on a charge, it draws less current from the charger. Correspondingly,
the meter will show less current being drawn by the battery. When the current stops decreasing,
the battery is charged.
Charging Mode output (1, 2 & BOOST, MIN options)
BT280P (CD230P)
MIN with Button (1) - Charging Current: 26Amp=26000mA; 0.65KW
MIN with Button (2) - Charging Current: 31Amp=31000mA; 0.80KW
BOOST with Button (1) - Charging Current: 33Amp=33000mA; 1.0KW
BOOST with Button (2) - Charging Current: 36Amp=36000mA; 1.30KW
BT750P (CD430P)
MIN with Button (1) - Charging Current: 31Amp=31000mA; 0.80KW
MIN with Button (2) - Charging Current: 36Amp=36000mA; 1.30KW
BOOST with Button (1) - Charging Current: 3Amp=43000mA; 1.6KW
BOOST with Button (2)- Charging Current: 50Amp=50000mA;2.0KW
Charging
NOTE! Check that it is a 12 volt or 24 volt battery you are charging.
1. Place the charge rate to the preferred position (12V or 24V)
2. Ensure that all of the charger components are in place and in good working condition, including the plastic
boots on the battery clips. Make sure the electrolyte (battery liquid) in each cell is at the correct level.
3. Set the mode to Battery Charge and boost to the desired setting (MIN or BOOST)
a. GZL-30P; simply press the switch to select.
b. All other models; unscrew the “Terminal cap”, move the Terminal swap cable unto the appropriately
marked 12V or 24V terminal.
4. Set the Charge function to the desired setting (1- Low / 2- High).
5. Connect the battery following the precautions listed in this manual.
6. Connect the AC power following the precautions listed in this manual.
7. To disconnect the charger, reverse the procedure.
12V / 24V Charge Rate.