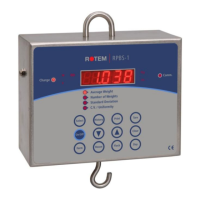
RPBS-1 PORTABLE SCALE 2.0 12
General Features
The following are included in this section:
Setting Up Bird Classification
A/D Count Test
Setting Up Bird Classification
This feature enables you to manage flock weight and provides an overall
flock view.
The RPBS-1 can automatically classify bird weights in to four user-defined
groups.
To create deferent groups follow the next easy instructions:
1. Simultaneously press the UP directional arrow and HISTORY buttons.
The message “CLASS no” appears on the display.
2. Use the UP and DOWN directional arrow buttons to select the message
“CLASS YES”, and press the SELECT button. The number “-1-”
(indicating Class 1) alternating with a weight value is displayed.
3. Press the UP and DOWN directional arrow buttons to change the weight
range. This sets the low limit of the first class value.
4. Press the SELECT button to enter Class 2 and use the UP and DOWN
directional arrow buttons to change the weight range and set the low
limit for Class 2. The low value of this class is the upper value of
Class 1.
5. Repeat Step 1 through Step 5 to adjust Class 3 and Class 4.
To exit bird classification mode:
Repeat Steps 1-2 above and select “CLASS no” in Step 2.
After creating different classes, the RPBS-1 automatically sorts weights
according to their proper classes. The main display indicates the group
number instead of weight.
To view the number of weight per class:
Browse by pressing the SELECT button to the number of weights and
use the UP and DOWN direction arrow to leaf through classes.
You can view the same information through the printer output or connected
computer.
NOTE: If Class 1’s low limit is set higher than 0, some weights that are lighter than
the low user-determined limit do not belong in any group or are not
considered.

 Loading...