7 Installation
Installer reference guide
39
RRLQ004~008CA + RHBH/X04+08CB
ROTEX HPSU low temperature Bi‑bloc
4P384979-1C – 2017.04
7.8.6 To insulate the water piping
The piping in the complete water circuit MUST be insulated to
prevent condensation during cooling operation and reduction of the
heating and cooling capacity.
If the temperature is higher than 30°C and the humidity is higher
than RH80%, the thickness of the insulation materials should be at
least 20 mm to prevent condensation on the surface of the
insulation.
7.9 Connecting the electrical wiring
7.9.1 About connecting the electrical wiring
Before connecting the electrical wiring
Make sure:
▪ The refrigerant piping is connected and checked
▪ The water piping is connected
Typical workflow
Connecting the electrical wiring typically consists of the following
stages:
1 Making sure the power supply system complies with the
electrical specifications of the heat pump.
2 Connecting the electrical wiring to the outdoor unit.
3 Connecting the electrical wiring to the indoor unit.
4 Connecting the main power supply.
5 Connecting the backup heater power supply.
6 Connecting the user interface.
7 Connecting the shut–off valves.
8 Connecting the electrical meters.
9 Connecting the domestic hot water pump.
10 Connecting the alarm output.
11 Connecting the space cooling/heating ON/OFF output.
12 Connecting the changeover to an external heat source.
13 Connecting the power consumption digital inputs.
14 Connecting the safety thermostat.
7.9.2 About electrical compliance
Only for indoor units
See "7.9.8 To connect the backup heater power supply" on
page41.
7.9.3 Precautions when connecting the
electrical wiring
INFORMATION
Also read the precautions and requirements in the
following chapters:
▪ General safety precautions
▪ Preparation
DANGER: RISK OF ELECTROCUTION
WARNING
ALWAYS use multicore cable for power supply cables.
7.9.4 Guidelines when connecting the electrical
wiring
Keep the following in mind:
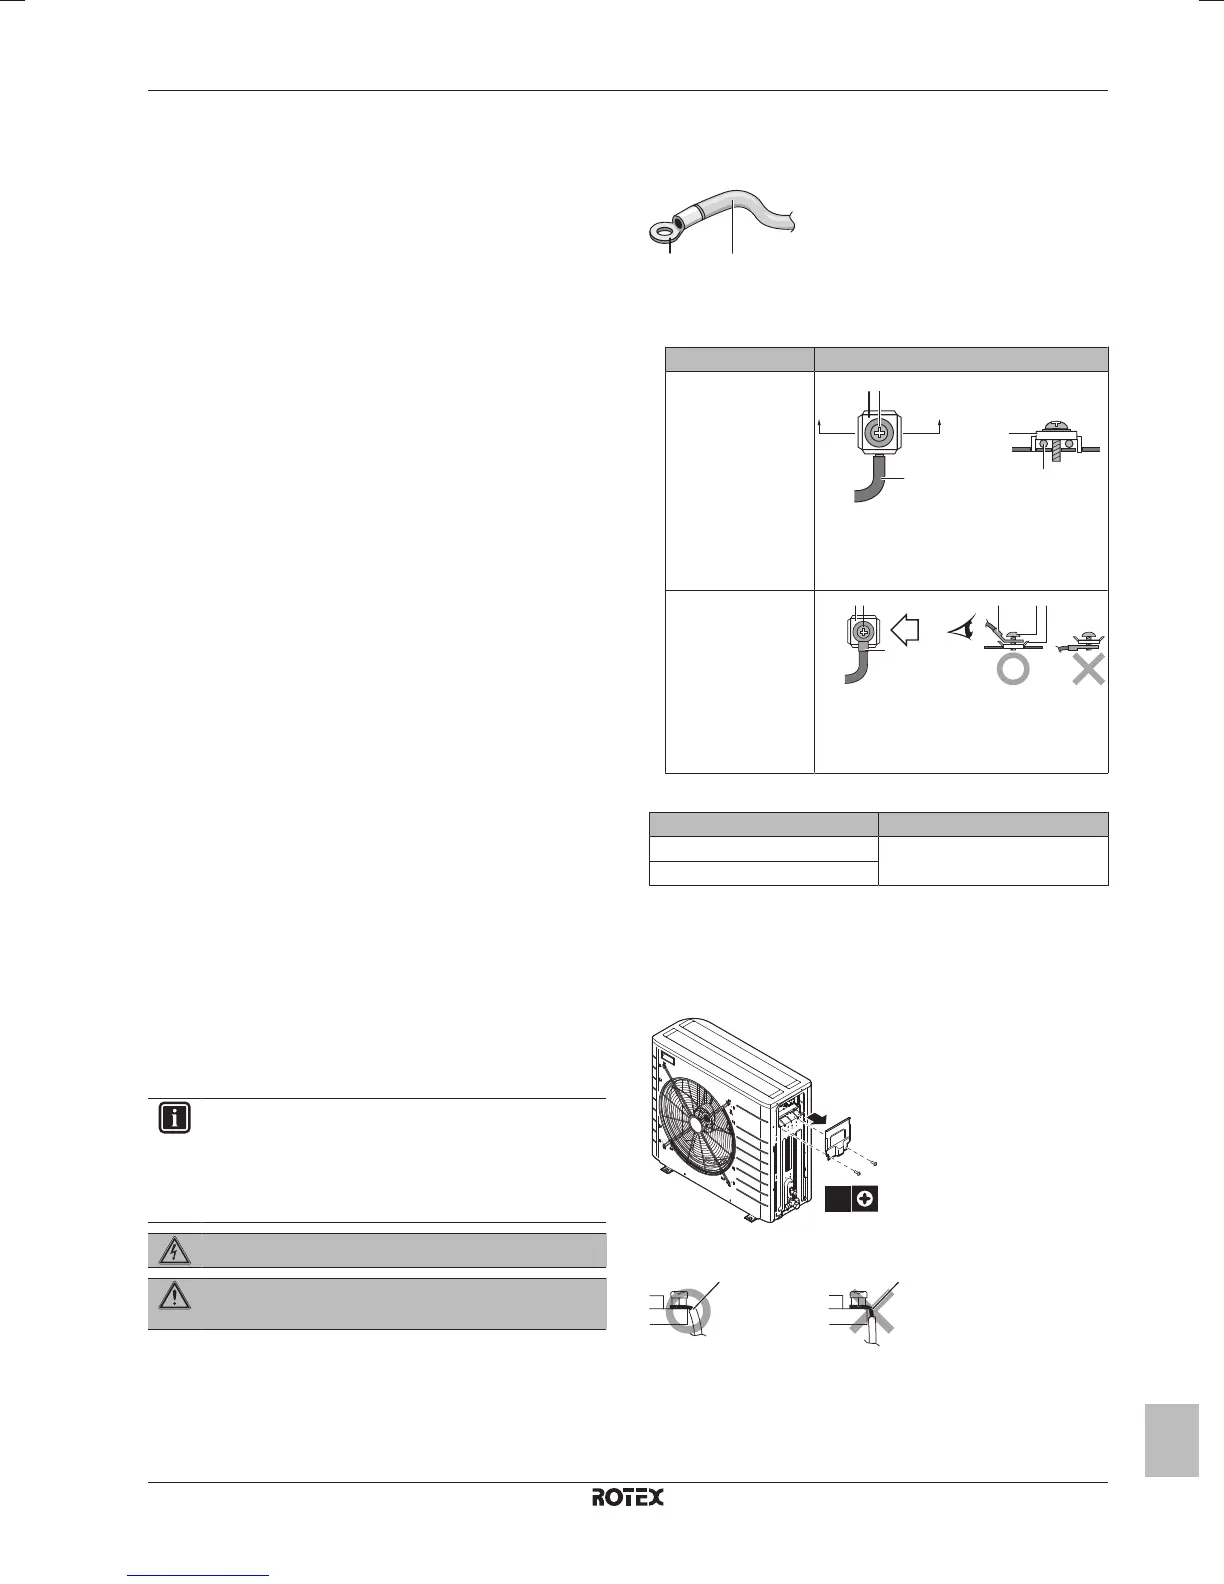
▪ If stranded conductor wires are being used, install a round crimp-
style terminal on the tip. Place the round crimp-style terminal on
the wire up to the covered part and fasten the terminal with the
appropriate tool.
a Stranded conductor wire
b Round crimp-style terminal
▪ Use the following methods for installing wires:
Wire type Installation method
Single core wire
a Curled single core wire
b Screw
c Flat washer
Stranded conductor
wire with round
crimp-style terminal
a Terminal
b Screw
c Flat washer
Tightening torques
Item Tightening torque (N•m)
M4 (X1M) 1.2~1.5
M4 (earth)
7.9.5 To connect the electrical wiring on the
outdoor unit
1 Remove the 2 switch box cover screws.
2 Remove the switch box cover.
3 Strip insulation (20mm) from the wires.
a Strip wire end to this point
b Excessive strip length may cause electrical shock or
leakage.
4 Open the wire clamp.
5 Connect the interconnection cable and power supply as follows: