from this while the system is in operation,
to the extent that quite a large puddle can
be left under the vehicle when it is parked.
2 It’s a good idea to operate the system for
about 30 minutes at least once a month,
particularly during the winter. Long term non-
use can cause hardening, and subsequent
failure, of the seals.
3 Because of the complexity of the air
conditioning system and the special
equipment necessary to service it, in-depth
fault diagnosis and repairs are not included in
this manual. For more complete information
on the air conditioning system, refer to the
Haynes “Automotive Heating and Air
Conditioning Manual”.
4 The most common cause of poor cooling is
simply a low system refrigerant charge. If a
noticeable drop in cool air output occurs, the
following quick check will help you determine
if the refrigerant level is low.
5 Warm the engine up to normal operating
temperature.
6 Place the air conditioning temperature
selector at the coldest setting, and put the
blower at the highest setting. Open the doors
- to make sure the air conditioning system
doesn’t cycle off as soon as it cools the
passenger compartment.
7 With the compressor engaged - the clutch
will make an audible click, and the centre of
the clutch will rotate - feel the inlet and outlet
pipes at the compressor. One side should be
cold, and one hot. If there’s no perceptible
difference between the two pipes, there’s
something wrong with the compressor or the
system. It might be a low charge - it might be
something else. Take the vehicle to a dealer
service department or an automotive air
conditioning specialist.
19 Engine base idle speed and
CO content check
4
Refer to the appropriate Parts of Chapter 4.
20 Manual transmission oil level
check
1
1 The manual transmission does not have a
dipstick. To check the oil level, raise the
vehicle and support it securely on axle stands,
making sure that the vehicle is level. On the
left-hand side of the transmission casing, to
the rear of the constant velocity joint, you will
see the filler/level plug. Wipe around the plug
with a rag, then unscrew and remove it. If the
level is correct, the oil should be up to the
lower edge of the hole.
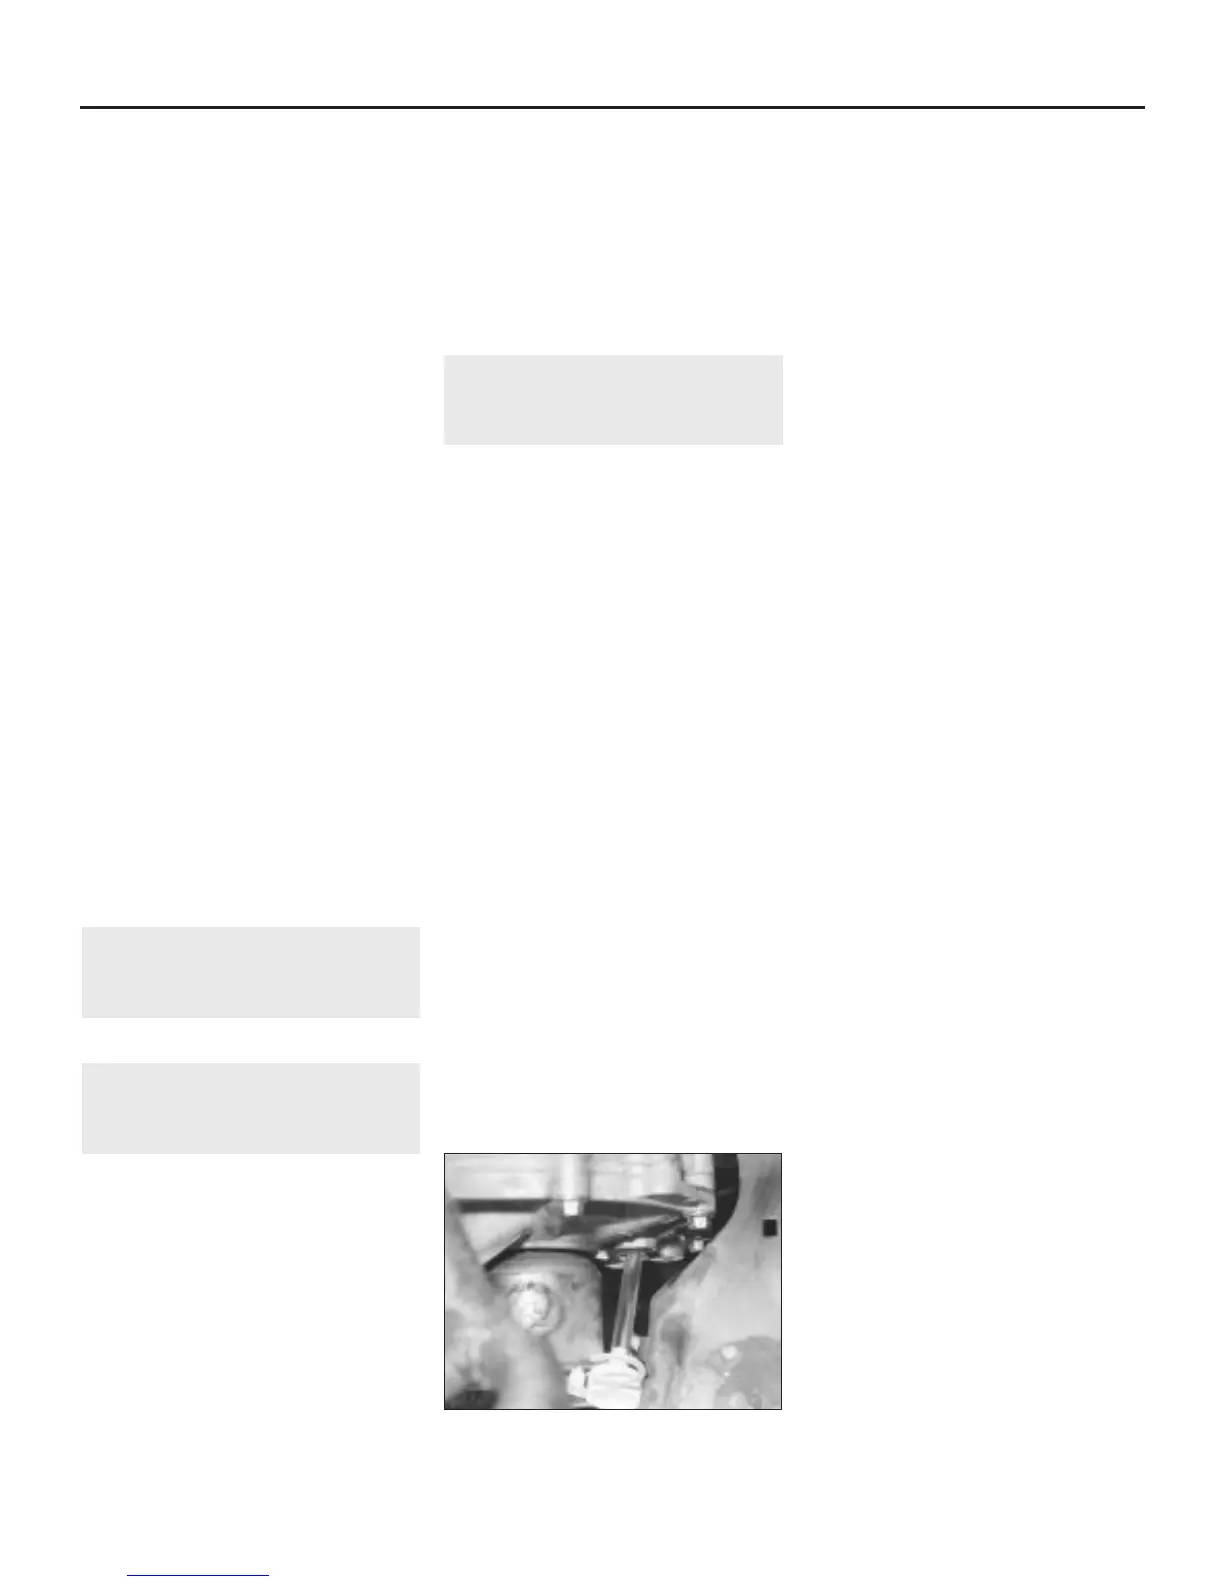
2 If the transmission needs more lubricant (if
the oil level is not up to the hole), use a
syringe, or a plastic bottle and tube, to add
more (see illustration). Stop filling the
transmission when the lubricant begins to run
out of the hole. Make sure that you refer to
“Lubricants, fluids and capacities” at the
beginning of this Chapter for the correct grade
of lubricant to use, according to transmission
type.
3 Refit the filler/level plug, and tighten it to the
specified torque wrench setting. Drive the
vehicle a short distance, then check for leaks.
4 A need for regular topping-up can only be
due to a leak, which should be found and
rectified without delay.
21 Steering, suspension and
roadwheel check
1
Front suspension and steering
check
1 Apply the handbrake, then raise the front of
the vehicle and support it on axle stands.
2 Visually inspect the balljoint dust covers and
the steering gear gaiters for splits, chafing or
deterioration. Any wear of these components
will cause loss of lubricant, together with dirt
and water entry, resulting in rapid deterioration
of the balljoints or steering gear.
3 Check the power-assisted steering fluid
hoses for chafing or deterioration, and the
pipe and hose unions for fluid leaks. Also
check for signs of fluid leakage under
pressure from the steering gear rubber
gaiters, which would indicate failed fluid seals
within the steering gear.
4 Check for signs of fluid leakage around the
shock absorber body, or from the rubber boot
around the piston rod (where fitted). Should
any fluid be noticed, the shock absorber is
defective internally, and renewal is necessary.
5 Grasp the roadwheel at the 12 o’clock and
6 o’clock positions, and try to rock it. Very
slight free play may be felt, but if the
movement is appreciable, further investigation
is necessary to determine the source.
Continue rocking the wheel while an assistant
depresses the footbrake. If the movement is
now eliminated or significantly reduced, it is
likely that the hub bearings are at fault. If the
free play is still evident with the footbrake
depressed, then there is wear in the
suspension joints or mountings.
6 Now grasp the wheel at the 9 o’clock and
3 o’clock positions, and try to rock it as
before. Any movement felt now may again be
caused by wear in the hub bearings or the
steering track rod balljoints. If the outer track
rod end balljoint is worn, the visual movement
will be obvious. If the inner joint is suspect, it
can be felt by placing a hand over the rack-
and-pinion rubber gaiter, and gripping the
track rod. If the wheel is now rocked,
movement will be felt at the inner joint if wear
has taken place.
7 Using a large screwdriver or flat bar, check
for wear in the suspension mounting bushes
by levering between the relevant suspension
component and its attachment point. Some
movement is to be expected as the mountings
are made of rubber, but excessive wear
should be obvious. Also check the condition
of any visible rubber bushes, looking for splits,
cracks or contamination of the rubber.
8 With the vehicle standing on its wheels,
have an assistant turn the steering wheel
back-and-forth, about an eighth of a turn each
way. There should be very little, if any, lost
movement between the steering wheel and
roadwheels. If this is not the case, closely
observe the joints and mountings previously
described, but in addition, check the steering
column universal joints for wear, and also
check the rack-and-pinion steering gear itself.
9 The efficiency of the shock absorber may
be checked by bouncing the car at each front
corner. Generally speaking, the body will
return to its normal position and stop after
being depressed. If it rises and returns on a
rebound, the shock absorber is probably
suspect. Examine also the shock absorber
upper and lower mountings for any signs of
wear.
Rear suspension check
10 Chock the front wheels, then raise the rear
of the vehicle and support it on axle stands.
11 Check the rear hub bearings for wear,
using the method described for the front hub
bearings (paragraph 4).
12 Using a large screwdriver or flat bar,
check for wear in the suspension mounting
bushes by levering between the relevant
suspension component and its attachment
point. Some movement is to be expected as
the mountings are made of rubber, but
excessive wear should be obvious. Check the
condition of the shock absorbers as
described previously.
Roadwheel check and balancing
13 Periodically remove the roadwheels, and
clean any dirt or mud from the inside and
outside surfaces. Examine the wheel rims for
signs of rusting, corrosion or other damage.
Light alloy wheels are easily damaged by
“kerbing” whilst parking, and similarly, steel
wheels may become dented or buckled.
Renewal of the wheel is very often the only
course of remedial action possible.
14 The balance of each wheel and tyre
1•20 Every 12 000 miles
20.2 Topping up the manual transmission
oil
1380 Rover 800 Series Remake
 Loading...