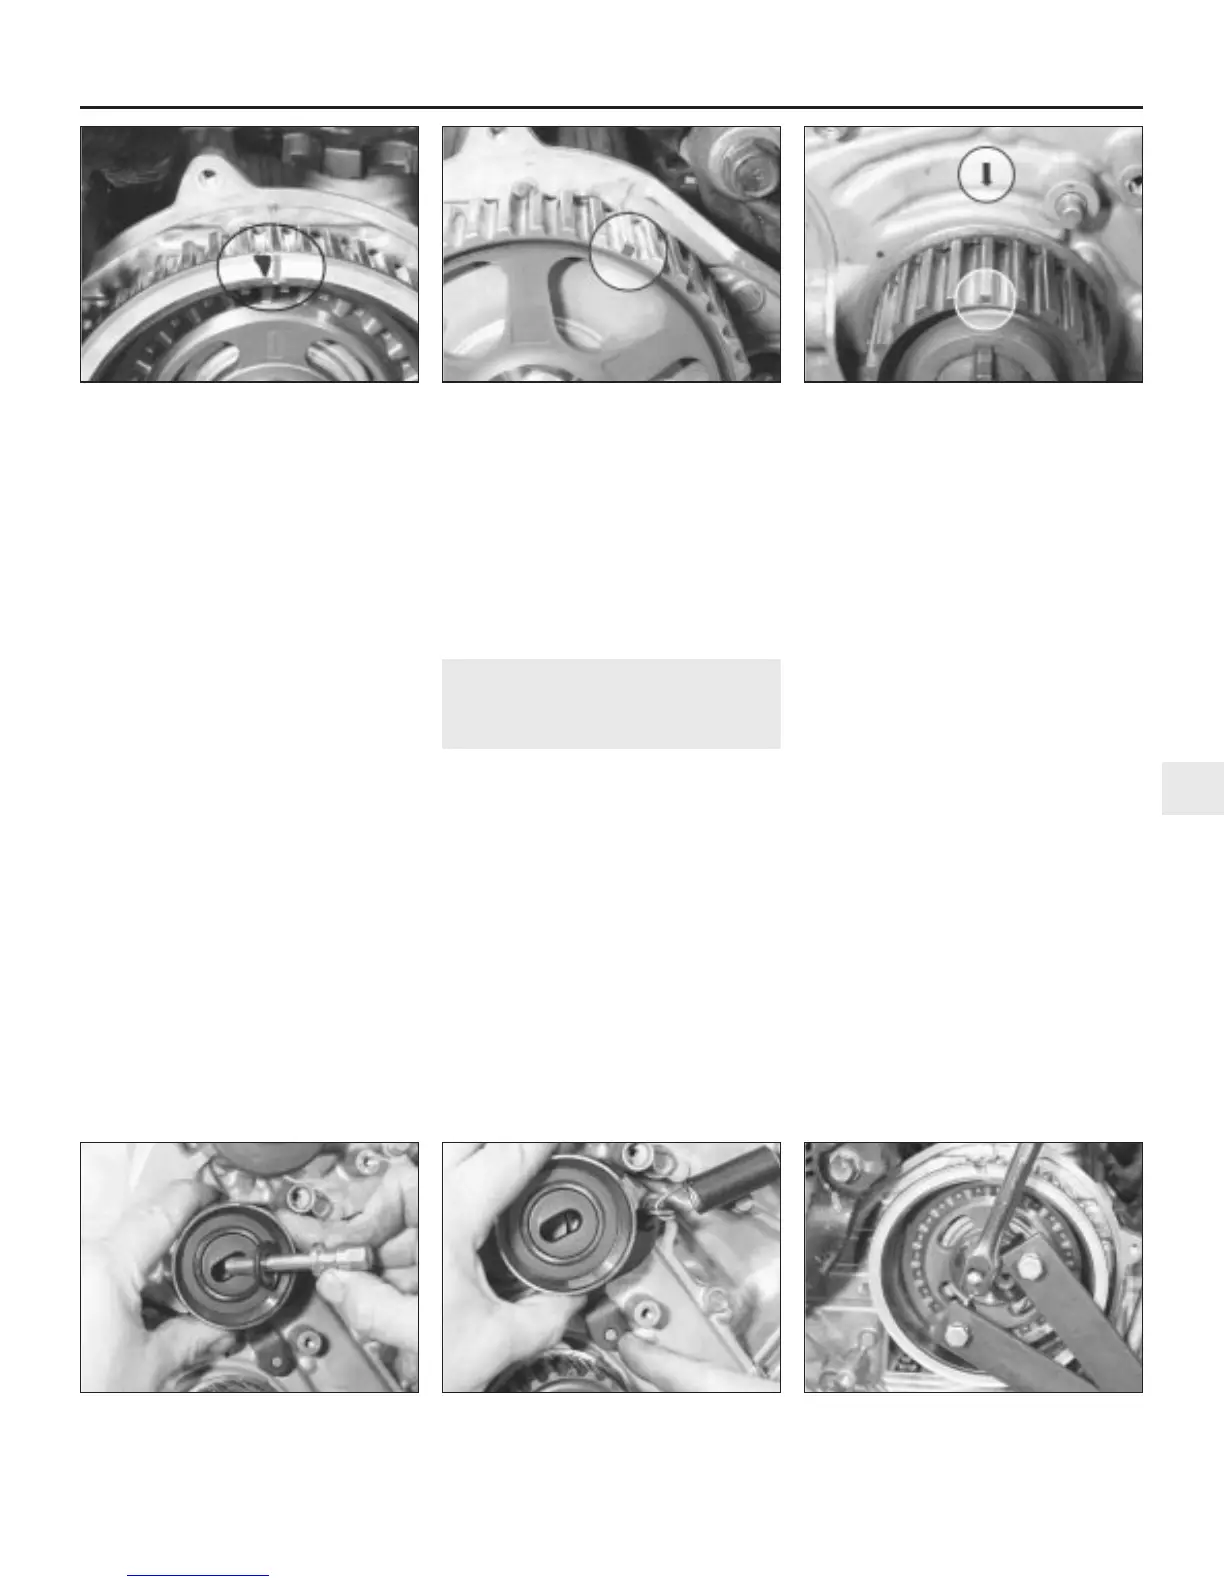
illustrations). Similarly, there is a notch on the
front of the crankshaft sprocket which should
align with an arrow cast into the oil pump
housing (see illustration).
Refitting and adjustment
10 Feed the timing belt around the
sprockets, starting with the crankshaft
sprocket, then, keeping it taught, feed it over
the front camshaft sprocket, water pump
pulley, rear camshaft sprocket, and tensioner
pulley.
11 Slacken the timing belt tensioner retaining
bolt, allow the tensioner to automatically
tension the belt, then re-tighten the bolt.
12 Refit the belt guide to the crankshaft
sprocket noting that it is fitted with its
concave side facing outwards.
13 Check that the timing marks are still
aligned with the engine at TDC, then refit the
timing belt covers and crankshaft pulley.
14 Turn the engine over by means of the
crankshaft pulley bolt to settle the belt on the
sprockets. Return the crankshaft to TDC for
No 1 cylinder on compression.
15 Now turn the crankshaft further by
approximately nine teeth on the camshaft
sprocket until an additional notch (usually
coloured blue) is aligned with the pointer on
the lower cover.
16 Slacken the timing belt tensioner bolt,
then retighten it once more.
17 Turn the crankshaft further to return it to
the TDC position for No 1 cylinder on
compression, and check that all the timing
marks, on the pulley and camshaft sprockets
are aligned as previously described. If they
are all is well. If not, the belt is probably a
tooth out and should be repositioned as
previously described.
18 Refit the plugs to the upper covers, then
refit the auxiliary drivebelts as described in
Chapter 1.
13 Timing belt tensioner and
sprockets - removal,
inspection and refitting
4
Tensioner
Removal
1 Remove the timing belt as described in
Section 12.
2 Unhook the tensioner spring from the
anchorage stud.
3 Remove the tensioner retaining bolt, lift off
the tensioner and remove the spring (see
illustration).
Inspection
4 Spin the tensioner, and ensure that there is
no roughness or harshness in the bearing.
Also check that the endfloat is not excessive
and there is no sign of free play. Check the
surface of the tensioner for any signs of
roughness, nicks or scoring which may
damage the timing belt. Renew the tensioner
if worn.
Refitting
5 Refitting is a reversal of removal, but ensure
that the lower tensioner arm engages over the
lug in the casing (see illustration).
Camshaft sprockets
Removal
6 Remove the timing belt as described in
Section 12.
7 Undo the three retaining bolts securing
each sprocket to its respective camshaft. To
prevent the sprockets turning as the bolts are
undone, either insert a large screwdriver
through one of the sprocket holes and engage
it with one of the backplate bolts behind, or
make up a holding tool from scrap metal,
which is of a scissor shape, with a bolts at
each end to engage with the holes in the
sprocket (see illustration).
8 Withdraw the two sprockets from the
camshafts, noting their orientation; the
sprocket with the flanged edge is fitted to the
front camshaft, and the sprocket with the
spokes is fitted to the rear camshaft.
Inspection
9 Check the condition of the sprockets,
inspecting carefully for any wear grooves,
pitting or scoring around the teeth, or any
wear ridges which might cause damage to the
timing belt. Make sure that the dowels are not
V6 engine - in-car engine repair procedures 2B•7
12.9c Notch on the front of the crankshaft
sprocket aligned with the arrow cast into
the oil pump housing
12.9b Rear camshaft sprocket timing
notch, aligned with the corresponding line
in the backplate
12.9a Front camshaft sprocket timing
mark, aligned with the corresponding line
in the backplate
13.7 Use a tool like this to hold the
camshaft sprocket as the bolts are
undone
13.5 Ensure that the lower tensioner arm
engages over the lug in the casing when
refitting
13.3 Remove the tensioner retaining bolt,
lift off the tensioner and remove the spring
2B
1380 Rover 800 Series Remake
 Loading...