and move the harness clear, then withdraw
the rear cover from the engine.
5 Undo the four bolts securing the front cover
to the cylinder head (see illustration).
6 Undo the dipstick tube bolt and remove the
front cover from the engine.
Refitting
7 Refitting is a reversal of removal, but ensure
that the lip on the cover lower edge engages
behind the lower cover (see illustration). Refit
the drivebelts as described in Chapter 1.
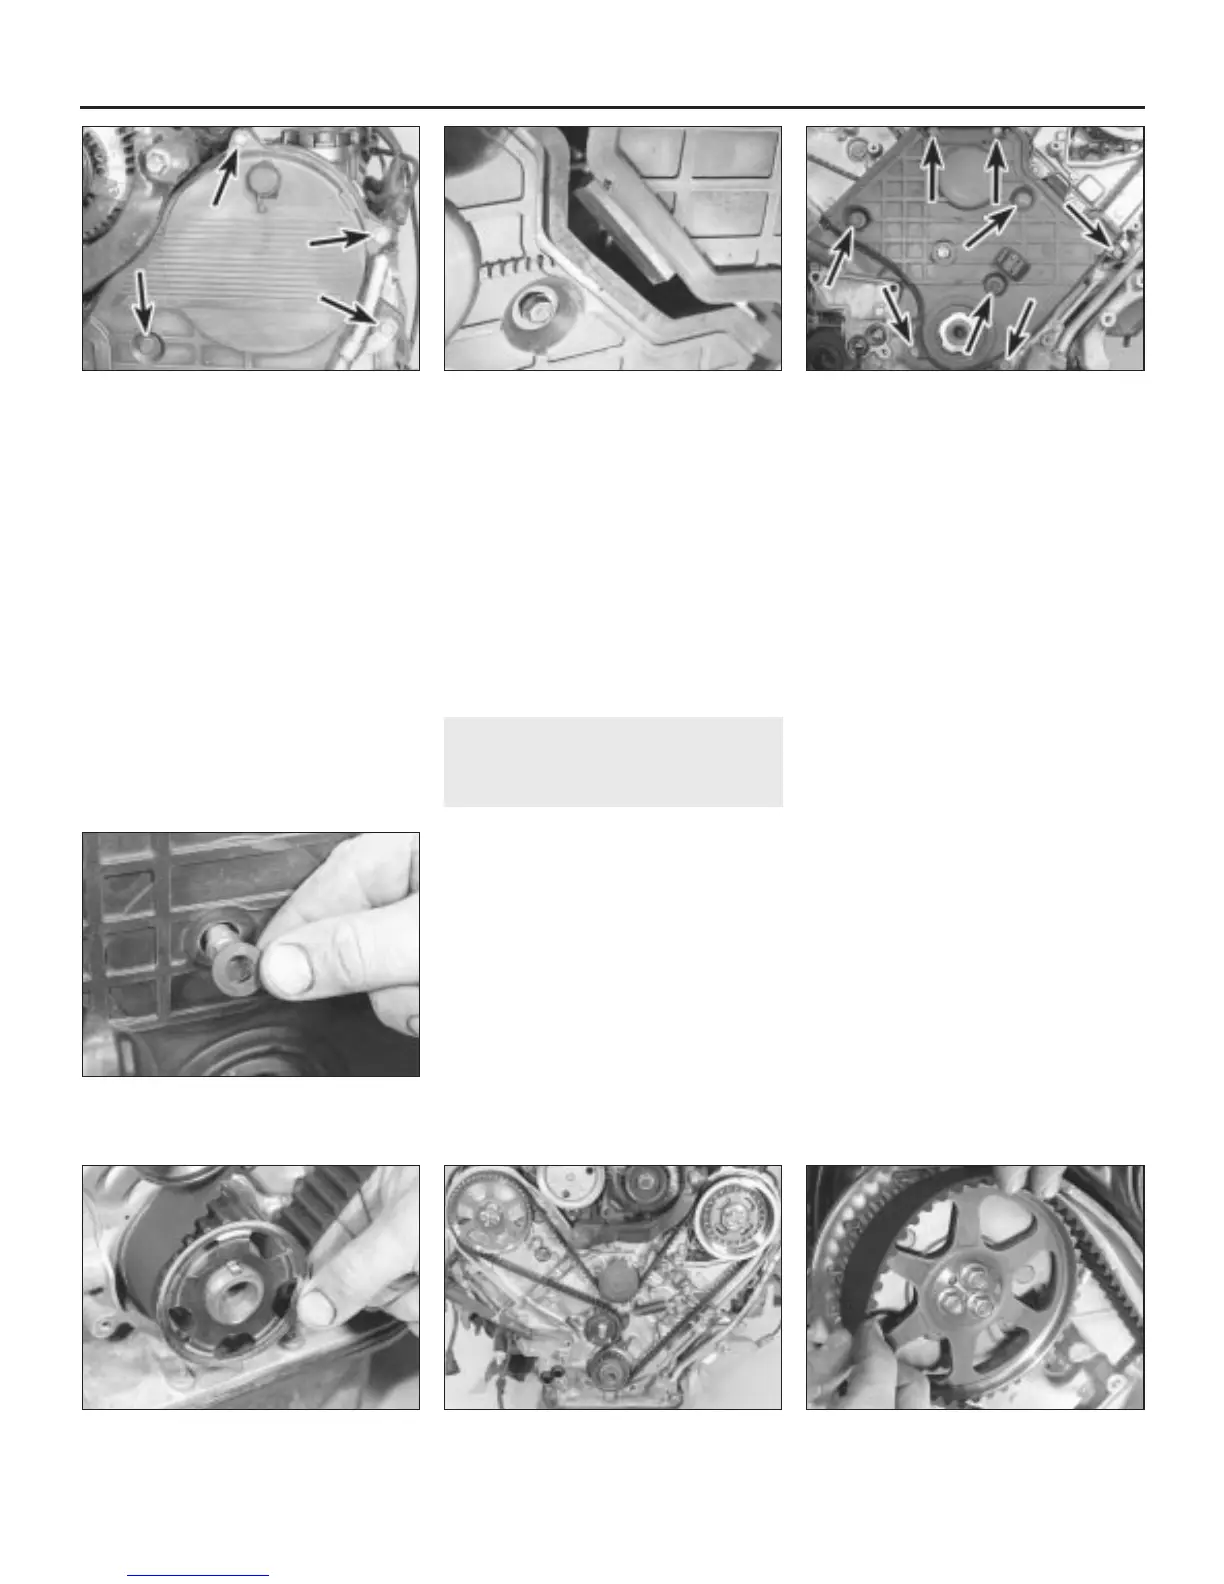
Lower cover
Removal
8 Remove the upper covers as described
previously.
9 Remove the crankshaft pulley as described
in Section 10.
10 Undo the eight bolts securing the lower
cover to the engine (see illustration).
11 Release the rubber grommet from the
protruding head of the timing belt tensioner
retaining bolt (see illustration).
12 Undo the two bolts from the air
conditioner compressor bracket and remove
the drivebelt tensioner from the compressor
bracket.
13 Withdraw the lower cover from the engine.
Refitting
14 Refitting is a reversal of removal.
12 Timing belt - removal, refitting
and adjustment
4
Note: Access may be improved if the coolant
is drained and the expansion tank is removed
(see Chapter 1).
Removal
1 Remove the timing belt upper and lower
covers, as described in Section 11. Note that
it will be necessary to support the engine, and
remove the bolts from the right-hand engine
mounting, to allow auxilliary drivebelt removal
(see Chapter 1).
2 Slacken the timing belt tensioner retaining
bolt and move the tensioner, against the
pressure of the spring, to the fully released
position. Tighten the bolt to hold the tensioner
in this position.
3 Remove the belt guide from the crankshaft
sprocket noting that it is fitted with its concave
side facing outwards (see illustration).
4 Sketch the timing belt arrangement around
the sprockets, water pump pulley and
tensioner, as a guide when refitting (see
illustration).
5 Ease the belt off the camshaft sprockets,
then the water pump pulley and tensioner and
finally, the crankshaft sprocket (see
illustration). Remove the belt from the engine.
6 If the timing belt is to be re-used, mark its
running direction with an arrow in chalk, and
store it on its edge while it is off the engine.
7 Check the belt for any sign of cracks or
splits, particularly around the roots of the teeth.
Renew the belt if wear is obvious, if there are
signs of oil contamination, or if the belt has
exceeded its service interval (see Chapter 1).
Also renew the sprockets if they show any
signs of wear or chipping of the teeth.
8 Check the tensioner and sprockets as
described in Section 13.
9 Before refitting the belt, check that the
engine is still at TDC with No 1 cylinder on
compression (Section 4) as it will probably
have moved when the crankshaft pulley was
removed. Use a screwdriver engaged with the
flywheel teeth to move the crankshaft as
necessary, and move the camshafts by
means of their sprockets. With the covers
removed, it is possible to see the mark or
notch on the ends of the camshaft sprockets,
which should be aligned with the
corresponding line in the backplate (see
2B•6 V6 engine - in-car engine repair procedures
12.5 Ease the belt off the camshaft
sprockets
12.4 Timing belt arrangement around the
sprockets, pulley and tensioner
12.3 Remove the belt guide from the
crankshaft sprocket
11.11 Release the rubber grommet from
the protruding head of the timing belt
tensioner retaining bolt
11.10 Timing belt lower cover retaining
bolts (arrowed)
11.7 Ensure that the lip on the upper cover
lower edge engages behind the lower
cover
11.5 Timing belt front upper cover
retaining bolts (arrowed)
1380 Rover 800 Series Remake
 Loading...