one and a half turns. Tighten the locknut
securely (see illustration).
5 Repeat paragraphs 3 and 4 for No 2
cylinder exhaust valves on the rear cylinder
head, and No 4 cylinder exhaust valves on the
front cylinder head.
6 Rotate the crankshaft through one
complete revolution and realign the timing
marks.
7 Repeat paragraphs 3 and 4 for No 5 and
No 6 cylinder exhaust valves on the front
cylinder head, and No 3 cylinder exhaust
valves on the rear cylinder head.
8 Refit the cylinder head side covers and
camshaft covers on completion.
8 Inlet manifold -
removal and refitting
1
Removal
1 Drain the cooling system as described in
Chapter 1.
2 Disconnect the spark plug HT leads from
the spark plugs and cable clips and move the
leads clear of the engine. Ensure each lead is
labelled to identify its respective spark plug.
3 Refer to Chapter 4, Part D and remove the
following components:
(a) Air cleaner and air intake components
(Section 2).
(b) Throttle body (Section 12).
(c) Electronic idle control valve (Section 12).
(c) Fast idle valve (Section 12).
(d) Front and rear fuel rail and injectors
(Section 12).
4 Refer to Chapter 4, Part E and remove the
air suction valve pipe.
5 Check that all the vacuum hoses at the pipe
cluster are numbered with corresponding
numbers on their respective pip stubs. Mark
any as necessary, then disconnect all the
hoses from the pipe cluster stubs.
6 Check that all pipes, hoses and cables have
been disconnected; undo the eight nuts and
bolts securing the manifold to the cylinder
head.
7 Lift the manifold up and off the engine and
recover the two gaskets.
Refitting
8 Ensure that the manifold and cylinder
mating faces are clean then place the
manifold on the cylinder head using new
gaskets. Secure the manifold with the eight
nuts and bolts.
9 Refer to the relevant Parts of Chapter 4 and
refit the previously removed components.
10 Reconnect the spark plug leads, then refill
the cooling system as described in Chapter 1.
9 Exhaust manifold -
removal and refitting
1
Note: Never work on or near a hot exhaust
system and in particular, the catalytic
converter (where fitted).
Removal
1 If the front manifold is being removed, refer
to Chapter 3 and remove the radiator.
2 Jack up the front of the vehicle and support
it on axle stands.
3 On the front manifold, undo the two nuts
and lift off the small heat shield and the air
suction pipe flange. Recover the gasket.
4 Disconnect the oxygen sensor wiring
harness connectors and release the wiring
from the support brackets.
5 Undo the bolts from the main manifold
heatshields and remove the heatshields.
6 Undo the flange nuts and lower the exhaust
front pipe from the manifold studs. Recover
the gaskets.
7 Undo the seven nuts securing each
manifold to its respective cylinder head, and
remove the manifold(s).
8 Clean the mating faces of all components
and obtain new gaskets prior to refitting.
Refitting
9 Refitting is a reversal of removal. Refit the
radiator as described in Chapter 3 on
completion.
10 Crankshaft pulley -
removal and refitting
1
Removal
1 Remove the auxiliary drivebelts for the
alternator, power steering and if fitted, the air
conditioning compressor as described in
Chapter 1.
2 Remove the starter motor as described in
Chapter 5.
3 Jack up the front of the car and support it
on axle stands.
4 Remove the access panel under the right-
hand wheelarch.
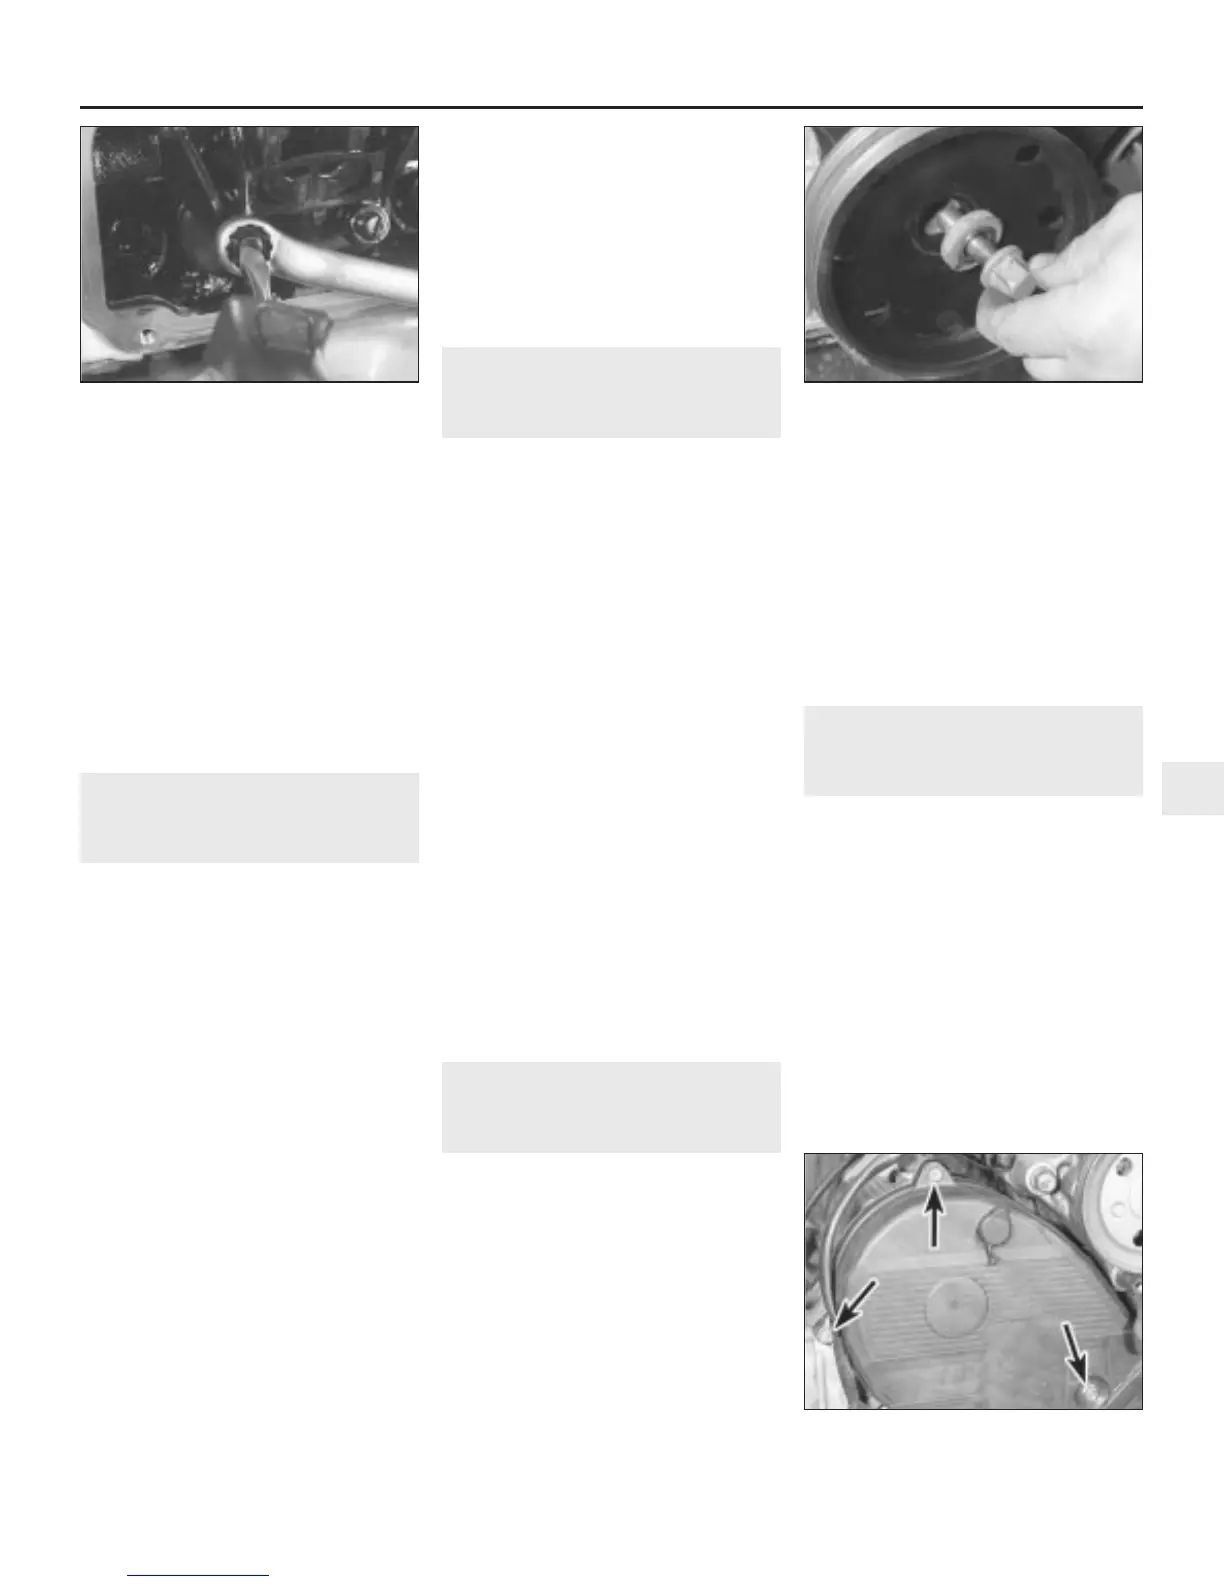
5 Using a socket and long handle, undo the
crankshaft pulley retaining bolt. Lock the
flywheel ring gear, through the starter motor
aperture, using a large screwdriver or tool to
prevent the crankshaft rotating as the pulley
bolt is undone. Remove the bolt and washer
(see illustration).
6 Withdraw the pulley from the crankshaft.
Refitting
7 Refitting is a reversal of removal.
Tighten the pulley retaining bolt to the
specified torque. Refit the starter motor as
described in Chapter 5, and the drivebelts
as described in Chapter 1.
11 Timing belt covers -
removal and refitting
4
Upper covers
Removal
1 If the covers are being removed for any
procedure that will entail disturbing the timing
belt, set the engine at TDC with No 1 cylinder
on compression, as described in Section 4,
before proceeding.
2 Remove the auxiliary drivebelts for the
alternator, power steering and if fitted, the air
conditioning compressor as described in
Chapter 1.
3 Undo the three bolts securing the rear
upper cover to the cylinder head (see
illustration).
4 Release the wiring harness support clips,
V6 engine - in-car engine repair procedures 2B•5
7.4 Exhaust valve rocker clearance
adjustment
11.3 Timing belt rear upper cover retaining
bolts (arrowed)
10.5 Remove the bolt and washer and
withdraw the crankshaft pulley
2B
1380 Rover 800 Series Remake
 Loading...