4 If not already done, undo the centre
retaining bolt and remove the timing belt
tensioner.
5 Slacken the clip and detach the water inlet
hose from the rear of the pump.
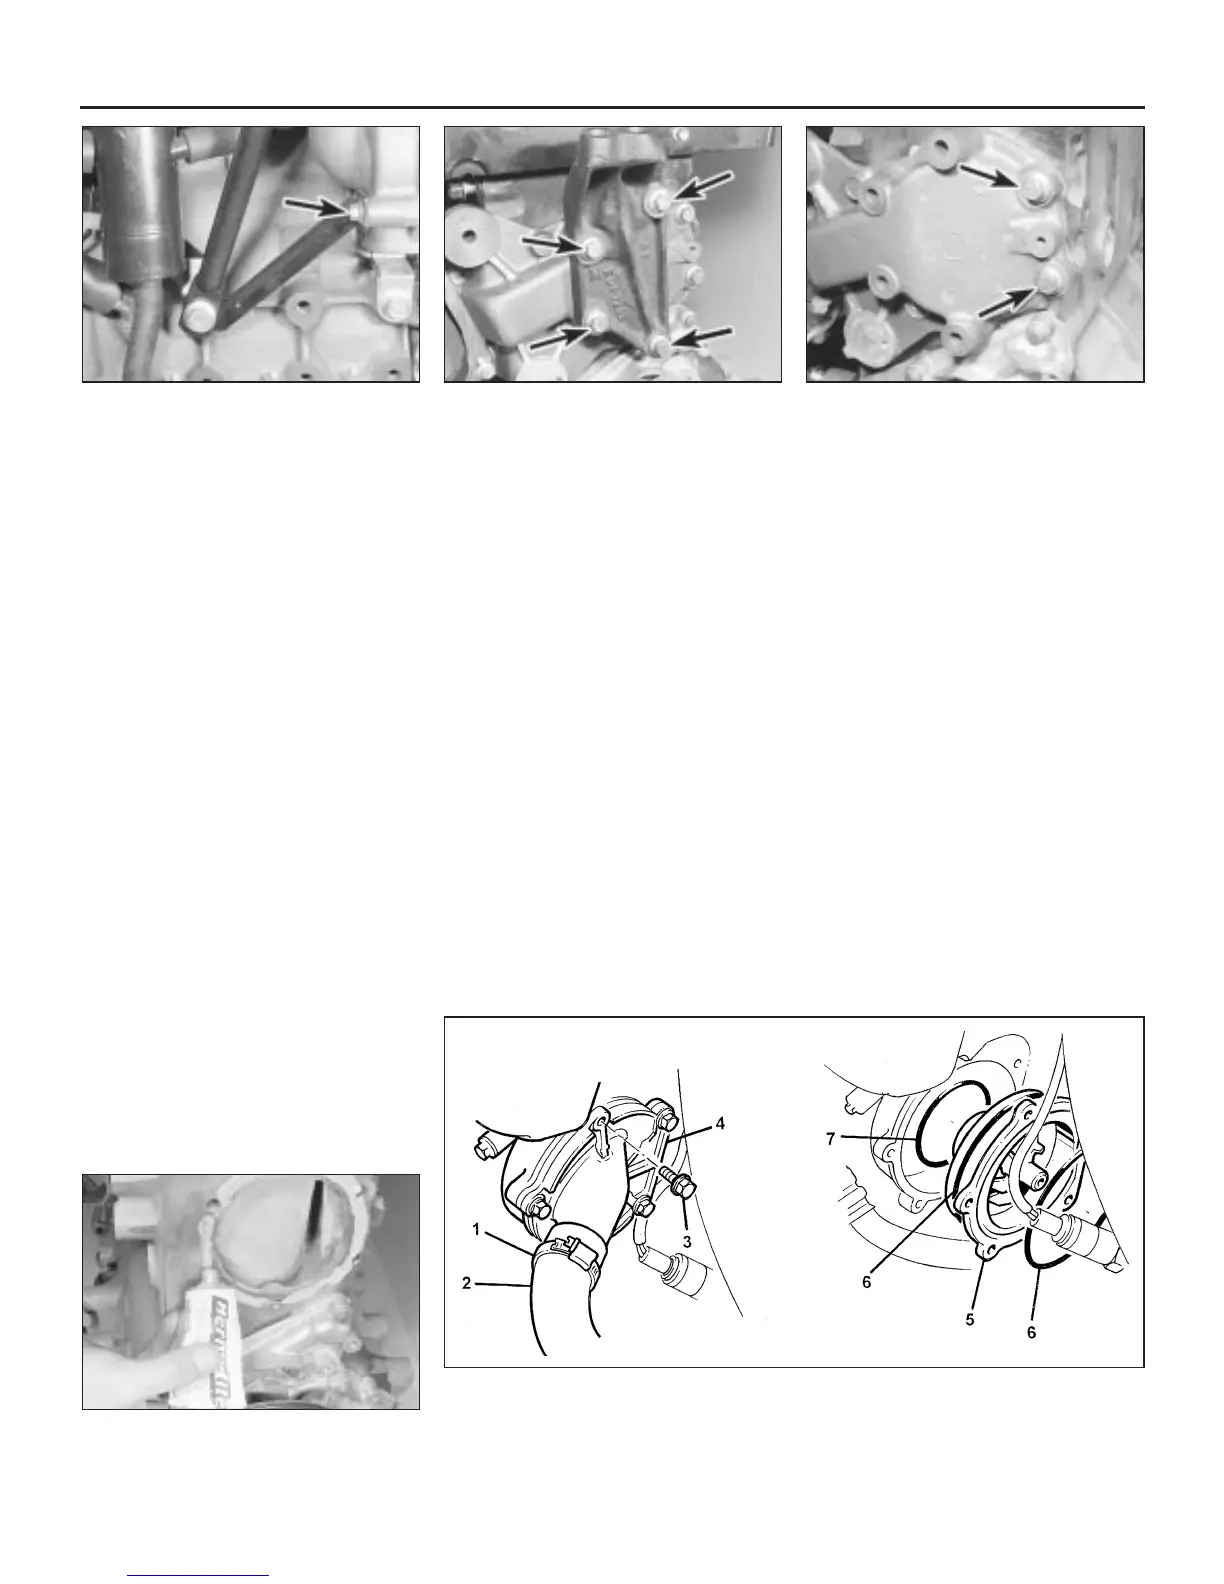
6 Undo the bolt securing the support strut to
the rear of the pump housing (see
illustration).
7 Undo the four bolts securing the right-hand
engine mounting bracket to the water pump,
then remove the bracket (see illustration).
8 Undo the remaining two bolts securing the
water pump to the cylinder block (see
illustration).
9 Have a container handy to catch any
remaining coolant, then withdraw the pump
from the block. If necessary, carefully tap the
pump body with a soft-faced mallet to free it.
10 With the pump removed, scrape away all
traces of RTV sealant from the pump and
cylinder block mating faces, ensuring that
both are completely clean and dry.
11 If the pump is to be renewed, undo the
three bolts or Torx type socket-headed
screws, as applicable, and remove the timing
belt tensioner mounting plate so that it can be
transferred to the new pump. Note, however,
that it will be necessary to obtain new bolts or
screws, prior to refitting. These are of the
micro-encapsulated type incorporating
locking compound in their threads;
consequently, they can only be used once.
Refitting
12 If removed, locate the timing belt
tensioner mounting plate in position, and fit
the three bolts or screws tightened to the
specified torque.
Do not attempt to retighten any of the screws
or bolts after the locking compound has set
(approximately two minutes), otherwise the
locking properties will be destroyed, and the
screws may loosen in service.
13 Apply a thin, continuous bead of RTV
sealant to the cylinder block mating face, and
locate the water pump in position (see
illustration).
14 Apply thread sealer to the two pump
retaining bolts, and fit them finger-tight at this
stage.
15 Apply thread sealer to the four engine
mounting bracket-to-pump bolts, fit the
bracket and tighten the bolts to the specified
torque. Now tighten the two pump bolts fitted
previously.
16 Refit the bolt securing the support strut to
the rear of the pump housing.
17 Reconnect the inlet water hose.
18 Refit the lower backplate to the engine,
and secure with the three bolts.
19 Refer to Chapter 2, Part A, and refit the
timing belt.
20 Refit the auxiliary drivebelt and refill the
cooling system as described in Chapter 1.
“T” Series engines
Removal
21 Drain the cooling system as described in
Chapter 1.
22 Slacken the clip and detach the water
inlet hose from the rear of the pump cover
(see illustration).
23 Undo the five bolts and remove the pump
cover from the housing.
24 Withdraw the pump assembly from the
housing and, where fitted, collect and discard
the three sealing rings. The sealing rings are
used on factory assembly, but Loctite sealer
is used instead, when the pump is refitted or
renewed in service.
25 Thoroughly clean the sealing ring
grooves, removing all traces of any old
sealant (if the pump has been removed
previously).
Refitting
26 Refitting is a reversal of removal, but
apply Loctite 405 to the sealing ring grooves,
and tighten the retaining bolts to the specified
torque. Refill the cooling system as described
in Chapter 1 on completion.
3•8 Cooling, heating and air conditioning systems
9.22 Water pump components on the “T” series engine
1 Hose clip
2 Water inlet hose
3 Pump cover retaining bolts
4 Water pump cover
5 Water pump
6 Sealing rings
7 Inner sealing ring
9.13 Apply RTV sealant to the cylinder
block mating face
9.8 Undo the remaining two bolts securing
the water pump to the cylinder block
9.7 Undo the four bolts securing the right-
hand engine mounting bracket to the
water pump
1380 Rover 800 Series Remake
9.6 Undo the bolt (arrowed) securing the
support strut to the housing
H27493


 To Next Page
 Loading...
