Do you have a question about the Royal Enfield 500 TWIN 1949 and is the answer not in the manual?
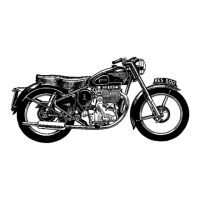
Engine configuration, lubrication, and crankshaft details for twin cylinder models.
Description of cylinders, heads, push rods, and bore specifications for twin engines.
Details on piston material, construction, and compression ratio for twin engines.
Steps for removing the timing cover, including oil management and gasket replacement.
Procedure for setting the valve timing using camshaft sprockets and chain marks.
Method for adjusting tappet clearance using rocker screws for precise valve lift.
Guide to setting the ignition timing using the magneto sprocket and contact breaker.
Detailed procedure for safely removing the engine from the motorcycle frame.
Steps for detaching the gearbox from the crankcase after engine removal.
Instructions for dismantling the crankcase, including draining the oil tank.
Comprehensive steps for dismantling the gearbox, including covers and mechanisms.
Overview of the Amal Monobloc Carburetter, its design improvements and features.
Guidance on tuning procedures, including adjustments for pilot air screw and needle position.
Introduction to the coil ignition system comprising coil, contact breaker, and distributor.
Maintenance procedures for the ignition coil and distributor, including cleaning and lubrication.
Methods for testing ignition components to diagnose faults like misfiring.
Description of the Magdyno unit, a combined magneto and dynamo.
Maintenance tasks for the Magdyno, including lubrication and contact breaker checks.
Diagnostic steps to test Magdyno function and locate ignition faults on the engine.
Description of the C35SD dynamo, its shunt-wound design and output.
Information on lubrication for the dynamo's ball bearings, minimal requirements.
Procedure to test dynamo operation and diagnose charging circuit faults using a voltmeter.
Step-by-step instructions for dismantling the dynamo and distributor unit.
Description of the E3LM dynamo, its design for Magdyno use and output.
Procedure to test dynamo operation and diagnose charging circuit faults using a voltmeter.
Step-by-step instructions for dismantling the dynamo unit.
Description of the RB107 control box, its components and layout.
Specifications for cut-out voltage and regulator settings at various ambient temperatures.
Procedures for servicing the control box, including wiring and electrical setting checks.
Description of the PUZ7E battery, supplied dry-charged and requiring electrolyte.
Instructions for preparing the battery, including mixing electrolyte and initial charging.
Description of the headlamp unit and its integration into the motorcycle's structure.
Details on the Lucas Light Unit, its prefocus bulb and protected construction.
Steps for replacing the headlamp light unit and bulb.
Details on the frame construction, materials, and rear suspension attachment points.
Information on steering head races, their removal, fitting, and adjustment.
Procedure for removing the rear suspension units from the frame.
Description of the telescopic front fork, its components, and hydraulic damping system.
Explanation of how the fork's movement and damping system function during operation.
Steps for dismantling the fork to replace internal components like springs and seals.
Description of the telescopic front fork with facia panel and aluminium alloy bottom tubes.
Explanation of the fork's movement and hydraulic damping system during operation.
Description of the telescopic front fork with facia panel and steel bottom tubes.
Steps for dismantling the fork to replace internal components like springs and seals.
Procedure for removing the front wheel from the fork assembly.
Steps for removing the brake cover plate assemblies to access the brake shoes.
Instructions for removing brake shoes and springs from the brake assembly.
Procedure for removing the front wheel from the fork assembly.
Steps for removing the brake cover plate assembly to access the brake shoes.
Instructions for removing brake shoes and springs from the brake assembly.
Description of the detachable rear wheel, including cush drive and brake system.
Procedure for removing the main portion of the rear wheel for tyre service.
Steps for removing the complete rear wheel to access the brake components.
Description of the non-detachable rear wheel, including cush drive and brake system.
Procedure for removing the rear wheel from the motorcycle.
Procedure for removing brake shoes and fitting new linings.
| Year | 1949 |
|---|---|
| Displacement | 499cc |
| Compression Ratio | 6.5:1 |
| Suspension (Front) | Telescopic forks |
| Brakes (Front) | Drum |
| Brakes (Rear) | Drum |
| Engine Type | Parallel twin |
| Transmission | 4-speed |