It’s Under Control
®
MOUNTING KA8
1. Loosen the captive screws of the unit to the level indicated by the lines in the diagram. Screws should not be removed from the unit.
2. Align the mounting frame hooks with the KA8 mounting slots and gently pull the KA8 unit down the mounting bracket. Make sure the mounting hooks are properly
engaged.
3. To complete the installation, tighten the 2 captive screws on the bottom part of unit, to secure the KA8 on the mounting bracket.
4. For Portrait orientation, rotate mounting bracket and KA8 90 degrees in counterclockwise direction before installation.
REMOVING THE KA8
• Using a Philips head screw driver, loosen the 2 captive screws on the KA8, then gently pull straight up from the mounting frame to disengage the unit.
DIMENSIONS
ETHERNET COMMUNICATION
• When the KA8 is connected to a network switch by Ethernet cable, the unit will acquire a network address via DHCP and automatically connect to the LAN.
PROGRAMMING
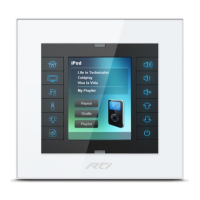
THE TOUCHSCREEN DISPLAY
• The KA8 touchscreen display is programmed using the RTI Integration Designer Programming Software. Normally it is organized into a series of pages containing objects
(buttons, text, graphics, etc.) that are related to each other.
UPDATING SOFTWARE
• RTI’s Integration Designer data les can be downloaded to the KA8 via an Ethernet network.
Tighten the 2 captive screws to secure
the KA8 to the mounting bracket.
Loosen captive screws Align mounting frame hooks
Gently pull KA8 down
Loosen captive screws Gently pull KA8 up to release
KA8 (Rear View) KA8 (Front) KA8 (Side View)
223,5mm
8.80
36,25mm
1.43
148,4mm
5.84
108mm
4.25
42,5mm
1.67
Inch
Inch
Inch
Inch
Inch
 Loading...