Do you have a question about the RTK RE3447 Series and is the answer not in the manual?
Safety instructions and warnings for operating electrical equipment.
Positioner compliance with EMC regulations and directives.
Key technical data including signals, output, power, and temperature.
Requirements for correct installation and adjustment of the feedback potentiometer.
Fastening the power board using specified screws.
Attaching the processor board, ensuring correct connector seating.
Connecting the feedback potentiometer as per the wiring diagram.
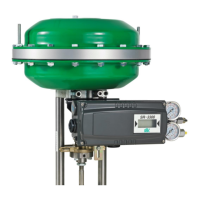
Connecting the positioner output to the actuator according to the diagram.
Securing the mounting bracket using specified screws.
Attaching the processor board, ensuring correct connector seating.
Connecting the feedback potentiometer as per the wiring diagram.
Connecting the positioner output to the actuator according to the diagram.
| Brand | RTK |
|---|---|
| Model | RE3447 Series |
| Category | Valve Positioners |
| Language | English |