4
BEFORE USING FOR THE FIRST TIME
Fill the reservoir to the max mark, and run the appliance without coee.
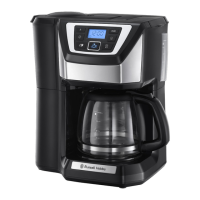
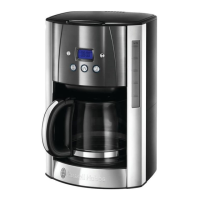
FILLING
1. Remove the carafe from the hotplate.
2. Use the grip to open the lid, and expose the reservoir.
3. Fill the reservoir with the exact amount of water required.
4. Open up a #4 paper lter, and put it into the lter holder.
5. Put 1 scoop of lter-ground coee into the lter for each cup.
6. Close the lid.
7. Replace the carafe on the hotplate.
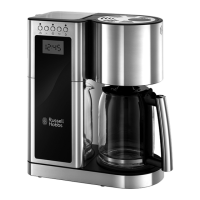
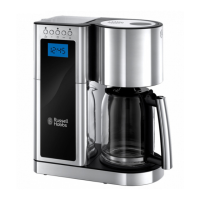
SWITCH ON
1. Put the plug into the power socket.
2. 12:00 will blink on the display.
COFFEE NOW
1. Ignore the clock.
2. If you’re making less than 5 cups of coee, press the B button. A will show on the display. It
slows the brewing process, so your coee will have the same strength as coee from a full carafe.
3. Press the W button. The button will light up.
4. Shortly afterwards, coee will start to drip into the carafe.
5. When it’s done, the hotplate will keep the carafe warm.
6. If you want to stop the coee maker while it’s brewing, press the W button.
STATUS LIGHT
The status light will change colour to show how fresh the coee is.
blue = brewing / 0-30 minutes since brewing
blue (blinking) = 30-40 minutes since brewing
AUTO SHUTOFF/SLEEP MODE
About 40 minutes after brewing nishes, the appliance will shut down.
After 15 seconds of inactivity, the appliance will go to sleep.
To wake the appliance, press the min button.
COFFEE LATER
1. The clock will retain its settings until the coee maker is unplugged.
2. It’s a 24 hour clock.
3. Set the clock to the correct time.
4. Use the h and min buttons to set the correct hour and minute.
5. Set the timer to the time you want to start brewing.
6. Press the T button.
7. Use the h and min buttons to set the correct hour and minute.
8. If you don’t press either the h or min buttons within 5 seconds, the coee maker will revert to
“normal”, and the time will show. You’ll have to press the T button, and start again.
9. If you’re making less than 5 cups of coee, press the B button. A will show on the display.
ACTIVATION
1. Press the AUTO button.
2. AUTO will show on the display.

 Loading...