14
Note:
1. The respective lights will come on to indicate which stage the oven is operating in.
2. It will beep after each stage.
3. Speed frost will not be count into the stage cooking but it will put into the 1st program.
4. Auto defrost & Auto cook cannot be used in multi-stage cooking.
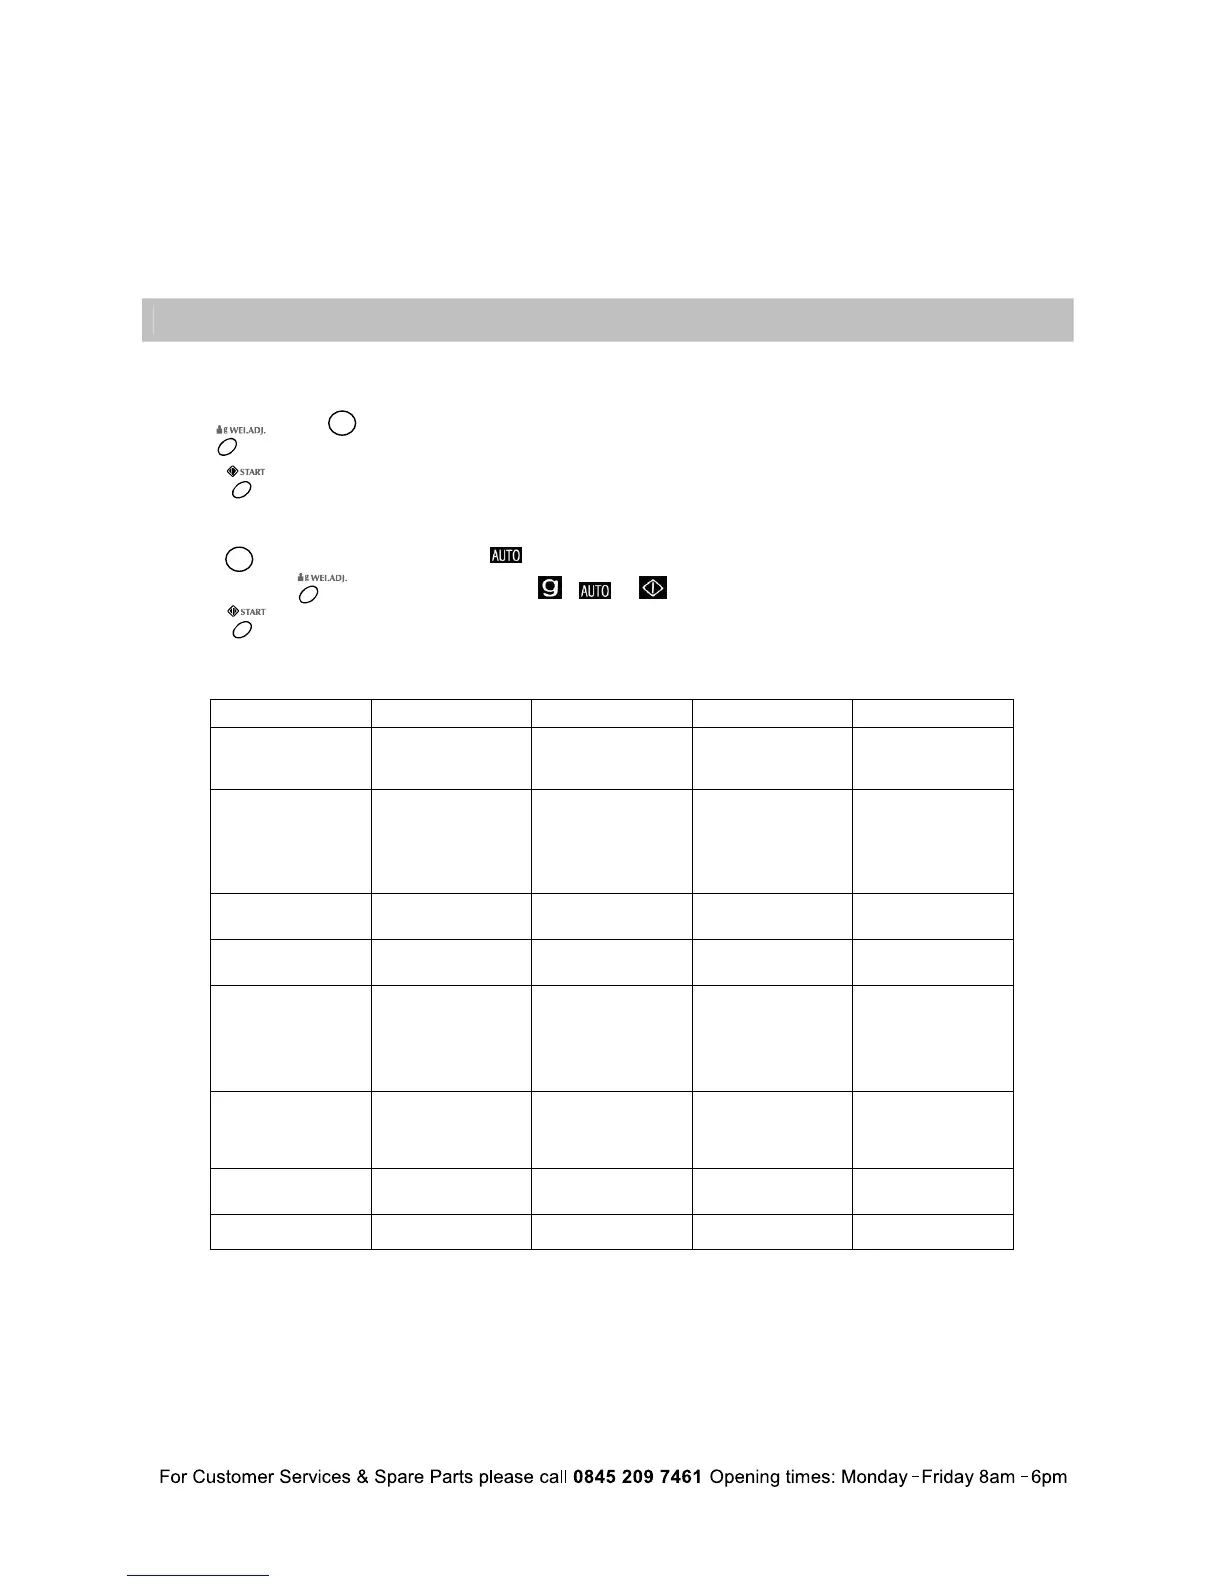
AUTO COOK
This auto function has eight pre-set cooking program. You do not need to set either cooking times or power level. The table below shown
the details of the programs.
1. In standby state, turn clockwise to choose desired auto cooking program, i.e. 1 to 8.
2. Press to select the weight of food.
3. Press to start the cooking.
Example: To cook 400g of fish.
1. Turn clockwise until the LED displays “
” & “6“.
2. Continue to press until the LED display “400”, “
”, “ ” & “ “ are flashing.
3. Press to start cooking.
AUTO FUNCTION COOKING CHART
Auto Cooking Auto Manual Weight Display Power
1 MILK/COFFEE
1 portion / 200 ml
2 portions / 400 ml
3 portions / 600 ml
1
2
3
P-100
ECIR 2
150 g
300 g
450 g
600 g
150 g
300 g
450 g
600 g
30% P-100
30% P- 80
40% P-40
3 SPAGHETTI
100 g
200 g
300 g
100 g
200 g
300 g
P- 80
4
POTATO
1 portion / 230 g
2 portions / 460 g
3 portions / 690 g
1
2
3
P-100
5
AUTO REHEAT
200 g
300 g
400 g
500 g
600 g
700 g
800 g
200 g
300 g
400 g
500 g
600 g
700 g
800 g
P-100
6
FISH
200 g
300 g
400 g
500 g
600 g
200 g
300 g
400 g
500 g
600 g
P-80
AZZIP 7
150g
300g
450g
150g
300g
450g
P- 100
8
POPCORN
99g 99g P- 100
Note:
For Spaghetti add boiling water before cooking.
The result of auto cooking depends on factors such as fluctuation of voltage, the shape and size of food, your personal preference as to the
doneness of certain foods and even how well you happen to place food in the oven. If you find the result at any rate not quite satisfactory,
please adjust the cooking time a little bit accordingly.
Time/ Menu
Time/ Menu
 Loading...