Do you have a question about the Russell Hobbs RHSV1B and is the answer not in the manual?
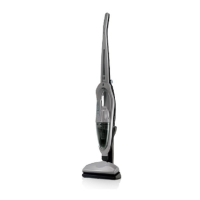
Ensure all parts are removed from packaging and identify components like handheld vacuum, upright frame, and charging accessories.
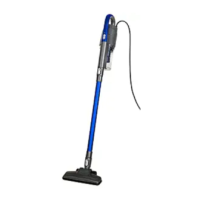
Assemble the charging station by pushing the leg down into the foot until it locks into place for floor mounting.
Position the charging station leg on the wall, mark holes, fit screws, and attach the leg to the wall for mounting.
Connect the adaptor's small plug to the charging station and the main adaptor to the wall power outlet.
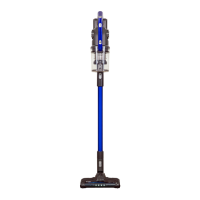
Align power pins and press the upright frame into the motorised floor tool until it locks.
Position the handheld vacuum's crevice tool into the upright frame and push the top until it locks.
Place the stick vacuum on the charging station; the charging light indicates charging status.
Turn on the vacuum and move the floor tool over surfaces, overlapping areas for thorough cleaning.
Use the handheld vacuum for small spills on furniture or car seats, with or without the crevice tool.
Turn off the vacuum and return it to the charging station when cleaning is complete.
Wipe external surfaces with a damp cloth; do not use harsh agents or put parts in a dishwasher.
Press the release button, turn the dust bin clockwise to remove, empty, and wash if needed.
Tap dust filter to remove dust, or soak and air dry if very dirty. Clean mesh filter similarly.
Ensure all components are dry before reassembling the mesh filter, dust filter, and dust bin.
Remove debris and hair from the brush using scissors or by hand for optimal performance.
Check dust bin, filters, rotating brush, and crevice tool for blockages or low suction issues.
Read safety precautions regarding adult supervision, proper use, and avoiding liquids or fire hazards.
Details the limited warranty provided by Salton for defects in material and workmanship.
Information on how to register your product online or by mail to receive benefits.
| Brand | Russell Hobbs |
|---|---|
| Model | RHSV1B |
| Category | Vacuum Cleaner |
| Language | English |