Do you have a question about the Russell Hobbs RHSV2P and is the answer not in the manual?
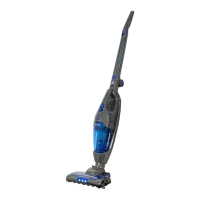
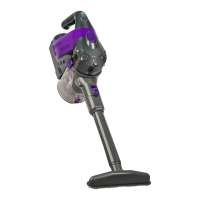
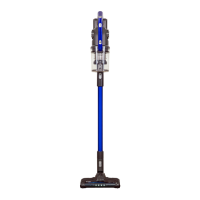
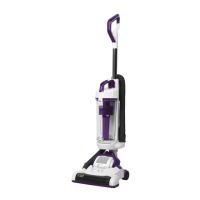
Assemble the charging station by pushing the leg down into the foot until it locks into place.
Mount the leg using screws, leaving 80mm space below for the floor tool to rest correctly.
Connect the plug to the charging station and the charger to the wall power outlet.
Attach the floor tool to the upright frame by aligning pins and pressing down until it locks.
Insert the handheld vacuum into the upright frame, ensuring the crevice tool is retracted.
Charge the vacuum on the station for 10-16 hours for full battery. Charging light indicates status.
Turn on using the power button and move the floor tool over the surface.
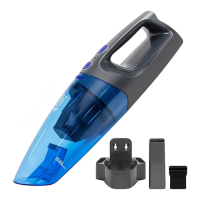
Detach handheld unit and use for smaller areas or surfaces like furniture and cars.
Wipe external surfaces with a damp cloth; avoid harsh agents and dishwashers.
Detach dust bin, empty contents, and wash if needed, ensuring it's dry before refitting.
Remove and clean filters by tapping or washing, then air dry completely.
Ensure components are dry, then reassemble dust bin, filters, and motor unit securely.
Remove debris and hair from the brush using scissors or by hand.
Check dust bin, filters, brush, and crevice tool for blockages and clear them.
Details the terms and conditions of the limited 2-year warranty provided by Salton.
Instructions on how to register the product online or by mail for benefits.
| Brand | Russell Hobbs |
|---|---|
| Model | RHSV2P |
| Category | Vacuum Cleaner |
| Language | English |