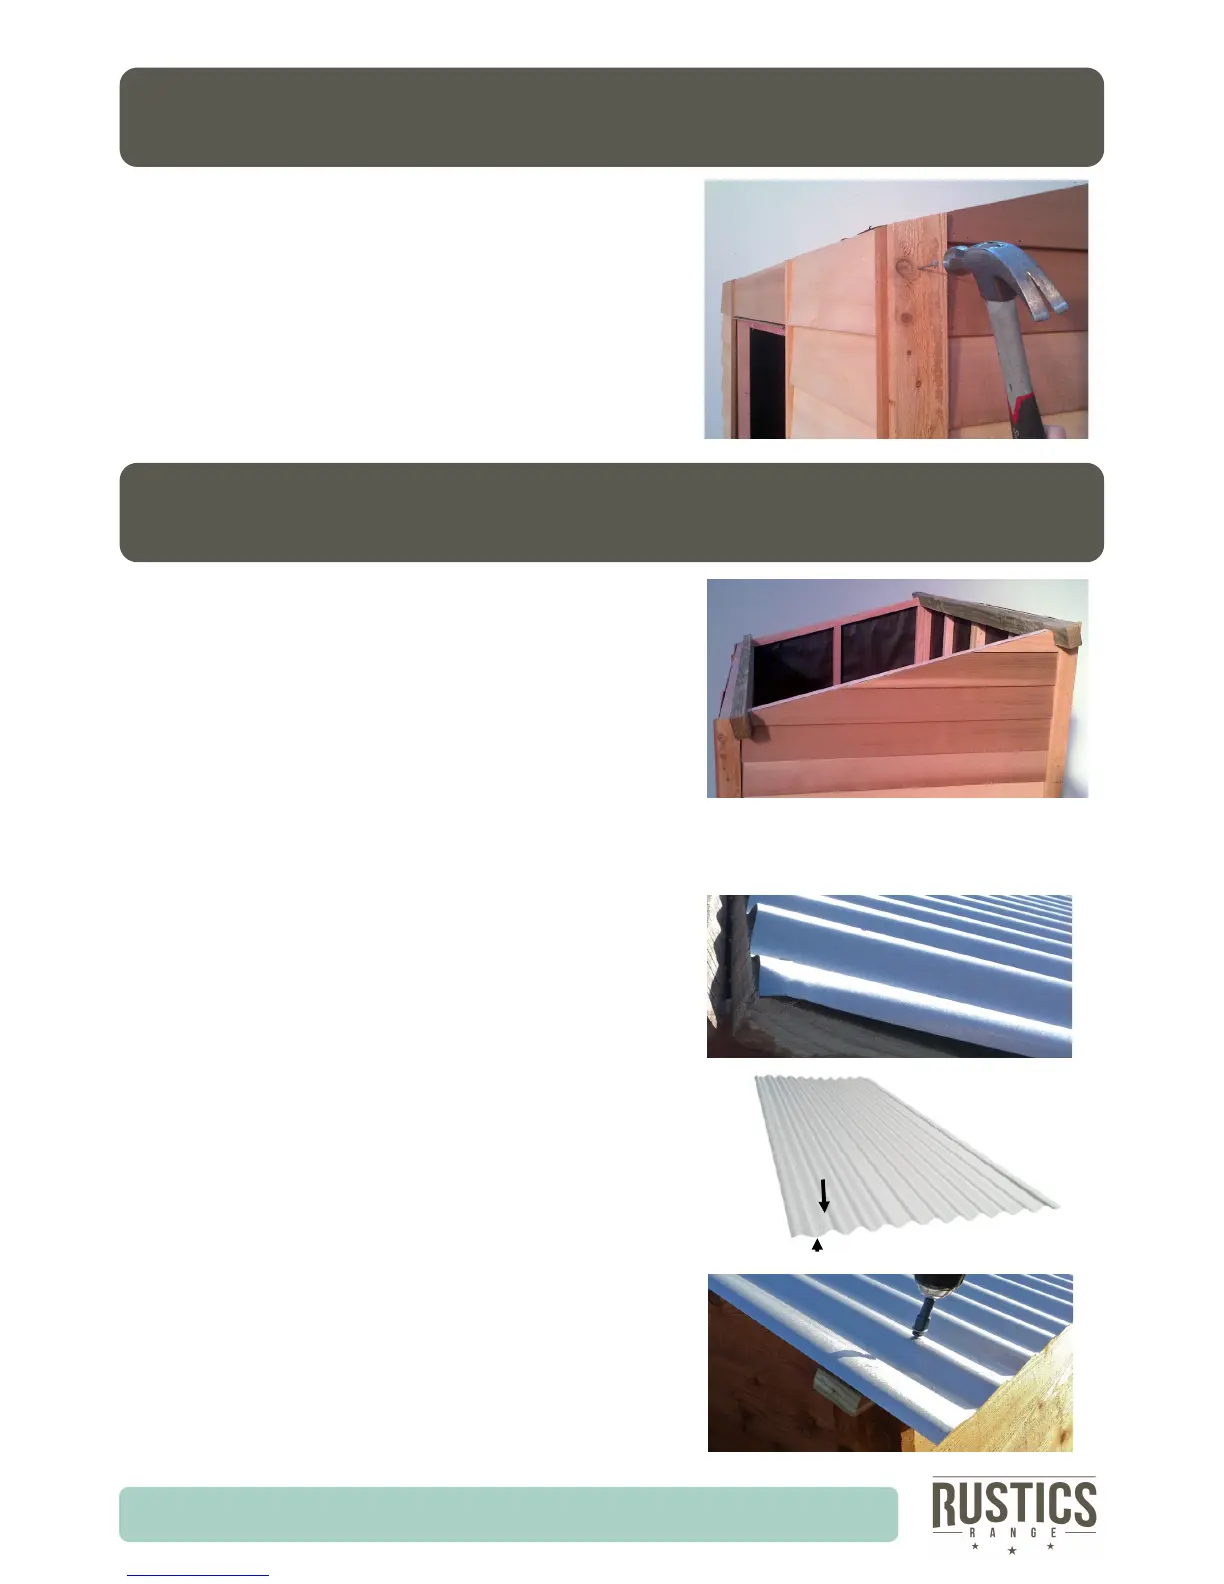
Step 10: Ensuring the clashing is ush at the top.
Silicone and nail corner clashings on all corners as
shown using 4 x bead nails per clashing. Note short
clashings at the front, long clashings at the rear.
Silicone both edges where the clashing meets the
weatherboards to ensure this doesn't leak.
PG 8
IDAHO CORNER CLASHINGS
Step 11: Posion both purlins on roof. Top purlin
and boom purlins should be against top plate
seners. Using 75mm framing nails, nail purlins
to end panels and in the middle of the purlin (2
nails per point).
Tip: Measure and mark the middle of the seners and
also the purlins, then line these marks up to get an even
overhang all around.
Note: The purlins shown above are not used on this
model. Posion of the purlins are directly above
the seners on this model.
IDAHO ROOF
Step 12: Ensure shed is square, by measuring
diagonals at top corner of wall panels.
Step 13: Posion rst full sheet with rib ush with
end of purlins and top of sheet ush with the top
of the purlin.
Tack top of the sheet into the top purlin using a
30mm clout through the pan. Using a 35mm
Roong Screw with Washer, screw through the
rst full rib into the boom purlin to a depth of
approximately 10mm.
Tip: Predrilling with a 3mm drill bit may make this easier.
First full Rib
Pan
 Loading...