3
1
1
2
3
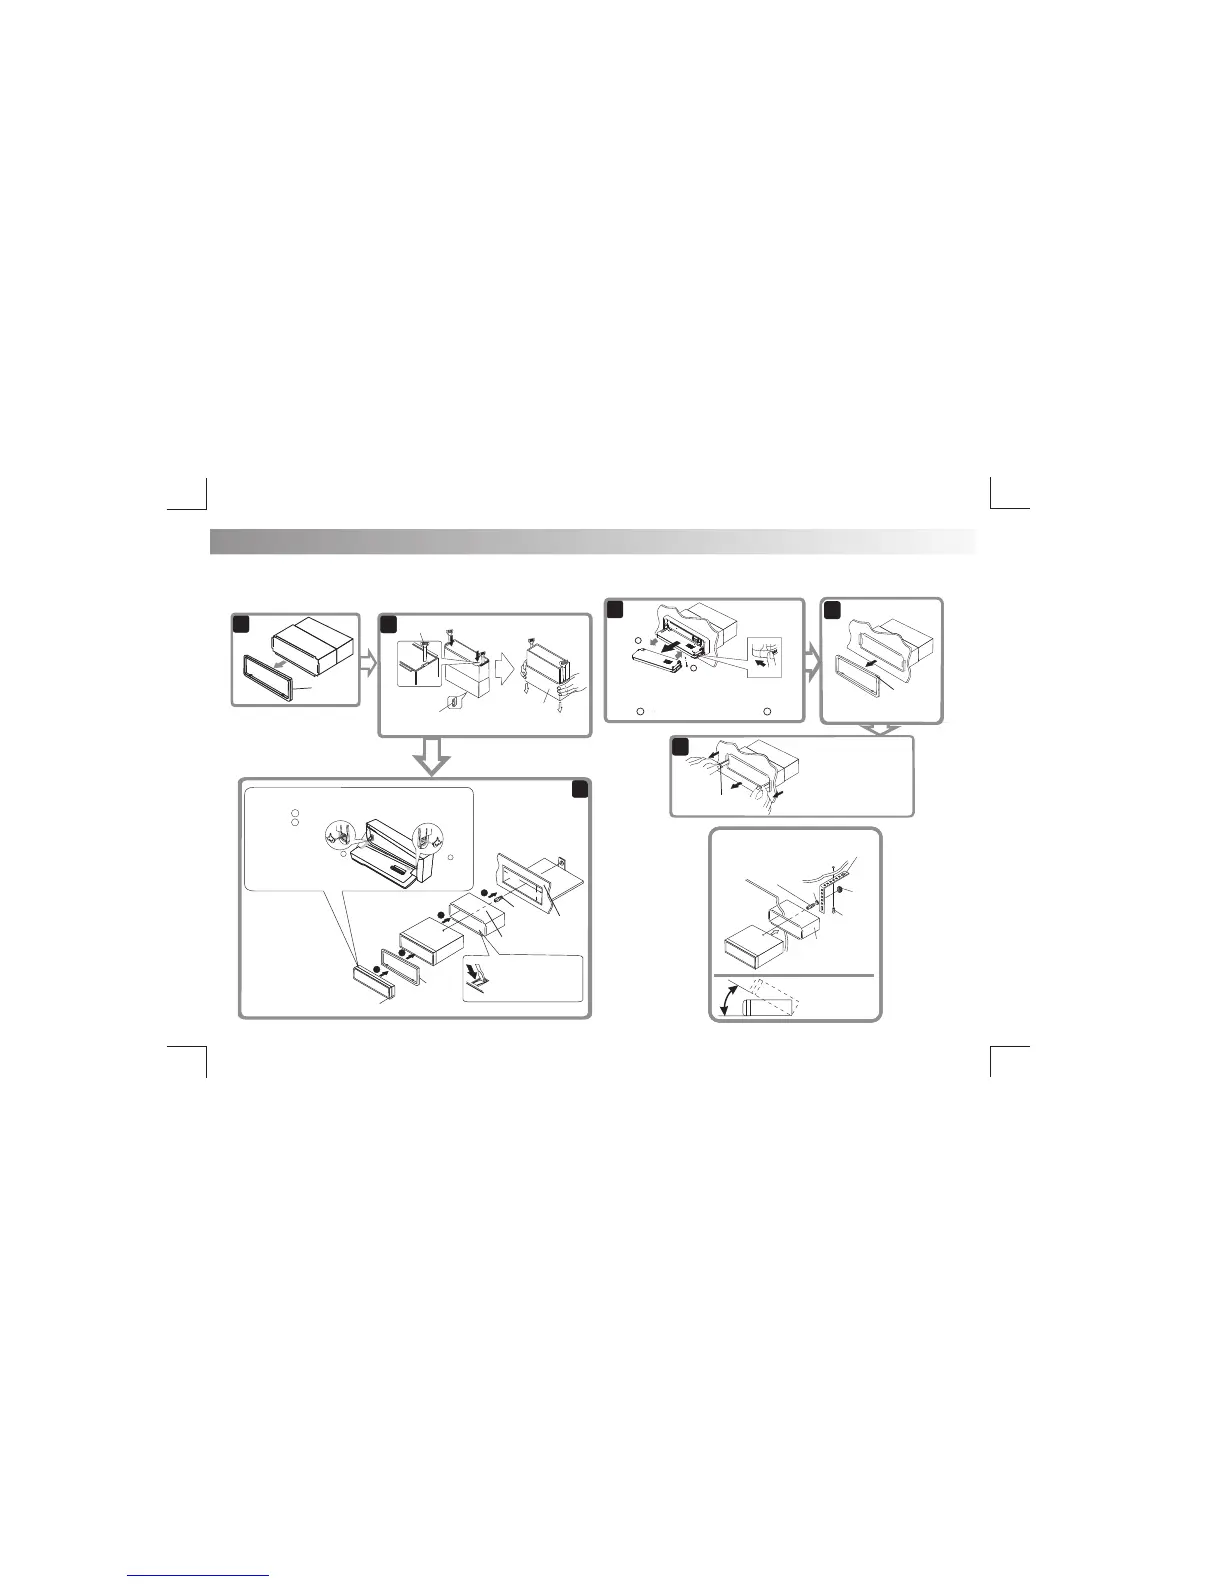
Trim Plate
Before removing the unit, release the optional stay screw if fitted.
Removing the unit
When using the optional stay
Step
1
Step
2
1. Press the Panel Release Button.
2. After flipping the front panel down, push it to the right
( ), then pull the left side out ( ).
.
Step
1
To remove the front panel:
Step
2
Trim Plate
Insert the two disassembly
tools, then pull them as
illustrated so that the unit
can be removed.
Disassembly
tools
Release
30°
Panel
Stay(option)
Screw
(4x12mm)
Washer
Screw
Sleeve
Install the unit at
an angle of less
than 30°.
4
18
2m
m
53
m
m
1
2
3
Screw
RV Panel
Sleeve
Bend the appropriate
tabs to hold the sleeve
firmly in place.
Trim
Plate
Control
Panel
To re-attach the front panel back on to the unit chassis,
first insert the right mounting hole in to the right mounting
tab ( Step ), then insert the left mount in to the left
tab ( Step ).
2
When you stand the unit, be careful
not to damage the fuse on the rear.
Sleeve
Disassembly
tool
Nut
E - 9
Step 1
Step 2
2
1
1. INSTALLATION
The following illustrations show a typical RV installation.
.
If you are not sure how to install this unit correctly, please have it
installed by a qualified technician.
(optional)