IN THE BOX
In the Box
ASSEMBLY
Assembly
WARNING! Always take care when removing the packaging to prevent damage to you
or to the lawnmower.
NOTE! Always recycle the packaging in accordance with local recycling schemes.
Remove the packaging from the handle.
Step 1 - Assemble the lower handle
Step 2 - Assemble the upper handle
5 6
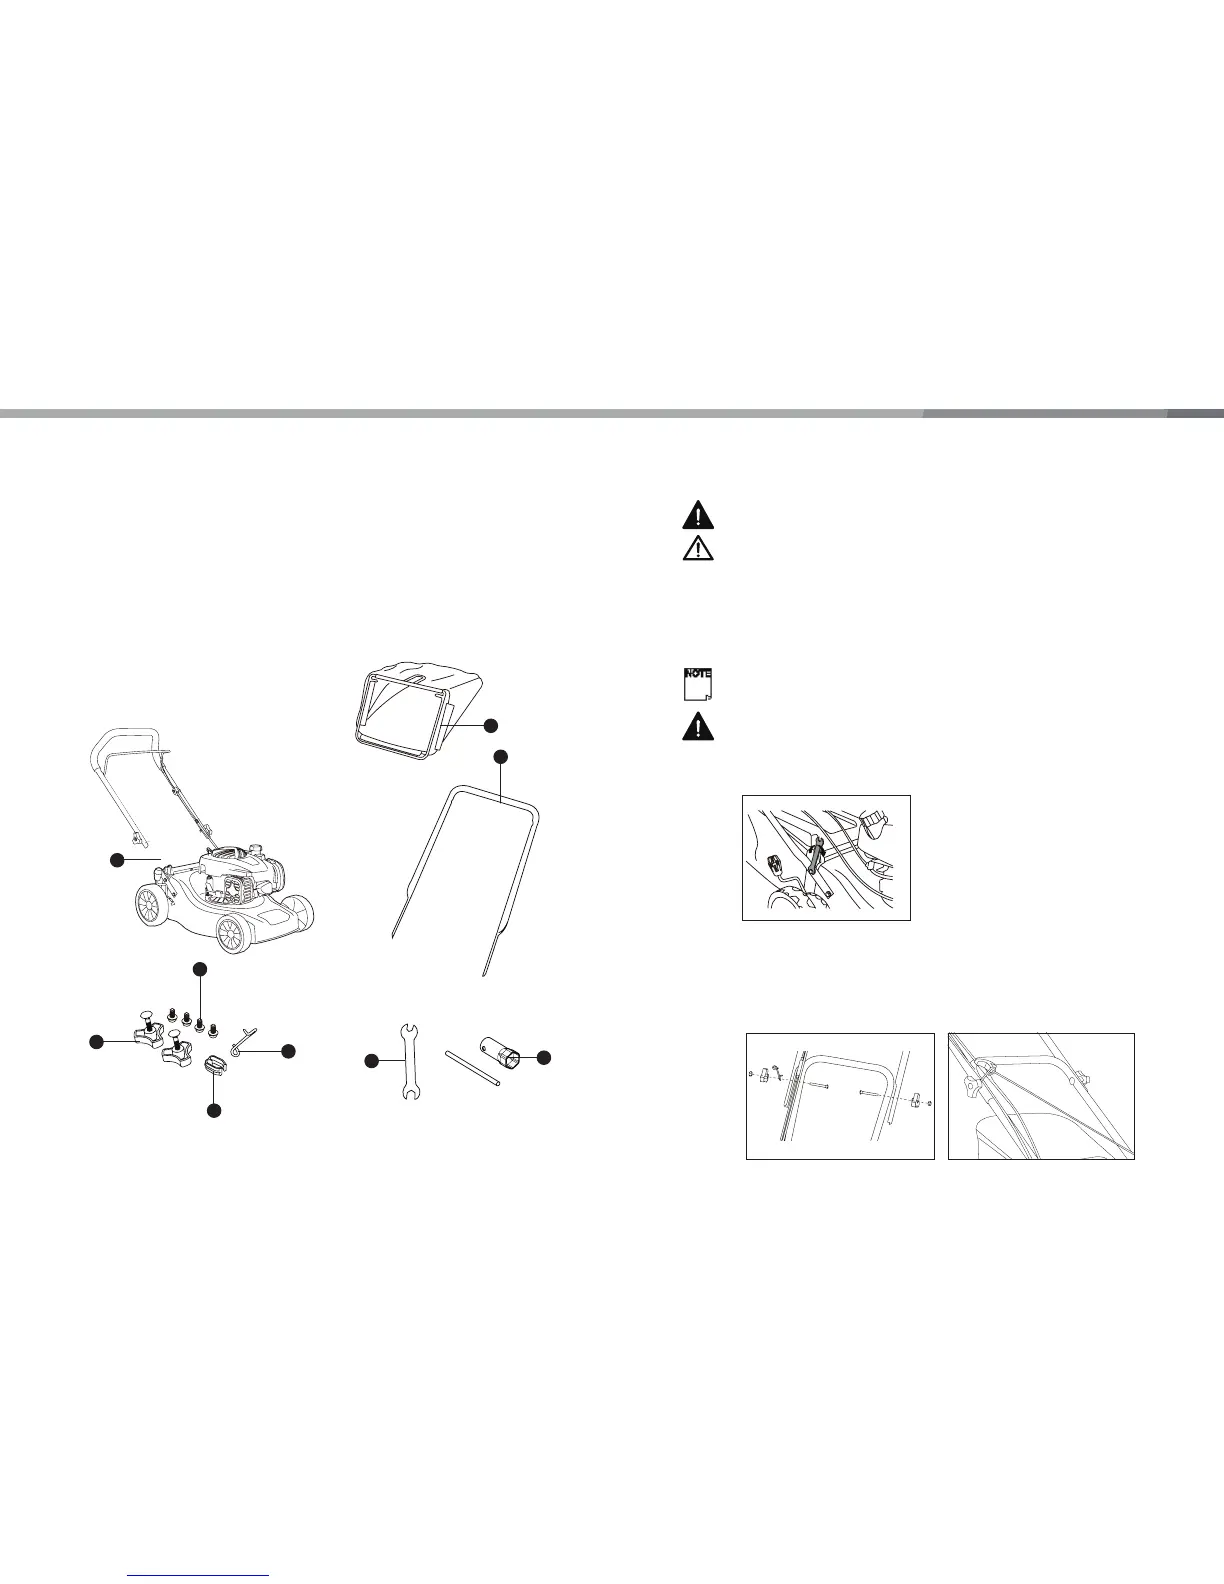
Parts Tools
A Main mower deck (with upper handle attached)
B Lower handle
C Self-tapping screws 4pcs (mounted on machine)
D Handle tensioning knob with nut M8 x 2pcs
E Rope guide 1pc
F Grass collecting bag 1pc
G Cable clip 1pc
1 Spark plug wrench
2 Spanner & Philips screwdriver 1pc
IMPORTANT! Before assembling the lawnmower, check all the parts indicated in the
manual are in the box. Inspect all the parts for signs of damage. Do not assemble the
lawnmower if you observe any damaged components.
WARNING! This item requires a two person lift to remove from the packaging. Make sure
thatyou have sufficient space to put the lawn mower down. Keep your feet apart so that
you have a stable position, bend at the knees and keep your back straight.
1. Remove all parts of the lawnmower from the box and carefully remove all packaging.
Take care not to lose any instructions which may be affixed to the parts. These provide
important information which will be required while assembling the lawnmower.
2. Keep all packaging until the lawnmower is fully assembled and has been operated
successfully.
Helpline: 01904727504
Email: support@coreservice.co.uk
Website: www.coreservice.co.uk
Helpline: 01904727504
Email: support@coreservice.co.uk
Website: www.coreservice.co.uk
2a 2b
1
Align the lower handle with the holes in the deck. Fix the lower handle onto the deck firmly \
with supplied wrench.
A
D
C
E
G
F
B
1
2