5
• Lag screws up to 9.5 mm dia. by 38.1 mm long
• Hole saw up to 38.1 mm
• Spade bits up to 19.1 mm
• Drill bits up to 12.7 mm
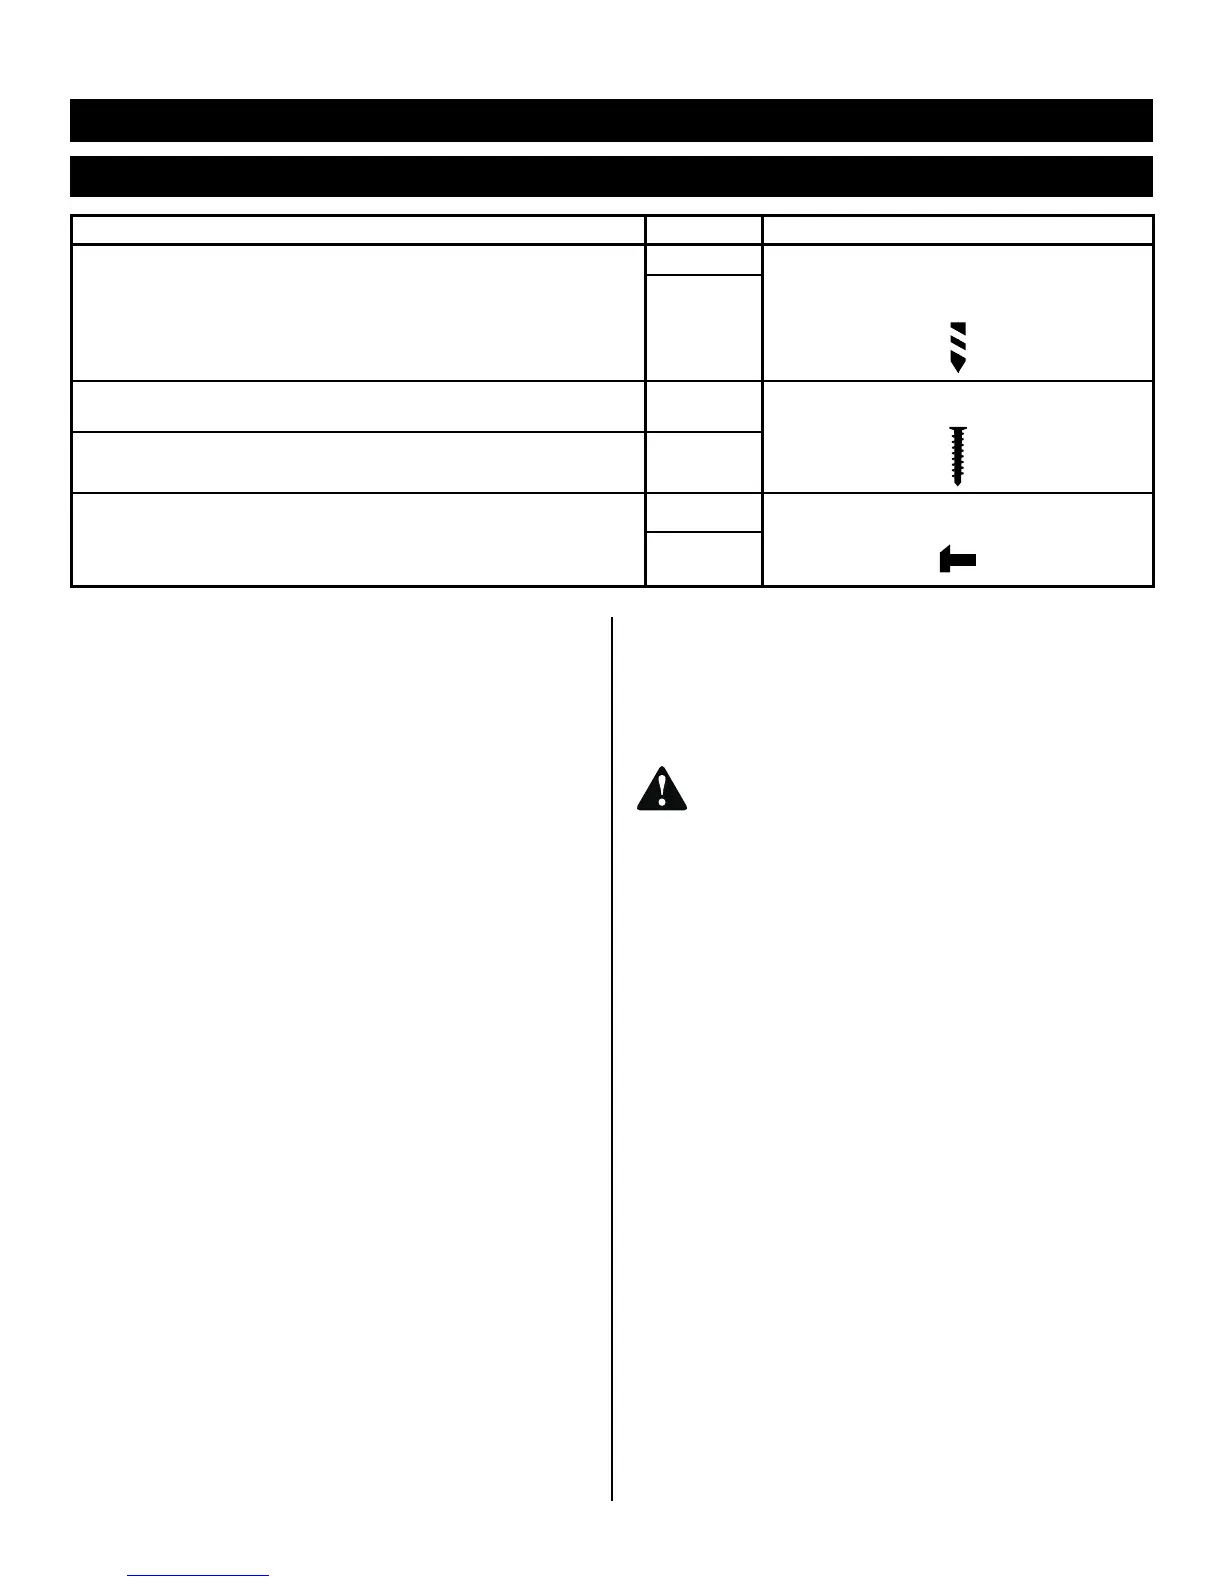
• Drilling into metal
• Concrete screws
1/LOW
DRILL MODE
(TORQUE ADJUSMENT NOT ACTIVE)
2/HIGH
• Deck or wood screws up to 76.2 mm long
• Self tapping screws
1/LOW
DRIVE MODE
• Deck or wood screws up to 50.8 mm long
• Small screws or delicate work that requires more control
2/HIGH
• Masonry bit up to 12.7 mm
1/LOW
HAMMER MODE
(TORQUE ADJUSMENT NOT ACTIVE)
2/HIGH
See Figure 7.
When using the drill-driver for various driving
applications, it becomes necessary to increase
or decrease the torque in order to help prevent the
possibility of damaging screw heads, threads, workpiece,
etc. In general, torque intensity should correspond to the
screw diameter. If the torque is too high or the screws too
small, the screws may be damaged or broken.
The torque is adjusted by rotating the torque adjustment ring.
The torque is greater when the torque adjustment ring
is set on a higher setting. The torque is less when the
torque adjustment ring is set on a lower setting.
The proper setting depends on the type of material and
the size of screw you are using.
See Figure 2.
When not in use, bits provided with the drill can be placed
in the storage areas located on the base of the drill.
See Figure 2.
The magnetic tray conveniently stores screws or other
small parts.
See Figure 8.
Lock the trigger switch by placing the rotation selector
in the center position.
Open or close the chuck jaws to a point where the
opening is slightly larger than the bit size you intend
to use. Also, raise the front of the drill slightly to keep
the bit from falling out of the chuck jaws.
Insert the drill bit.
Tighten the chuck jaws on the drill bit.
:
Make sure to insert the drill bit straight into the
chuck jaws. Do not insert the drill bit into the
chuck jaws at an angle then tighten. This could
cause the drill bit to be thrown from the drill,
resulting in possible serious personal injury or
damage to the chuck.
Rotate the chuck body in the direction of the
arrow marked to tighten the chuck jaws. Do not
use a wrench to tighten or loosen the chuck jaws.
See Figure 8.
Lock the trigger switch by placing the rotation selector
in the center position.
Open the chuck jaws.
Rotate the chuck body in the direction of the
arrow marked to loosen the chuck jaws. Do
not use a wrench to tighten or loosen the chuck jaws.
Remove the drill bit.
Check the rotation selector for the correct setting
(forward or reverse).
Secure the material to be drilled in a vise or with
clamps to keep it from turning as the drill bit rotates.