EasyManua.ls Logo

Ryobi RY401021 User Manual

Ryobi RY401021
44 pages
To Next Page IconTo Next Page
Page #1 background imageLoading...
Page #1 background image
OPERATOR
S
MANUAL
@
40
VOLT
21
in.
LAWN
MOWER
RY401021
S
2-4
4-5
.6
11-12
.13
....
Page
arriere
Back
Page
Pag.
posterior
y
servicio
.
$
Assembly
....
Operation
....
Maintenance
MANUEL
D
UTILISATION
MANUAL
DEL
OPERADOR
SAVE
THIS
MANUAL
FOR
FUTURE
REFERENCE
CONSEBVER
CE
MANUEL
POUR
FUTURE
REFERENCE
GUARDE
ESTE
MANUAL
PARA
FUTURAS
CONSULTAS
....2-4
....
4-5
........
6
....
7-8
..
8-11
11-13
.....
13
TONDEUSE
DE
40
V
DE
533,4
mm
(21
po)
PODADORA
DE
40
V
DE
533,4
mm
(21
pulg.)
....
2-4
....
4-5
....
...6
....
7-8
..
8-11
11-13
.....
13
Important
Safety
Instructions.
Symbols
.................
:
...............
Features
..................................
..7-8
8-11
Troubleshooting
....
Parts
Ordering
and
Service
...................
Instrucciones
de
seguidad
importantes....
............. .
Simbolos
............................
Caracteristicas
...................
Armado
..............................
Funcionamiento
................
Mantenimiento
..................
Correccion
de
problemas
.
Pedidos
de
piezas
Instructions
importantes
concemant
la
securite....
Symboles
......................
Caracteristiques
............
Assemblage
..................
Utilisation
......................
Entretien
........................
Depannage
....................
Commande
de
pieces
et
reparation
......
-
.....
4
WARNING:
To
reduce
the
risk
of
injury,
the
user
must
read
and
understand
the
operator
s
manual
before
using
this
product.
REGISTER
YOUR
TOOLS
B
http://registerryobitools.com
V
1-800-525-2579
A
AVERTISSEMENT
:
Pour
reduire
les
risques
de
blessures,
I
utilisateur
doit
lire
et
veiller
a
bien
comprendre
le
manuel
d
utilisation
avant
d
employer
ce
produit.
RYOBL
A
ADVERTENCIA:
Parareducir
el
riesgo.de
lesiones,
el
usuario
debe
leer
y
comprender
el
manual
del
operador
antes
de
usar
este
producto.

Other manuals for Ryobi RY401021

Question and Answer IconNeed help?

Do you have a question about the Ryobi RY401021 and is the answer not in the manual?

Ryobi RY401021 Specifications

General IconGeneral
TypeWalk Behind Mower
Battery40V Lithium-ion
Voltage40V
Cutting Height1.5 - 4 inches
Deck MaterialSteel
Brushless MotorYes
Power SourceBattery
Battery IncludedYes
Charger IncludedYes
Mulching CapabilityYes
Cutting Height AdjustmentSingle Lever
Warranty5 years
Deck Size20 inches
Cutting Width20 in

Summary

Important Safety Instructions

Symbols and Safety Alerts

Safety Alert Symbol

Indicates a potential personal injury hazard.

Read Operator's Manual Symbol

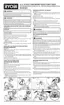
User must read and understand manual before using product.

Eye Protection Symbol

Always wear eye protection with side shields marked to comply with ANSI Z87.1.

Wet Conditions Alert Symbol

Risk of fire/burns. Do not expose components to rain, water, or liquids.

Electric Shock Safety

Failure to use in dry conditions and observe safe practices can result in electric shock.

Product Features Overview

All-Wheel Drive System

Provides increased traction and easy maneuverability.

Two-Position Handle

The handle can be adjusted to two heights for mowing.

Battery Cover Protection

Protects the battery port from moisture and debris.

Brushless Motor Performance

Maximizes power and performance as well as battery run time.

Dual Battery Ports

Maximizes runtime and minimizes downtime by allowing battery switching.

Dual Blades

Provide a premium cut and finer mulching.

Grass Catcher Function

Collects grass clippings and prevents discharge across the lawn.

Height Adjustment Handle

Provides cutting height adjustments.

LED Headlights

Illuminate path in low light conditions. Operate continuously when motor runs.

Maximum Speed Selector

Allows user to set maximum speed settings for the self-propelled feature.

Mulching Door Operation

Covers rear discharge opening for finer clippings.

One Touch Handle Folding

Unlocks handles for folding with a lever on the crossbar.

Self-Propelled Feature

Engaged by pushing down on the self-propelled paddle.

Side Discharge Chute

Directs clippings out of the mower deck when grass is too tall.

Start Button and Levers

Located on the upper handle of the mower for starting.

Start Key Function

Must be inserted before the mower can be started.

Tilt Sensor

Prevents starting if unit is vertical or tilted more than 45°.

Vertical Storage Capability

Folding handles allow for compact, upright storage in garage.

Product Assembly Procedures

Unpacking and Parts Check

Carefully remove product and accessories from box, verify packing list.

Handle Folding and Adjustment

Unfold and adjust the handle to desired height and lock in place.

Grass Catcher Assembly

Assemble the grass catcher bag and frame by attaching clips.

Installing Grass Catcher

Place grass catcher under rear discharge door, seating hooks onto slots.

Using the Mulching Door

Lock mulch door lever to closed position for mulching.

Installing Side Discharge Chute

Install chute into side discharge cover, aligning notches with tabs.

Setting Blade Height

Adjust cutting height for best suited lawn height.

Operation Guide

Installing/Removing Battery Packs

Insert or remove battery packs from the mower's battery port.

Dual Battery Port Usage

Utilize dual ports for extended mowing sessions.

Starting and Stopping the Mower

Learn how to start the motor and blades, and how to stop the mower.

Self-Propelled Mowing

Engage and control the mower's self-propelled function.

Maximum Speed Selector

Adjust the speed selector before engaging the blade for safe operation.

Mowing Tips

Provides advice for optimal mowing, including wet grass and cleaning.

Slope Operation

Exercise caution on slopes; mow across faces, not up/down.

Emptying the Grass Catcher

Instructions for safely stopping the mower and emptying the grass catcher.

Maintenance and Care

General Maintenance

Includes cleaning plastic parts and avoiding solvents.

Lubrication Requirements

Bearings are pre-lubricated for the unit's life; no further lubrication needed.

Replacing Cutting Blades

Detailed steps for safely removing and installing new mower blades.

Storing the Mower

Instructions for storing the mower indoors in vertical or horizontal positions.

Troubleshooting Common Issues

Related product manuals