EasyManua.ls Logo

Ryobi RY907022FI - User Manual

Ryobi RY907022FI
68 pages
Print Icon
To Next Page IconTo Next Page
Loading...
NEUTRAL BONDED TO FRAME
CONNECTEUR NEUTRE RELIÉ AU CADRE
PUNTO NEUTRO CONECTADO AL MARCO
WARNING: To reduce the risk of
injury, the user must read and understand
the operator’s manual before using this
product.
TABLE OF CONTENTS
Important Safety Instructions ............3-4
Specific Safety Rules ...........................4
Symbols ............................................5-7
Electrical ...........................................8-9
Features .............................................10
Assembly ......................................11-12
Operation ......................................12-15
Maintenance .................................16-19
Troubleshooting .................................20
Parts Ordering / Service ....... Back Page
AVERTISSEMENT : Pour
réduire les risques de blessures,
l’utilisateur doit lire et veiller à bien
comprendre le manuel d’utilisation avant
d’employer ce produit.
TABLE DES MATIÈRES
Instructions importantes
concernant la sécurité ......................3-4
Règles de sécurité particulières ........4-5
Symboles ..........................................6-8
Caractéristiques électriques ...........9-10
Caractéristiques ................................. 11
Assemblage ..................................12-13
Utilisation ......................................13-17
Entretien ........................................17-21
Dépannage .........................................22
Commande de pièces /
réparation ............................Páge arrière
ADVERTENCIA: Para reducir el
riesgo de lesiones, el usuario debe leer
y comprender el manual del operador
antes de usar este producto.
ÍNDICE DE CONTENIDO
Instrucciones de seguridad
importantes .......................................3-4
Reglas de seguridad específicas ......4-5
Símbolos ...........................................6-8
Aspectos eléctricos ........................9-10
Características ...................................11
Armado .........................................12-13
Funcionamiento ............................13-17
Mantenimiento ..............................17-21
Corrección de problemas ..................22
Pedidos de piezas/
servicio ............................ Pág. posterior
OPERATOR’S MANUAL
MANUEL D’UTILISATION
MANUAL DEL OPERADOR
7,000 WATT GENERATOR
GÉNÉRATRICE DE 7 000 WATTS
GENERADOR 7 000 WATTS
RY907022FI
SAVE THIS MANUAL FOR
FUTURE REFERENCE
CONSERVER CE MANUEL
POUR FUTURE RÉFÉRENCE
GUARDE ESTE MANUAL
PARA FUTURAS CONSULTAS
NOTICE AVIS AVISO
Do not use E15 or E85 fuel in this
product. It is a violation of federal law
and will damage the unit and void your
warranty. Only use unleaded gasoline
containing up to 10% ethanol.
Ne pas utiliser d’essence E15 ou E85 dans ce produit. Une
telle utilisation représente une violation de la loi fédérale
et endommagera l’appareil et annulera la garantie. Utiliser
seulement de l’essence sans plomb ne contenant pas plus
de 10 % d’éthanol.
No utilice combustibles E15 o E85 con este producto. Esto
constituye una violación a la ley federal, dañará la unidad y
anulará la garantía. Utilice únicamente gasolina sin plomo
que contiene hasta 10% de etanol.
Question and Answer IconNeed help?

Do you have a question about the Ryobi RY907022FI and is the answer not in the manual?

Overview

This document describes the Ryobi 7,000 Watt Generator, model RY907022FI, a portable power solution designed for various electrical needs.

Function Description

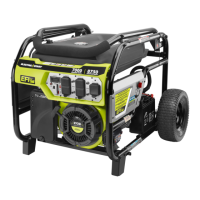
The Ryobi 7,000 Watt Generator is designed to supply electrical power for operating compatible electrical lighting, appliances, tools, and motor loads. It features both electric and recoil start capabilities, providing flexibility in starting the engine. The generator is equipped with an electronic fuel injection system, ensuring efficient operation. A key safety feature is the integrated carbon monoxide (CO) sensor, which automatically shuts down the unit if CO levels rise to an unsafe level, flashing a red LED to alert the user. The generator also includes a low oil shut-down protector, which stops the engine if the lubricant level is insufficient, preventing damage. For user convenience, it has a digital display that shows AC voltage output, frequency, current run time, and total operating hours. The unit is designed for outdoor use only and includes a ground terminal for proper grounding to protect against electrical shock.

Important Technical Specifications

  • Engine Type: 420cc, EFI (Electronic Fuel Injection)
  • Spark Plug: F6RTC or equivalent
  • Fuel Volume: 6 gallons (22.7 liters)
  • Engine Lubricant Volume: 32 ounces (0.94 liters)
  • Rated Voltage: 120 V/240 V
  • Rated Amps: 58.3 A/29.1 A
  • Rated Output: 7,000 W
  • Starting Watts: 8,750 W
  • Rated Frequency: 60 Hz
  • Receptacles: Two 120 Volt AC duplex 20 Amp GFCI protected receptacles, and one 240 Volt AC 30 Amp receptacle.
  • Operating Temperature Range: 23°F to 104°F (-5°C to 40°C) with relative humidity of 90% or less.
  • Grounding: Requires grounding to an approved earth ground, using #8 size wire, connected to the frame's ground terminal.

Usage Features

The generator is designed for ease of use and safety. Before operation, users must familiarize themselves with all operating features and safety rules outlined in the manual.

  • Starting the Engine:
    • Ensure all loads are unplugged.
    • Turn the fuel valve to the ON (I) position.
    • For electric start: Place the engine switch in the ON position, wait 30 seconds for fuel to travel, then slide down and hold the lock button while pushing the engine switch to the START position. Release the switch once the engine starts.
    • For recoil start: Place the engine switch in the ON position, wait 30 seconds for fuel to travel, then pull the recoil starter grip until the engine runs. Gently return the grip to its original place.
    • The battery may require charging before the first start. Once the generator is running, the battery will charge.
  • Stopping the Engine:
    • Under normal conditions: Remove all loads, push the engine switch to the OFF (O) position, and turn the fuel valve to the OFF (O) position.
    • In an emergency: Push the engine switch to the OFF (O) position.
  • Fueling: Always refuel outdoors with the engine off and cooled for at least five minutes. Fill the fuel tank to 1 inch below the top of the fuel neck with unleaded gasoline (86 octane or higher) containing no more than 10% ethanol. Do not use E15 or E85 fuel. Fuel stabilizer can be mixed with gasoline to extend fuel life.
  • Lubricant: The engine requires SAE 10W-30 full synthetic 4-stroke motor lubricant that meets or exceeds API service classification SJ. Always check the lubricant level before each use; it should be between the hatched areas on the dipstick. The low oil shut-down protector will prevent the engine from starting or running if the oil level is too low.
  • Digital Display: Provides real-time information on voltage, frequency, current run time, and total hours of operation. It also displays maintenance reminders at 25, 50, and 100 cumulative run hours for lubricant changes, air filter cleaning, and fuel filter changes.
  • Handle: The generator includes a handle for easy movement, which can be raised or lowered and secured with a lock pin. The handle should only be used for rolling the unit, not for lifting.
  • Ground Fault Circuit Interrupter (GFCI): The 120V receptacles are GFCI protected, guarding against ground fault currents. GFCI receptacles can be tested monthly using the TEST and RESET buttons to ensure proper operation.
  • Spark Arrestor: The unit is equipped with a spark arrestor to prevent fires in dry vegetation. Users should comply with local fire prevention regulations.

Maintenance Features

Regular maintenance is crucial for the generator's performance and longevity. A detailed maintenance schedule is provided, with some tasks requiring a qualified service center.

  • Engine Lubricant:
    • Check before each use.
    • Change after the first month or 25 hours of operation, then every 100 hours (or as indicated by the digital display).
    • To change: Unscrew the oil cap/dipstick, place a container under the oil drain plug, remove the plug, drain the lubricant (preferably when warm), reinstall the plug, and refill with new lubricant.
  • Air Filter:
    • Check before each use.
    • Change after the first month or 25 hours, then every 240 hours (or as indicated by the digital display).
    • To clean: Remove the air filter cover and element, wash the element with warm soapy water, rinse, dry, and apply a light coat of engine lubricant before reinstalling.
  • Spark Plug:
    • Check/adjust every 100 hours.
    • Replace every 200 hours.
    • To check: Remove the engine cover and spark plug cap, then remove the spark plug. Clean with a wire brush, inspect for damage, and measure the gap (0.028-0.031 in.). Adjust if necessary and reinstall.
  • Spark Arrestor Screen: Check/clean every 100 hours. Remove carbon deposits using a brush.
  • Idle Speed: Check/adjust every 240 hours (service center recommended).
  • Valve Clearance: Check/adjust every 240 hours (service center recommended).
  • Head Bolt Torque: Check/adjust every 240 hours (service center recommended).
  • Fuel Filter: Inspect every 240 hours, replace every 480 hours (or as indicated by the digital display).
    • To replace: Drain the fuel tank, turn the fuel valve to OFF, remove fuel lines from the old filter, install the new filter, and reconnect fuel lines.
  • Battery:
    • The battery cables must be connected before operation (red to positive, black to negative).
    • The battery maintainer (included) can be used to keep the battery charged during storage. Connect the maintainer to a power supply (120V AC, 60 Hz) and then to the battery's charging cable. A red light indicates charging, turning green when fully charged.
    • The battery charge circuit fuse (7 amp ATO blade-type) protects the battery and should be checked and replaced if needed.
  • Storage: For storage longer than two months, drain the gasoline from the tank. For longer periods (one year or more), also remove the spark plug, add a tablespoon of engine lubricant to the cylinder, slowly turn the engine with the pull rope to distribute the lubricant, reinstall the spark plug, and change the engine lubricant. Always store the generator in a well-ventilated area with an empty fuel tank.

This generator is a robust and feature-rich power source, designed with safety and convenience in mind for various applications.

Ryobi RY907022FI Specifications

General IconGeneral
BrandRyobi
ModelRY907022FI
CategoryPortable Generator
LanguageEnglish

Related product manuals