11
6. Digital audio output: To set the both SPDIF and HDMI’s digital audio output mode. It has options:
LPCM and RAW
<->1080i_50Hz<->AUTO<->1080p_50Hz.
7. TV resolution: You can switch video resolution circularly by the sequence 576i <-> 576P
<->720p_50Hz
8. Video Output: To set video output mode RCA (CVBS) / SCART(CVBS)/ SCART(RGB)/ YCbCr(YUV)/
HDMI
9. TV Mode: you can switch the TV output mode by NTSC /Auto/ PAL
10. TV Format: You can switch the screen aspect ratio mode. Now we provide below options: 4:3 LB/4:3
PS/16:9 LB/16:9 FIT
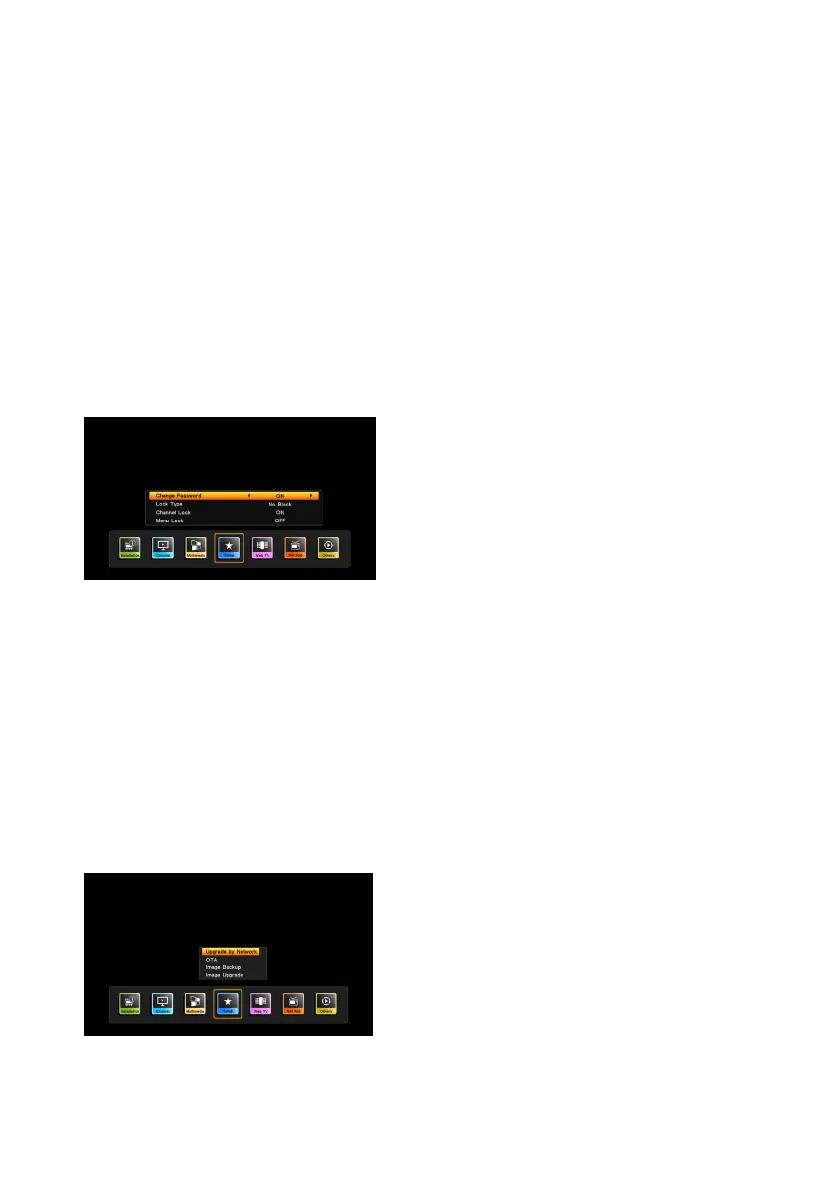
9. Parental control
When first enter this menu, you should input the password. Default password is “0000”.
10. Update & Back-up
By pressing [Menu] and selecting “Setup” item, and press OK key enter to update & backup menu when
the highlight on the upgade & backup items
Image upgrade:you can download new software to this
receiver by external USB memory device(the upgrade file
format support “*ssu”)
Image backup:store the software backup to USB memory
device.
When you enter to “Backup by USB” menu, you can store
the changed parameters and searched channels and etc.
1. Insert the external USB memory device to USB slot of
this receiver.
2. You can select the file or add the new file to backup
1. Change Password: To change
password. You can input the new
password in this item by using number
keys directly. After you filled in 4 digital
numbers, the highlight will auto skip to
confirm Password and ask you to input
the new password again.
2. Lock Type: No Block/Total
Block/05/06/…/18
3. Channel Lock: In order to enter to the
locked channels, you should input the
password. The locked channels mark
will show up a popup message on the
screen and ask for the password.
4. Menu Lock: If set ON, in order to enter
some certain menu, you should enter the