Do you have a question about the Safeguard Supply ERA-UTX and is the answer not in the manual?
Lists key features like transmitter capacity, output duration, and battery status indication.
Instructions for opening the case and installing the CR-2 battery.
Explains the default function of the LED indicator when activated.
Steps to select and program different melodies for receiver zones.
How to adjust receiver volume, mute, and power it off using the volume button.
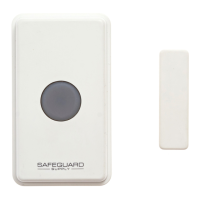
Details on mounting and using magnetic contacts for doors/windows.
Explains the 12V DC output feature and duration settings.
Step-by-step guide for wiring a 12V DC device to the receiver.
Instructions for mounting the transmitter unit to a wall.
How to connect external detectors (N/O or N/C) to the transmitter.
Guidance on series/parallel connections for multiple N/C or N/O detectors.
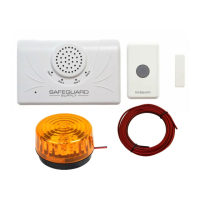
The ERA-UTX is a versatile universal transmitter designed to work with the ERA-DCRX Receiver, available either separately or as part of the ERA-UTDCR kit. This device offers multiple activation methods, including a push button for panic or doorbell functions, terminals for normally open (N/O) or normally closed (N/C) inputs to connect with various detector contacts, and a magnetic contact for doors or windows. When activated, the transmitter sends a signal to the receiver, triggering one of 12 distinct tones, activating 12V DC outputs, and/or engaging a relay output. The device complies with Part 15 of the FCC rules, ensuring it does not cause harmful interference and accepts any interference received.
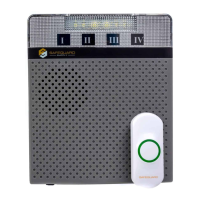
The ERA-UTX transmitter is designed to be paired with the ERA-DCRX receiver. Each zone on the receiver can be programmed to play a specific melody when triggered by a paired transmitter. By default, zones are set to a "ding-dong" sound for quick setup. The receiver supports up to four transmitters per zone and features individual 12V DC outputs for each zone. The output duration for the 12V DC outputs and the C-Form relay can be configured to 5 seconds, 10 seconds, 1 minute, or 2 minutes. The receiver also includes a volume control with four levels, plus mute and off options. A low battery in the transmitter will cause the corresponding zone LED on the receiver to flash for 10 minutes when triggered.
The "volume" button on the side of the receiver controls the volume levels.
The magnetic contact can be used on doors/windows with a gap of less than 1½ inch.
The ERA-UTX can be activated by any detector with a normally open (N/O) or normally closed (N/C) output.
The default setting is for the LED indicator to light up for two seconds when the ERA-UTX is activated.
For any operational difficulties, contact Safeguard Supply by phone at 904-245-1184 from 8:00 AM to 5:00 PM Monday through Friday (Eastern Standard Time).
Safeguard Supply warrants this product to be free of defects in material and workmanship for one year from the date of purchase. The warranty does not cover damage from accident, abuse, act of God, or improper operation. For defective products under warranty, return to Safeguard Supply with a note describing the troubles, name, return address, and original sales receipt for repair or replacement at no charge. If not covered by warranty, charges will be communicated before work is done.
| Brand | Safeguard Supply |
|---|---|
| Model | ERA-UTX |
| Category | Accessories |
| Language | English |