EasyManua.ls Logo

SALSA Warbird User Manual

SALSA Warbird
2 pages
To Next Page IconTo Next Page
Page #1 background imageLoading...
Page #1 background image
1
25773 1/18
For additional product and safety information go to salsacycles.com/safety
WARBIRD CABLE ROUTING INSTRUCTIONS
RETAILER: This framesheet supplement MUST BE provided to the
end user.
At Salsa, we believe that a sense of adventure makes life better.
The bicycle can be so much more than just a bike; its a path
to new places, new people, and amazing experiences.
Salsa. Adventure by bike.
®
Thank you for purchasing a Salsa Warbird! We want to give you
important information about your bike...
WARNING: Cycling can be dangerous. bicycle products
should be installed and serviced by a professional mechanic.
Never modify your bicycle or accessories. Read and follow all
product instructions and warnings including information on the
manufacturer’s website. Inspect your bicycle before every ride.
Always wear a helmet.
Tools
2 mm hex wrench
Torque wrench that measures in Nm
Installation for Mechanical (Cable Operated)
Shifters & Disc Brakes
Warbird frames use cable routing tunnels for easy installation
and maintenance. Improperly routed cables will make themselves
obvious when it comes time to connect cables to components,
but follow these instructions to expedite the build process.
1. Remove the bottom bracket cover via the two M3 bolt heads.
2. If your bike uses a front derailleur, feed the shift housing
through the top DRIVESIDE port at the top of the downtube
until it comes to the opening in the bottom bracket shell.
Turn the housing up into the internal housing stop behind the
bottom bracket and feed the shift cable through the stop to the
front derailleur (Figs. 1 & 2).
3. Insert the housing for the rear derailleur through the top
NON-DRIVESIDE port at the top of the downtube until it comes
to the opening in the bottom bracket shell, direct the housing
into the drive side chainstay tube and push it until it exits at the
rear of the driveside seatstay (Figs. 1, 2, & 3).
4. For brakes, feed the brake housing through the
NON-DRIVESIDE port on the side of the downtube until
it exits the rear non-driveside chainstay (Figs. 1 & 3).
5. Reinstall the M3 bottom bracket shell cover bolts and tighten
to 1 Nm.
Figure 1
Rear Shift Housing
& Electronic Wire
Front Shift Housing
& Electronic Wire
Rear Brake Line
Figure 3
Front Mechanical
Shift Cable
Front Electronic
Shift Wire
Rear Brake Line
Rear Shift Housing
& Electronic Wire
Figure 2 Shown with BB cover removed
Front Mechanical
Shift Housing
Rear Mechanical
Shift Housing
Question and Answer IconNeed help?

Do you have a question about the SALSA Warbird and is the answer not in the manual?

SALSA Warbird Specifications

General IconGeneral
Frame MaterialAluminum
Fork MaterialCarbon
Brake TypeDisc
Front Axle12mm thru-axle
Rear Axle12mm thru-axle
BrakesHydraulic disc
Wheel Size700c

Summary

Tools

Mechanical Cable Routing Installation

Bottom Bracket Cover Removal

Remove the bottom bracket cover using the two M3 bolt heads.

Front Derailleur Shift Housing

Feed front shift housing through the DRIVESIDE port to the bottom bracket shell.

Rear Derailleur Shift Housing

Feed rear shift housing through NON-DRIVESIDE port to the driveside seatstay.

Brake Housing Routing

Feed brake housing through the NON-DRIVESIDE downtube port to the rear chainstay.

Bottom Bracket Cover Reinstallation

Reinstall the M3 bottom bracket shell cover bolts and tighten to 1 Nm.

Shimano Di2 Electronic Shifter Installation

Di2 Initial Setup & BB Cover Removal

Di2 installation is easier without BB. Remove BB cover via M3 bolts.

Di2 Junction Box Wiring

Feed Di2 wire from junction box via NON-DRIVESIDE port to the bottom bracket shell.

Front Derailleur Di2 Wiring

Front derailleur wiring comes from junction box to small port below front derailleur.

Rear Derailleur Di2 Wiring

Rear derailleur wiring comes from junction box to driveside seatstay.

Internal Seatpost Battery Wire

Battery wire drops inside seat tube to junction box; ensure slack for seatpost removal.

Junction Box Securing

Secure junction box to BB shell cover with zip tie through small slots.

Bottom Bracket Cover Reinstallation

Reinstall M3 bottom bracket shell cover bolts and tighten to 1 Nm.

Care and Maintenance

Frame Cleaning & Protection

Keep frame clean to prevent oxidation and abrasion. Protect from elements and store properly.

Frame Inspection

Before every ride, inspect frame for signs of fatigue or damage. Consult dealer if issues found.

Modification Warnings

Never modify the frameset or components. Improper modifications can cause loss of control.

Serial Number Location

Locate serial number at the bottom of the bottom bracket shell for warranty or identification.

Warranty Information

Proof of purchase is required for warranty claims. Register your product at salsacycles.com.
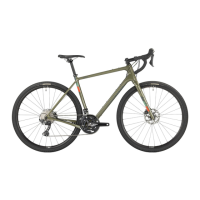
Related product manuals