SUN_IS_ electrical_installation_v5.1_06092021
15
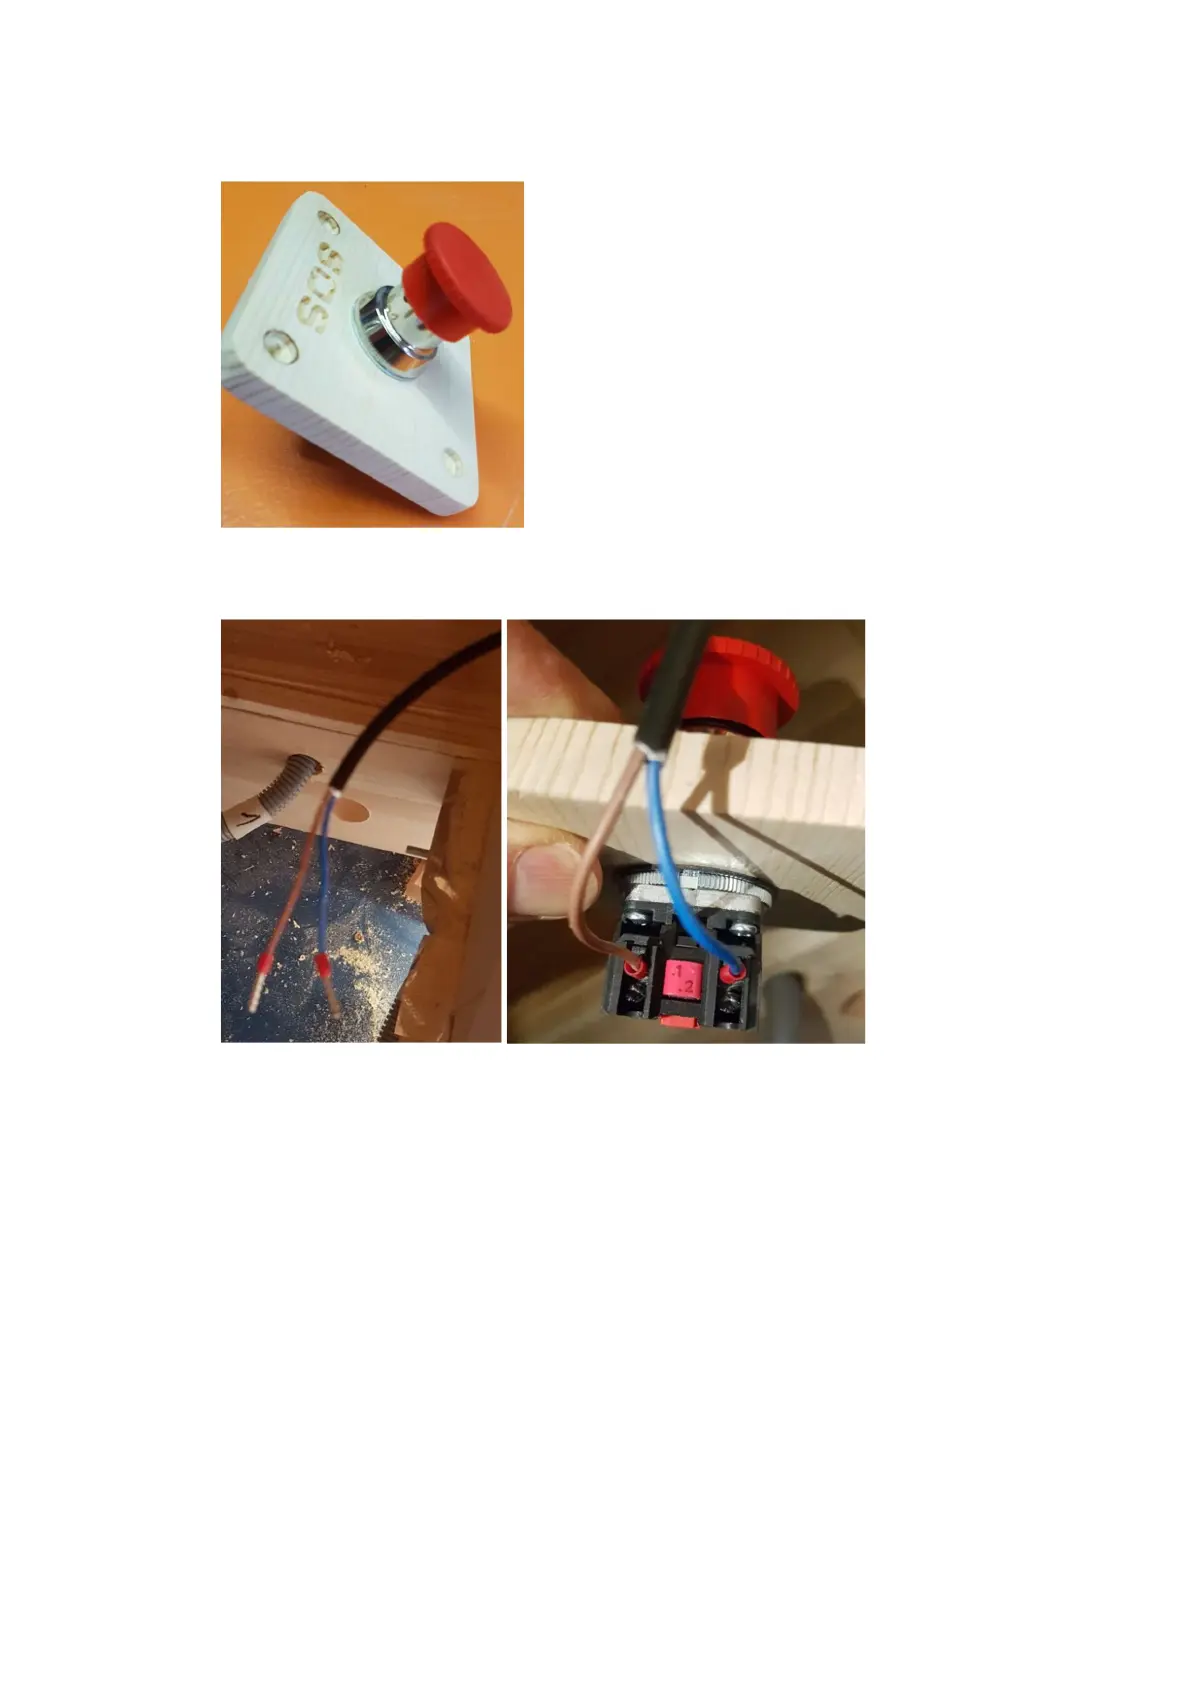
3. Mount the SOS button to the base, making sure the retaining ring is firmly tightened.
4. Tack the ends onto the cables and screw to the switch.
NOTE: The wires should be screwed to the side marked in red (poles 1 and 2).
5. Drill four holes with a 2.5 mm drill bit so that the base is mounted horizontally, then using
four stainless steel screws phi 3.8 mm, length 25 mm, tighten the base to the sauna paneling.