SP | Sheave Mountaing and Alignment | Tensioning
7
CHECK SHEAVE MOUNTING AND
ALIGNMENT
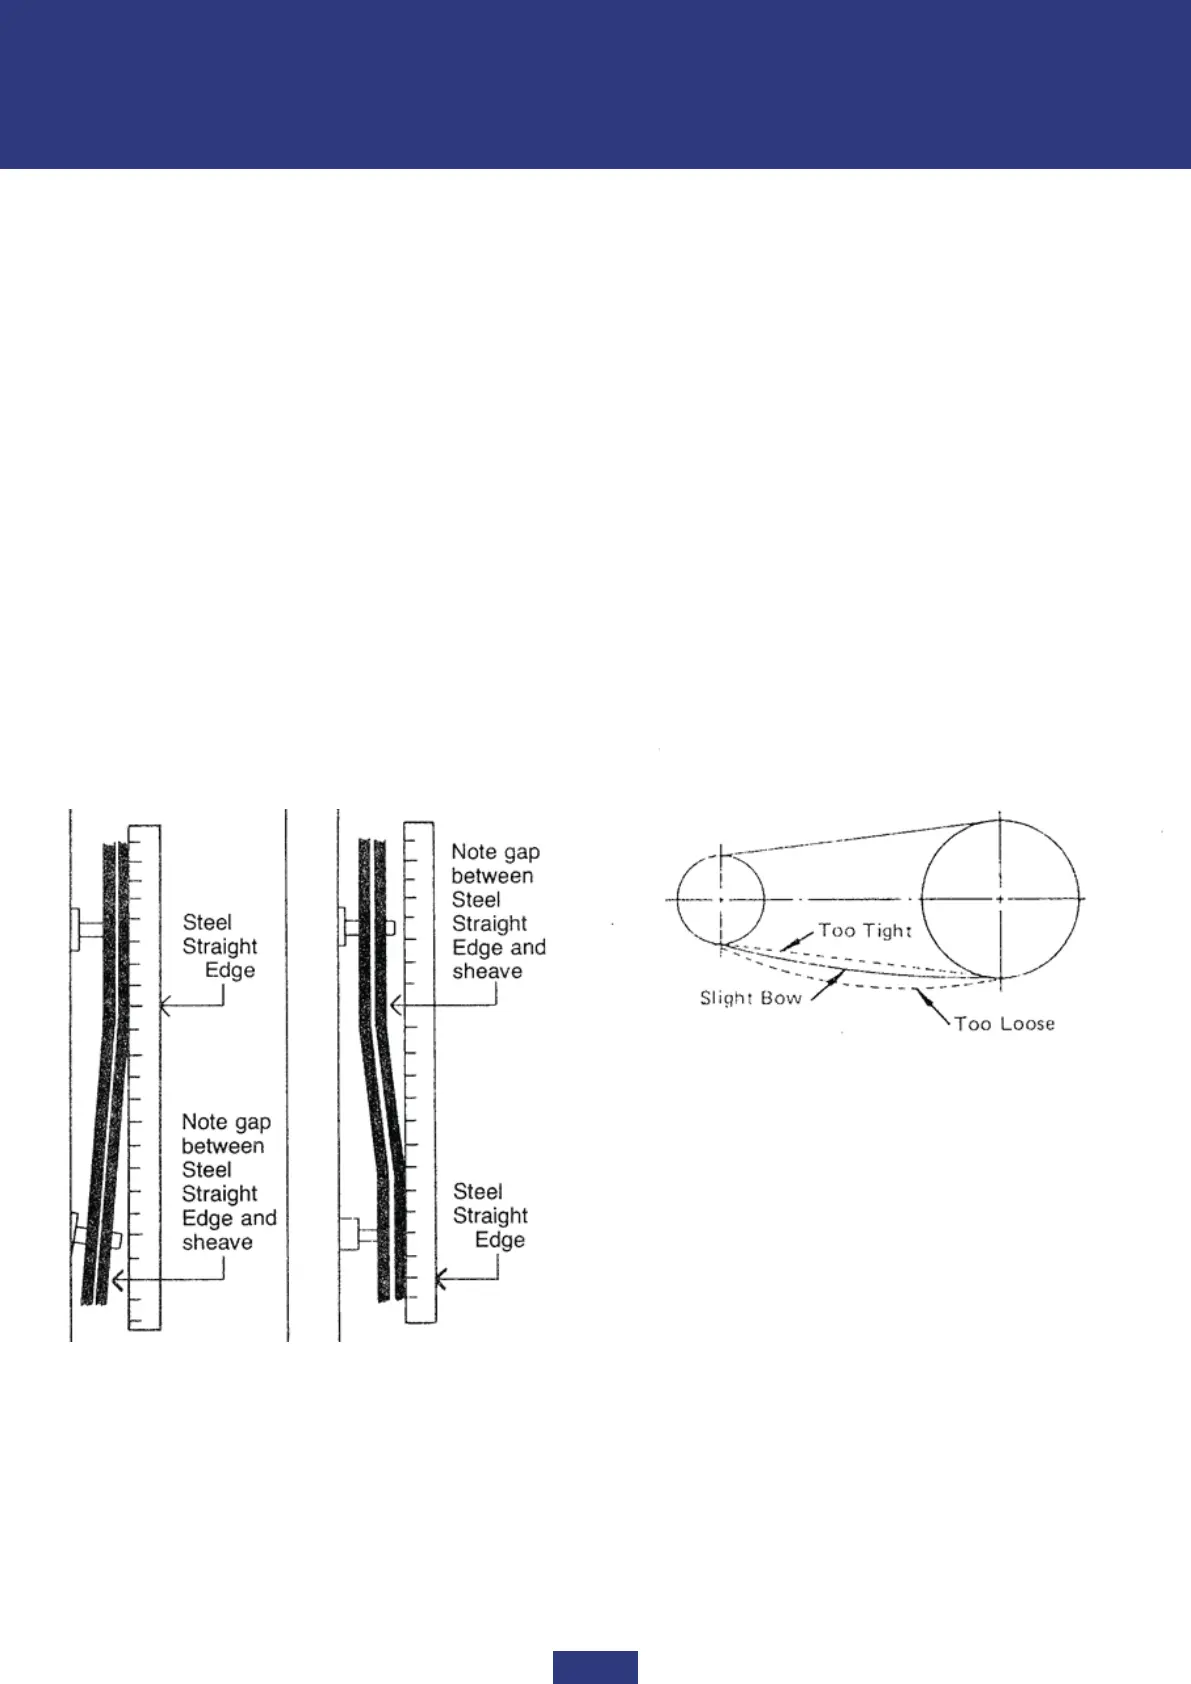
V-Belt drives do not require alignment to as close
tolerances as most other types of drives - but
unless the belts enter and leave the sheaves in a
relatively straight line, wear is accelerated.
The two most common causes of misalignment are
shown: (a) the shafts of the driver and driven
machines are not parallel, and (b) the sheaves are
not located properly on the shafts. To check align-
ment, all you need is a straight edge or, for drives
with longer centres, a steel tape. If these aren't
available, you can, as a last resort, even use heavy
string. Just line the straight edge or tape along the
outside face of both sheaves as shown in the
illustration. Misalignment will show up as a gap in
between the sheave face and straight edge, or
perhaps as a "break" in the tape or string. Make
sure that the width of the outside land is equal on
both sheaves, when using this method.
V-BELT DRIVE TENSIONING METHOD
Before attempting to tension any drive it is
important that the sheaves be properly installed
and aligned. The V-belts should be placed over the
sheaves and in the grooves without forcing them
over the sides of the grooves.
Step 1: With all belts in their proper groove, adjust
the centres to take up all slack and until the belts
are fairly tight.
Step 2: Start the drive and continue to adjust until
the belts have only a slight bow on the slack side
of the drive while operating under load. See
sketch.
Step 3: After a few days of operation, the belts will
seat themselves in the sheave grooves and it may
become necessary to readjust so that the drive
again shows a slight "bow" in the slack side.
The drive is now properly tensioned and should
operate satisfactorily with only an occasional
readjustment to compensate for belt and groove
wear.