29
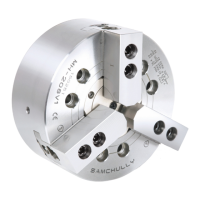
4-2 Forming of soft jaw
Fit a suitable soft jaw according to the shape, size, ma-
terial, surface roughness and cutting conditons of the
workpiece. Since the soft jaw can be easily seperated
from the master jaw by loosening haxagon socket head
screws, it can be freely adjusted by changing the en-
gaged position on the serration.Since the soft jaw can
be easily seperated from the master jaw by loosening
haxagon socket head screws, it can be freely adjusted
by changing the engaged position on the serration.
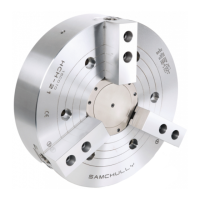
Position of Set Jaws
The T-Nut must not be protrude from the master
jaw(see Fig.8-2) Incorrect usage will cause damage
to the master jaw and T-nut as well as inaccuracy.
If T-nut is used with it extruded(see Fig.8-1), it will
cause inaccuracy. Also the master jaw or T-nut will
be broken. The jaw or workpiece discharge thus
resulting in danger.
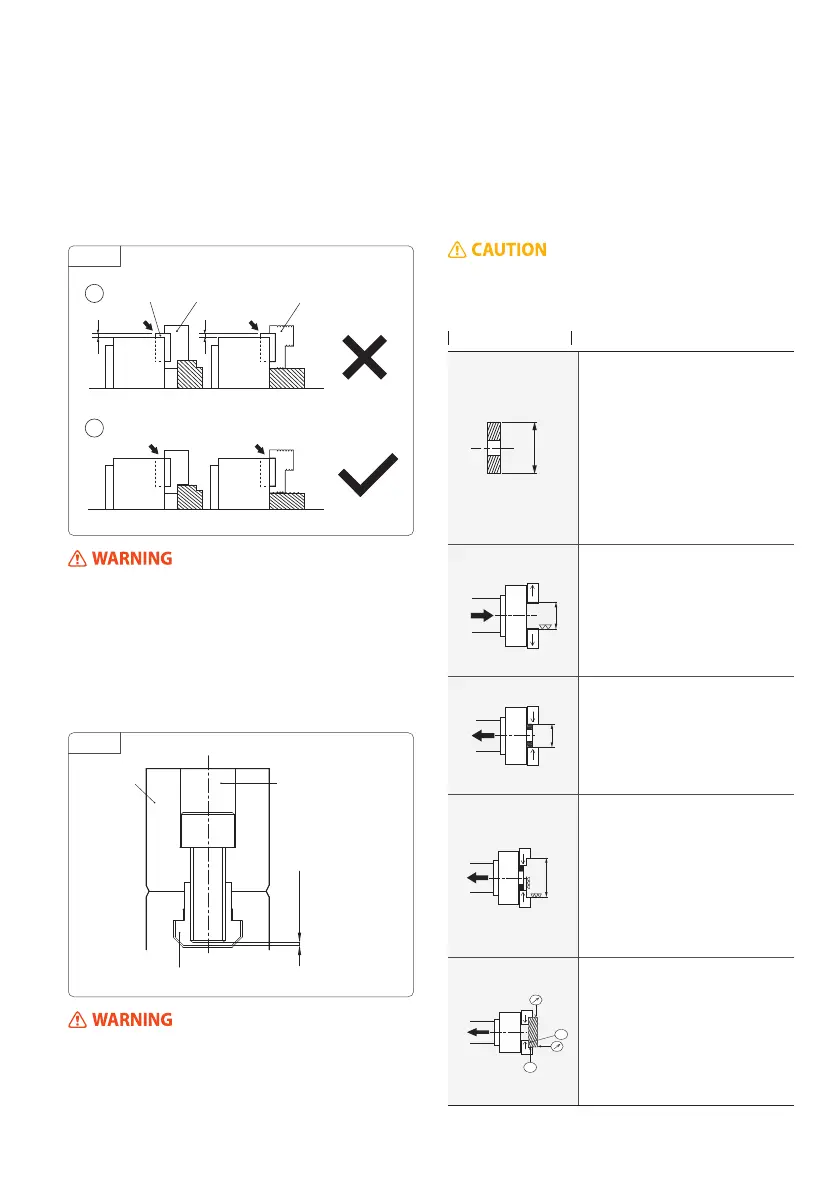
If the screwing depth for T-nut of the top jaw
mounting bolt is shallow, T-nut may be damaged.
Also, the jaw or workpiece discharges thus resulting
in danger. If the bolt protrudes from the T-nut bot-
The following table describes the procedures to
form soft jaws for external gripping, internal grip-
ping and high accuracy gripping.
Prepare for the plug for forming as
outer dia of plug is dierent in accor-
dance to the size and shape of form-
ing parts. It would be convenient to
prepare for the dierent sizes of outer
dia of plugs in advance. For accuracy
of the plug, use 25S or less. Make sure
the plug is not warped and has ade-
quate wall thickness.
Open the master jaw fully by operat-
ing the valve. Next, set ØD dimension
to grip around the middle of the maxi-
mum jaw stroke.
plug dia : ØD
≒
Ød+Max. Jaw Stroke÷2
Grip the plug at the Ø D-forned part by
operating the valve. At this time grip
with it pressed against the front face of
chuck lest the plug should decline.
While gripping the plug, the jaws are
formed. Machine ØD´ part as large as
gripping dia, of a workpiece (H7 ap-
proximately) and the surface nish less
than 6S. While forming the jaws set the
pressure the same as designated pres-
sure for workpiece operation or higher.
After forming, chuck a workpiece and
check the jaw stroke and the gripping
accuracy. Perform trial cutting and
conrm machining accuracy. As for the
contact of the chucking surface,make
chucking contact both surface A and B.
Ø d
External gripping
g. 8
g. 9
1
2
0~1mm
Top Jaw Mounting BoltTop Jaw
T-Nut
Hard JawSoft JawT-Nut
tom, the top jaw is not xed even if the mounting
bolt is tightened. Also, the jaw or workpiece dis-
charges thus resulting in danger, consequently, the
overall length of the top jaw mounting bolts should
be 0~1mm from the T-nut bottom.(Fig.9) Be sure
to use the attached T-nut and mounting bolt.In an
unavoidable case, use the bolt and nut of strength
12.9(M22 or more 10.9) or more and sufficient
length. Never start the spindle with T-nut still loose.
The top jaw will discharge.
 Loading...