5
EN
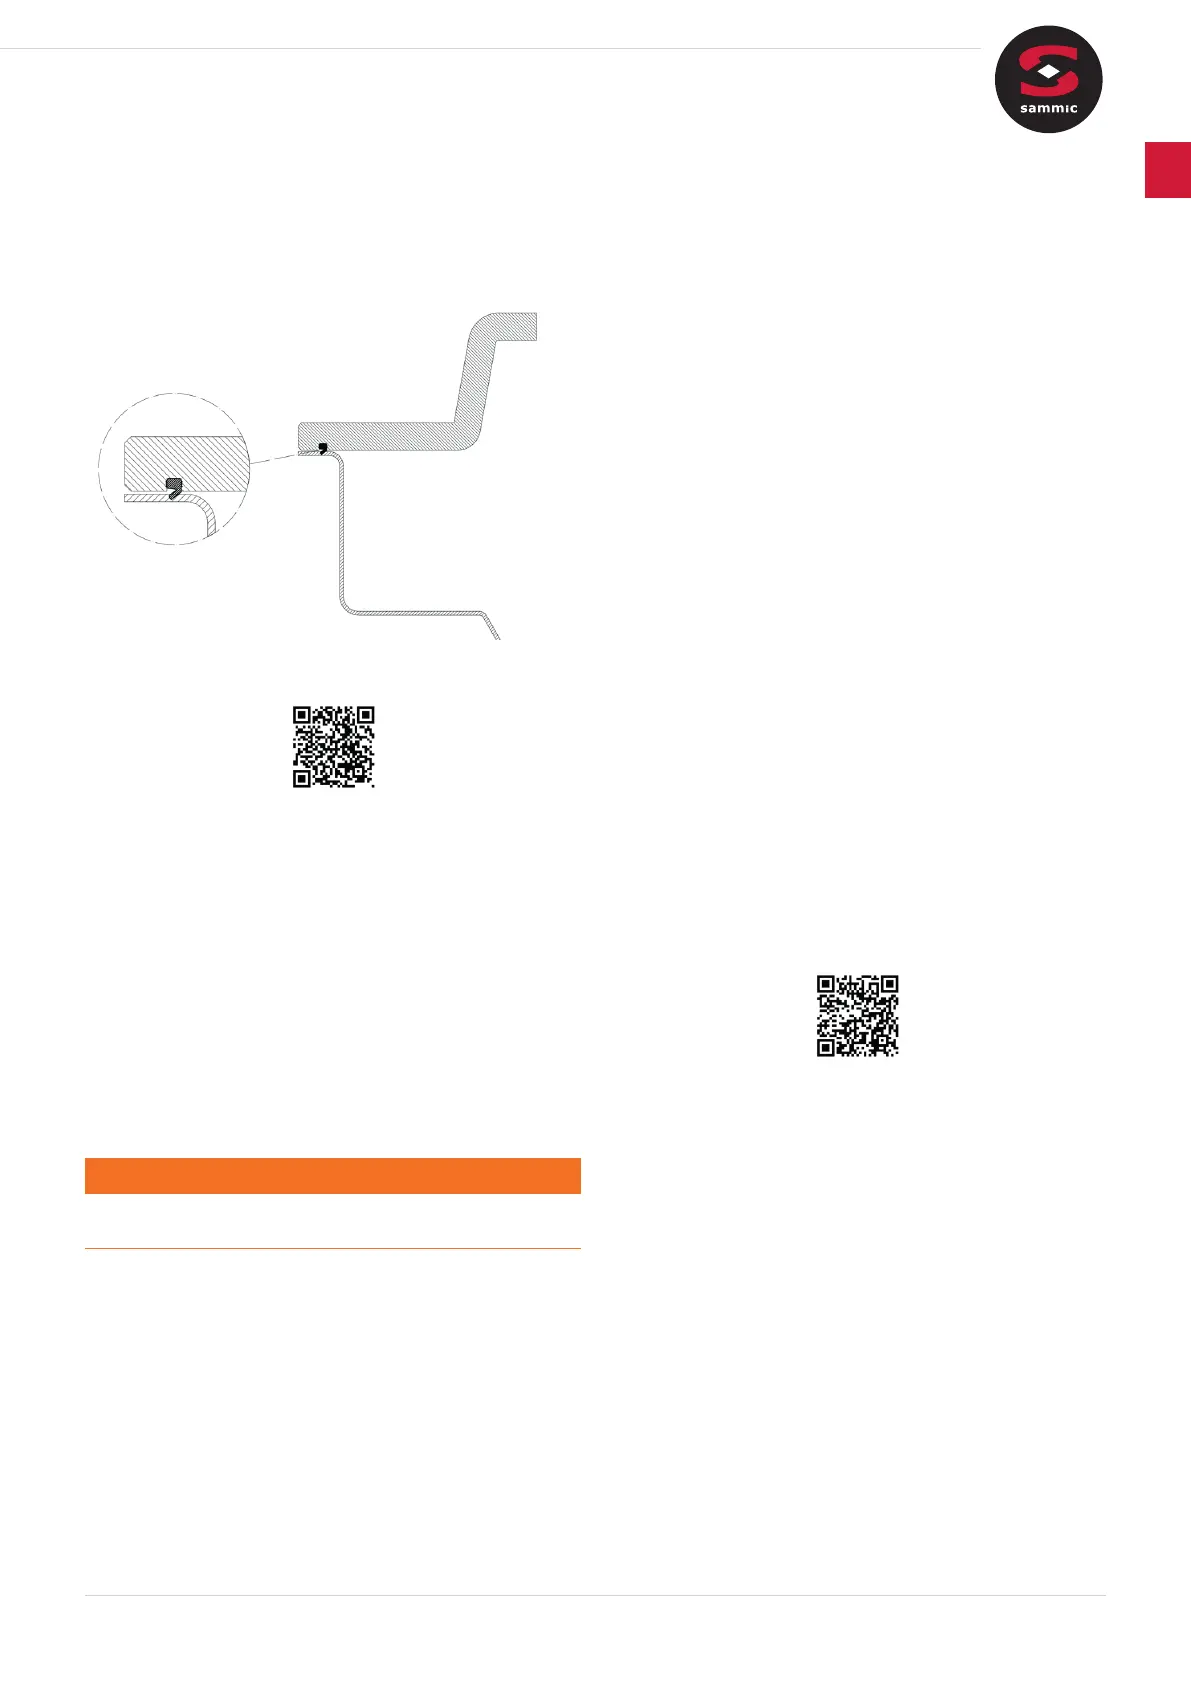
1. Pull the silicone gasket out of the hood.
2. Remove the gasket along the entire length of the hood.
3. Have the same type and length of gasket ready.
4. Fit the gasket in the groove of the hood.
5. The gasket must be in the following position:
►
Video: Changing the hood seal on a packaging machine
1.6 Replacing the pad
The pad holder wears out with the cycles run during the sealing
phase. The pad holder is used as a base against the seal rod to
ensure an even seal on the bag.
1. Pull on the pad.
2. Have the same type of pad ready with the same length of pad
holder.
3. Insertthepadrmly.Rememberthatthepadmustbeevenalong
the entire length of the holder.
1.7 Replacingtheexhaustlter.
Warning
Risk of burns from contact with vacuum pump.
--Wait until the vacuum pump has cooled down.
Theexhaustlteraccumulatesoilwiththeuseofthepump.Its
function is to prevent oil from escaping through the vacuum pump
exhaust.
1. Access the vacuum pump by loosening the 4 screws and removing
the rear cover.
2. Loosenthe4screwsontheairltercover.
3. Releasethestrapholdingtheairlterinplace.
4. Pullthelterouttoremoveit.
5. Replacethelterwithanewone.
6. Fit the O-ring.
7. Placethenewlterinposition.
8. Securetheairlterwiththestrap.
9. Fittheltercoverandtightenthe4screws.
10. Tighten the 4 screws on the rear cover.
1.8 Replacing the seal rod resistor and adhesive
strip
The resistor and adhesive strip of the seal rod wear out with use.
Their function is to heat and isolate the bag, respectively.
1. Loosen the stainless steel bracket that adds rigidity to the seal
rod.
2. Loosen the adhesive strip.
3. Unscrew the fastenings of the two resistors.
4. Remove the two resistors and the tie rods and springs on each
side of the rod.
5. Clean the remains of the adhesive strip from the seal rod.
6. On one side, screw one of the resistor fastenings back on, leaving
a gap.
7. First insert the springs and then the tie rods on one side of the rod.
8. Fit the two new resistors.
9. Fit the springs and tie rods on the other side.
10. Tighten to maximum torque the fastenings of the resistors on both
sides of the rod.
11. Attach the new adhesive strip.
12. Replace the bracket that adds rigidity to the seal rod.
►
Video: How to change the resistor and adhesive strip of the seal
rod.
 Loading...