Do you have a question about the Samson CL8 and is the answer not in the manual?
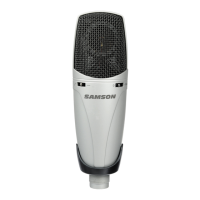
Lists key features like large diaphragm, dual capsules, pickup patterns, pad, hi-pass filter, power, construction, and included accessories.
Explains the need for phantom power and how to connect the CL8 to a mixer or mic-pre.
Guides on setting the mic trim control and using the PEAK/CLIP LED for optimal signal.
Describes the function of the -10dB PAD switch for high SPL sources.
Explains the 12dB/octave low-cut filter at 100Hz for reducing unwanted low frequencies.
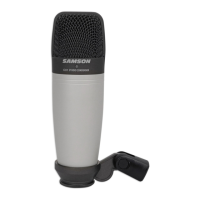
Introduces the concept of pickup patterns and their importance for microphone directionality.
Details the Super-cardioid pattern, its benefits for isolation, and how to select it.
Explains omni-directional pickup for ambient sound and its reduced susceptibility to proximity effect.
Describes the bi-directional pattern for front/back pickup and its use in duets or creating echo effects.
Discusses careful placement and the proximity effect for optimal sound capture with the CL8.
Addresses the issue of plosive sounds and methods to mitigate them, including off-axis placement.
Guides on mounting the microphone to a stand using the included swivel mount adapter.
Insert the internal shock-mount washer into the SP01 with the curved side up.
Place the microphone into the SP01 and tighten the threaded collar carefully.
Details technical parameters like type, polar patterns, frequency response, sensitivity, impedance, SPL, SNR, and power supply.
| Type | Condenser |
|---|---|
| Frequency Response | 50Hz-18kHz |
| Max SPL | 135dB |
| Sensitivity | -40dBV/Pa (8mV/Pa) |
| Impedance | 200 Ohms |
| Connector | XLR |
| Power Requirements | 48V Phantom Power |