8
Guided Tour - Main Section
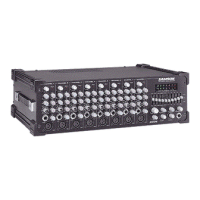
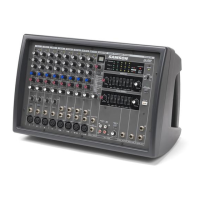
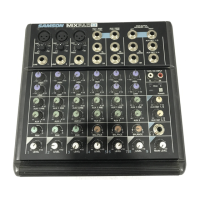
4: Main Level (white) - This knob determines the final signal level sent to the speaker output jacks on the rear panel.
You can think of this as being the “master fader”—and we made this knob extra big so you won’t miss it even under
low-light performance conditions. At its fully counterclockwise (“∞”) position, the signal is infinitely attenuated—that is,
there is no sound. At its 2 o’clock position, the SD8 mixer section is at unity gain and is providing no attenuation or boost
to the output signal. At its fully clockwise (“0”) position, the maximum amount of gain is being added by the SD8 mixer
section to the output signal. For more information, see the “Setting The Correct Gain Structure” section on page 13 in this
manual.
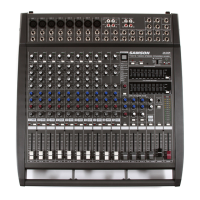
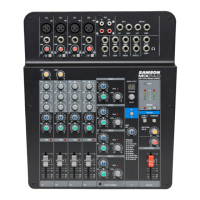
5: Return 1-2 Level (violet) - This knob determines the input level of signal arriving via Aux returns 1 and 2 (see #4 on
page 9), with Aux return 1 automatically panned hard left and Aux return 2 automatically panned hard right. This signal
is at unity gain (no boost or attenuation) when the knob set to the “0” position. Turning the knob clockwise from the “0”
position (towards the “10” position) causes the return signal to be boosted by as much as 10 dB. Turning it
counterclockwise from “0” (towards the “∞” position) causes the return signal to be attenuated (when fully
counterclockwise, the signal is attenuated infinitely—in other words, there is no return signal). For information on how to
properly set this, see the “Setting Up and Using the SD8” section on page 12 and “Using the Aux Sends and Returns”
section on page 19 in this manual.
6: Monitor Level (violet) - This knob determines the overall level of the signal being output from the rear panel Monitor
jack. This signal is at unity gain (no boost or attenuation) when the knob set to the “0” position. Turning the knob
clockwise from the “0” position (towards the “10” position) causes the Monitor signal to be boosted by as much as 10 dB.
Turning it counterclockwise from “0” (towards the “∞” position) causes the Monitor signal to be attenuated (when fully
counterclockwise, the signal is attenuated infinitely—in other words, there is no Monitor signal sent). For more
information, see the “Using the Aux Sends and Returns” section on page 19 in this manual.
7: Headphone Level (white) - This knob sets the level of the signal sent to the headphone jack (see #8 below).
WARNING: To avoid possible damage to connected headphones (or, worse yet, to your ears!), always turn this all the
way off (to the fully counterclockwise “∞” position) before plugging in a pair of headphones—then raise the level slowly
while listening. Changing the Headphone Level has no effect on any other output levels.
8: Headphone jack - Connect any standard stereo headphones to this jack (via a standard 1/4" TRS plug) for private
monitoring of the final output signal. NOTE: The SD8 main speaker outputs are not muted when headphones are
inserted into the Headphone jack—to monitor your main mix in privacy, set the Main Level control to its fully
counterclockwise (“∞”) position. The built-in SD8 headphone amplifier delivers 20 mW into 8 ohms.
9: DSP Mix Level - Determines the level of “wet” signal returning from the onboard Zoom Digital Signal Processor.
Wet signal is returning at unity gain (that is, with no boost or attenuation) when the knob set to the “0” position. Turning
the knob clockwise from the “0” position (towards the “10” position) causes the wet signal to be boosted by as much as
10 dB. Turning it counterclockwise from “0” (towards the “∞” position) causes the wet signal to be attenuated (when fully
counterclockwise, the wet signal is attenuated infinitely—in other words, there is no return from the DSP—you’ll hear the
signal completely “dry”). For more information, see the “Using the Internal Digital Signal Processor” section on page 20 of
this manual.
10: Preset (1 - 16) - Allows you to select any of 16 preset effect types for the onboard Zoom DSP. For more information,
see the “Using the Internal Digital Signal Processor” section on page 20 of this manual.
11: Effect (1 - 16) - Allows you to select any of 16 variations on the preset effect type selected for the onboard Zoom
DSP (see #10 above). For more information, see the “Using the Onboard Digital Signal Processor” section on page 20
of this manual.