EasyManua.ls Logo

Samsung AQN09VFUAGM User Manual

Samsung AQN09VFUAGM
24 pages
To Next Page IconTo Next Page
Page #1 background imageLoading...
Page #1 background image
Vivaldi MAX_AQN09VFU@@ IB&IM_32163A_E.indd 1 2012-6-20 13:28:12
MAX INSTALLATION MANUAL
AQN09VFUAGM
AQN36VFUAGM
AQN24VFUAGM
AQN18VFUAGM
AQN12VFUAGM
Question and Answer IconNeed help?

Do you have a question about the Samsung AQN09VFUAGM and is the answer not in the manual?

Samsung AQN09VFUAGM Specifications

General IconGeneral
Cooling Capacity9000 BTU/h
Energy Efficiency Ratio (EER)3.5
Power Supply220-240V, 50Hz
RefrigerantR32
Noise Level (Outdoor)50 dB(A)
Operating Temperature (Cooling)18-43°C

Summary

Installing the unit

Power supply line, fuse or circuit breaker

Discusses power supply compliance, grounding, voltage, frequency, and safety switches.

Choosing the installation location

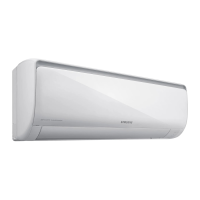
Details optimal placement for indoor and outdoor units for performance and accessibility.

Accessories

Accessories in the indoor unit case

Details items included with the indoor unit, like remote controllers and plates.

Accessories in the outdoor unit case

Lists items included with the outdoor unit, such as assembly cables and drain plugs.

Optional accessories

Tools required for installation

General Tools

Lists common tools like vacuum pumps, wrenches, and cutters needed for installation.

Tools for test operations

Specifies tools required for verifying the unit's functionality after installation.

Fixing the installation plate

If you fix the indoor unit on a wall

Details steps for securing the installation plate to a wall, including anchor considerations.

If you fix the indoor unit on a window frame

Explains how to attach the installation plate to a window frame using wooden uprights.

If you fix the indoor unit on a gypsum board

Guides on using stud finders to properly mount the plate on gypsum board walls.

Connecting the assembly cable

Connecting the cable

Details electrical work, wiring regulations, terminal connections, and precautions.

Connecting the assembly cable

Installing and connecting the assembly pipe of the indoor unit

Explains how to connect pipes to the indoor unit, including cutting, flaring, and tightening.

Installing and connecting the drain hose of the indoor unit

Drain hose installation

Covers connecting extension hoses, routing, and ensuring proper drainage slope.

Changing direction of the drain hose

Installing and connecting the drain hose of the outdoor unit

Purging the connected pipes

Important information regulation regarding the refrigerant used

Charging the refrigerant under conditions of liquid by using a liquid pipe

Performing the gas leak tests

Leak test with nitrogen (before opening valves)

Procedure for leak testing the system with nitrogen gas before opening valves.

Leak test with R410A (after opening valves)

Method for leak testing the system with the actual refrigerant after opening valves.

Pump down (before disconnecting the refrigerant connections for unit repair, removal or disposal)

Explains the pump-down procedure to safely collect refrigerant before disconnecting lines.

Fixing the indoor unit in place

Fixing the outdoor unit in place

Final Check and Trial Operation

Check the followings

A checklist of items to verify before and during trial operation.

Correct operation (follow the steps below)

Step-by-step guide for performing trial operation of the unit.

How to connect your extended power cables

Sub PCB installation(optional)

Remocon module installation (optional)

QUESTIONS OR COMMENTS?

Related product manuals