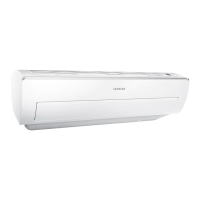
Do you have a question about the Samsung AR18HSFSJWKN and is the answer not in the manual?
Internal protections via the unit control system.
Set the Fast function for fast and powerful cooling/heating.
Set the Comfort function for mild cooling/heating.
Reduce energy usage while operating in Cool/Heat mode.
Reduce noise generated from the indoor unit during Cool/Heat mode.
Produce positive ions and supply them into the airflow.
Minimize indoor unit moisture for clean air.
Mute or enable beep sound from the indoor unit.
Display the amount of electricity consumed by the air conditioner.
Reset the reminder after cleaning the air filter.
Adjust the display lighting of the indoor unit.
Control air conditioner remotely using a Smart APP.
Clean the product with a damp cloth and soft brush.
Clean the heat exchanger to maintain cooling performance.
Remove the air filter from the main body for cleaning.
Clean washable foam based air filter with vacuum or hand wash.
Reassemble the air filter back into the main body.
Follow precautions for safe installation and operation.
Select suitable indoor and outdoor unit locations.
List of supplied accessories for indoor and outdoor units.
List of general tools and test operation tools.
Steps to fix the installation plate to the wall or frame.
Fix the indoor unit with hanger plate using screws.
Steps to remove and attach the indoor unit cover panel.
Details on cable specifications and electrical connections.
Connect indoor/outdoor units with field-supplied copper pipes.
Remove air from the indoor unit before connecting pipes.
Instructions for cutting and extending refrigerant pipes.
Route and connect the drain hose for proper water drainage.
Change the direction of the drain hose if necessary.
Connect drain hose to outdoor unit for condensate drain.
Remove air from pipes using vacuum pump for compressor protection.
Add refrigerant charge based on pipe length.
Check for gas leaks using nitrogen or leak detector.
Mount the indoor unit on the installation plate after leak test.
Install outdoor unit level on a stable base for noise and vibration control.
Check installation status for potential problems.
Perform checks and tests to ensure correct operation after installation.
Collect system refrigerant in outdoor unit before removal.
Steps to extend power wiring using connection sleeve and tape.
Install optional Sub PCB for wired/central remote controllers.
Install optional wired remote controller and connect wires.
| Brand | Samsung |
|---|---|
| Model | AR18HSFSJWKN |
| Category | Air Conditioner |
| Language | English |


