This document is a service manual for the Samsung Microwave Oven model C105AR-5. It provides comprehensive information for servicing, maintaining, and understanding the device.
Function Description
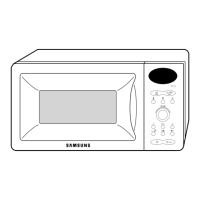
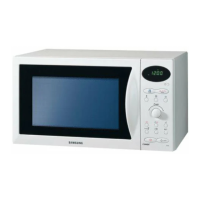
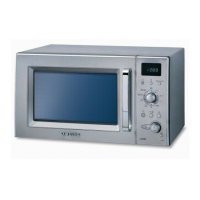
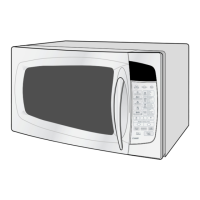
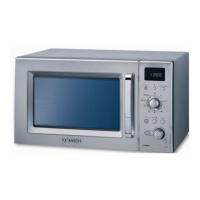
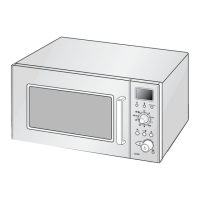
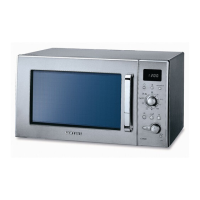
The Samsung C105AR-5 is a microwave oven designed for cooking and reheating food. It operates using microwave energy, and this specific model also features a grill and convection function, offering versatile cooking options. The control panel allows users to select various cooking modes, set times, and adjust power levels.
Important Technical Specifications
The microwave oven operates on a 230V 50Hz AC power source.
- Power Consumption:
- Microwave: 1,400W
- Grill: 1,300W
- Convection: 1,700W
- Output Power: Adjustable from 100W to 900W (6 levels), measured according to IEC-705 test procedure.
- Operating Frequency: 2,450MHz
- Magnetron: OM75PH(31)
- Cooling Method: Cooling Fan Motor
- Outside Dimensions (W x H x D): 517mm x 310mm x 516mm
- Net Weight: 19 kg
- Gross Weight: 22.5 kg
- Timer: Up to 99 minutes
Usage Features
The oven features a "Combi" function, suggesting combined cooking modes (e.g., microwave + grill or microwave + convection). The control panel includes various buttons for specific functions like "Auto Cook," "Defrost," "Clock," and a "+30s" button for quick start or adding time. The door has a handle for opening and closing, and inside, there's a glass plate, grill rack, and guide roller for the turntable. Safety interlock holes are present to ensure the oven only operates when the door is properly closed.
Maintenance Features
The manual provides detailed instructions for various maintenance and repair procedures, emphasizing safety precautions due to high voltage and microwave energy.
Safety Precautions:
- Microwave Energy Exposure: Technicians must be aware of potential exposure to excessive microwave energy. The oven should not be operated with the door open, and safety checks on all ovens must be performed after servicing. These checks include verifying interlock operation, proper door closing, seal and seating surfaces (arcing, wear, damage), hinge and latch damage, and evidence of dropping or abuse.
- Microwave Leakage Check: A microwave leakage check is required to verify compliance with Federal performance standards.
- High Voltage Warning: The magnetron operates at high voltage. Technicians must discharge the high voltage capacitor before touching any components or wiring. The capacitor remains charged for about 30 seconds after disconnection.
- Grounding: Proper grounding is essential. Any unauthorized use of the manual can lead to penalties under applicable international and/or domestic law.
Disassembly and Reassembly:
- Magnetron, Motor Assembly, and Lamp: Instructions are provided for removing the magnetron, including the shield case, permanent magnet, choke coils, and capacitors. It also covers removing the air cover, wave guide, fan motor, and oven lamp.
- High Voltage Transformer: Steps for discharging the high voltage capacitor, disconnecting leads, removing mounting bolts, and reconnecting leads are outlined.
- Door Assembly: Detailed procedures for removing and reassembling the door, including the upper and lower hinges, door "C" (inner panel), door "E" (outer panel), and key door spring.
- Fuse Replacement: Instructions for disconnecting power, replacing the 15A fuse (which blows out due to interlock monitor switch failure, door sensing switch, monitor switch, and power relay), and checking other parts if necessary.
- Drive Motor Replacement: Steps for removing the glass tray, guide roller, turntable motor cover, and drive motor. It also includes instructions for checking the shaft of the motor for proper fit.
- Control Circuit Board Replacement: Procedures for removing the control box assembly and the P.C.B. assembly, including disconnecting connectors and screws.
Alignment and Adjustments:
- High Voltage Transformer: Instructions for checking continuity of the transformer terminals (secondary, filament, primary) and normal resistance readings are provided.
- Low Voltage Transformer: Steps for checking the low voltage transformer, including terminal and resistance readings.
- Magnetron: Procedures for checking continuity, isolating, and checking the magnetron from the circuit by disconnecting leads, and checking filament terminals.
- High Voltage Capacitor: Instructions for checking continuity, normal capacitance, and resistance.
- High Voltage Diode: Steps for isolating the diode and measuring resistance with an ohm-meter.
- Main Relay and Power Control Relay: Instructions for checking the relays on the PCB assembly, operating the microwave with a water load, and checking continuity of terminals.
- Adjustment of Primary, Door Sensing, and Monitor Switches: Detailed steps for checking and adjusting the primary interlock switch, monitor switch, and door sensing switch. This includes checking switch actuation and gap.
Output Power Measurement:
- Procedure: A method for measuring the output power of the magnetron using a water temperature rise test is described. This involves using two 1-liter cylindrical borosilicate glass vessels with mercury columns, measuring initial and final water temperatures, and calculating output power using a specific formula.
Measurement of Microwave Energy Leakage:
- Procedure: A method for measuring microwave leakage using a survey meter is provided. This involves placing a 2-inch spacer cone perpendicular to the cabinet door, door seal, and exhaust openings. The maximum allowable leakage is 5mW/cm².
Troubleshooting:
A comprehensive troubleshooting guide is included, listing common symptoms, their probable causes, and corrective actions. Examples include:
- Oven dead, fuse is OK: Causes like open or loose lead wire harness, open thermal cutout, open low voltage transformer, or defective Ass'y PCB.
- No display and no operation: Causes like shorted lead wire harness, defective primary latch switch, defective monitor switch, or shorted HV capacitor.
- Oven does not accept key input: Causes like open or loose connection of membrane keypad to Ass'y PCB, shorted or open membrane panel, or defective Ass'y PCB.
- Timer starts countdown but no microwave oscillation: Causes like off-alignment of latch switches, open or loose connection of high voltage circuit, large contact resistance, defective high voltage components, or defective primary latch switch.
- Oven lamp and fan motor turn on: Causes like misadjustment or loose wiring of primary latch switch or defective primary latch switch.
- Oven can program but timer does not start: Causes like open or loose wiring of secondary interlock switch, off-alignment of primary interlock, or defective secondary interlock S/W.
- Microwave output is low, oven takes longer time to cook food: Causes like decrease in power source voltage, open or loose wiring of magnetron filament circuit, or aging of magnetron.
- Fan motor turns on when plugged in: Cause is loose wiring of door sensing switch.
- Oven does not operate and return to the plugged in mode: Cause is defective Ass'y PCB.
- Loud buzzing noise can be heard: Causes like loose fan and fan motor, loose screws on H.V.Transformer, or shorted H.V.Diode.
- Turntable motor does not rotate: Causes like open or loose wiring of turntable motor or defective turntable motor.
- Oven stops operation during cooking: Causes like open or loose wiring of primary interlock switch or operation of thermal cutout (magnetron).
- Sparks: Causes like metallic ware or cooking dishes touching the oven wall or ceramic ware trimmed with gold or silver powder.
- Uneven cooking: Cause is uneven intensity of microwave due to its characteristics.
- Noise from the turntable motor when it starts to operate: Cause is noise may result from the motor.
The manual also includes exploded views and parts lists for various components (main assembly, door, control box, casing, and standard parts), along with PCB diagrams and schematic diagrams to aid in servicing and repair.