EasyManua.ls Logo

Samsung C27JG50QQ Series User Manual

Samsung C27JG50QQ Series
54 pages
To Next Page IconTo Next Page
Page #1 background imageLoading...
Page #1 background image
USER MANUAL
C*JG5*
Gaming Monitor
The color and the appearance may differ depending on the product, and the specifications are subject to change without prior
notice to improve the performance.
The contents of this manual are subject to change without notice to improve quality.
© Samsung Electronics
Samsung Electronics owns the copyright for this manual.
Use or reproduction of this manual in parts or entirety without the authorization of Samsung Electronics is prohibited.
Trademarks other than that of Samsung Electronics are owned by their respective owners.
An administration fee may be charged in the following situations:
(a) An engineer is called out at your request, but it is found that the product has no defect (i.e., where the user manual
has not been read).
(b) You bring the unit to a repair centre, but it is found that the product has no defect (i.e., where the user manual has not
been read).
You will be informed of the administration fee amount before a technician visits.

Table of Contents

Question and Answer IconNeed help?

Do you have a question about the Samsung C27JG50QQ Series and is the answer not in the manual?

Samsung C27JG50QQ Series Specifications

General IconGeneral
BrandSamsung
ModelC27JG50QQ Series
CategoryMonitor
LanguageEnglish

Summary

Before Using the Product

Securing the Installation Space

Ensure adequate space around the product for ventilation to prevent overheating.

Safety Precautions

Warnings and cautions for safe operation and to prevent injury or damage.

Precautions for storage

Guidelines for storing the product to prevent damage or stains.

Cleaning

Electricity and Safety

Installation

Operation Warnings

Operation Cautions

Product Handling and Safety Precautions

Preparations

Parts Identification

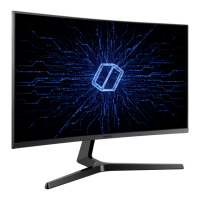
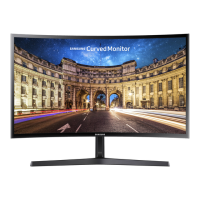
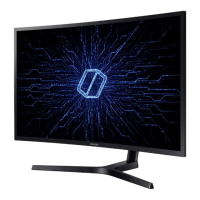
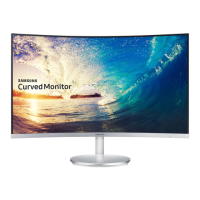
Identifies the physical components of the monitor and their functions.

Control Panel Overview

Describes the JOG button and Power LED indicator functions.

Function Key Guide

Adjusting Picture Settings

Adjusting Volume

Monitor Ports Overview

Adjusting Product Tilt

Anti-theft Lock Installation

Moving the Monitor Safely

Attaching the Stand (Model Group 1)

Attaching the Stand (Model Group 2)

Removing the Stand (Model Group 1)

Removing the Stand (Model Group 2)

Installing Wall-mount or Desktop Stand

Wall Mount Installation Notes

Connecting Source Devices

Pre-connection Checks

Important checks before connecting a source device to the monitor.

Connecting and Using a PC

Methods for connecting and using a PC with the monitor.

HDMI Cable Connection

Guide on connecting the monitor using an HDMI cable.

Connecting Source Devices

DP Cable Connection

Guide on connecting the monitor using a DP cable.

Connecting Headphones

How to connect headphones to the monitor for audio output.

Connecting Power (Model Group 1)

Connecting Power (Model Group 2)

Tidying Cables (Model Group 1)

Tidying Cables (Model Group 2)

Correct Posture for Use

Driver Installation Guide

Setting Optimum Resolution

Game Settings

Picture Mode

Selects optimum picture quality for different environments and content.

Refresh Rate Settings

Response Time Adjustment

Black Equalizer Function

FreeSync Technology

Enabling FreeSync

Screen Size Settings

In PC Mode

Select screen size and ratio for PC input, including Auto, Wide, and specific resolutions.

Screen Size Settings in AV Mode

Picture Settings

Picture Mode

Selects optimum picture quality for different environments and content.

Brightness Adjustment

Contrast Adjustment

Sharpness Adjustment

Color Settings

SAMSUNG MAGIC Upscale

Eye Saver Mode

HDMI Black Level Adjustment

Screen Position Adjustment

OnScreen Display Settings

Language Selection

Set the menu language for the onscreen display.

Display Time Adjustment

Configure the OSD menu to automatically disappear after a set period.

System Settings

Volume Control

Adjust the audio volume using the JOG button.

Eco Saving Plus

Reduce power consumption by controlling the monitor panel's electric current.

Smart ECO Saving+

Reduce power consumption by controlling the monitor panel's electric current.

Off Timer Function

PC/AV Mode Selection

DisplayPort Version Setting

Source Detection Method

Key Repeat Time Setting

Power LED Status Configuration

Reset All Settings

Software Installation Guide

Easy Setting Box

Enables monitor partitioning for better workspace management.

System Requirements

Lists the OS and hardware requirements for Easy Setting Box.

Installation Restrictions and Problems

Potential issues and restrictions during Easy Setting Box installation.

Troubleshooting Guide

Pre-contacting Customer Service

Steps to test the product before contacting customer support.

Product Testing Procedures

Procedures to check if the product is operating normally using test functions.

Resolution and Frequency Check

Information on optimal resolution and frequency settings.

PC Mode Installation Issues

Troubleshooting steps for screen switching or blank spaces in PC mode.

Screen Display Issues

Troubleshooting steps for issues like power LED off or "Check Signal Cable" message.

"Not Optimum Mode" Display Issue

Sound Troubleshooting

Source Device Troubleshooting

Q & A Section

Changing Refresh Frequency

Instructions on changing the refresh rate via graphics card settings.

Changing Screen Resolution

Instructions on changing the screen resolution in Windows.

Setting Power-Saving Mode

Steps to configure power-saving modes in Windows.

Specifications Overview

General Specifications

Provides general specifications like size, display area, and pixel pitch for models.

Plug-and-Play Functionality

Panel Dot Pixel Information

Recycling and Disposal Information

Standard Signal Mode Table

Signal Mode Table - HDMI1 (Model Group 1)

Signal Mode Table - HDMI2 (Model Group 1)

Signal Mode Table - DisplayPort (Model Group 1)

Signal Mode Table - HDMI1 (Model Group 2)

Signal Mode Table - HDMI2 (Model Group 2)

Signal Mode Table - DisplayPort (Model Group 2)

Horizontal Frequency Explained

Vertical Frequency Explained

Appendix - Service Responsibility

Pay Service Conditions

Situations where service charges may apply even if under warranty.

Non-Product Defects

Conditions considered not a product defect, potentially incurring service fees.

Customer-Caused Damage

Product damage resulting from customer mishandling or incorrect repair.

Other Service Conditions

Other conditions like natural disasters or consumable parts failure.

Related product manuals