Do you have a question about the Samsung ES60 and is the answer not in the manual?
Guide to installing software for PC connection and image editing.
Basic steps for capturing images with the camera.
Instructions on connecting the camera to a PC via USB.
Steps to ensure the camera is powered on or off.
How to locate the camera as a removable disk on a PC.
Lists all items included in the camera package.
Lists optional accessories available for purchase.
Identifies external components on the front and top of the camera.
Identifies external components on the back of the camera.
Identifies external components on the bottom of the camera.
Details the operation of the 5-function navigation button.
Explains the indicators and status of the self-timer lamp.
Displays icons representing different shooting modes.
Explains the meaning of the camera status indicator lamp.
Details the specifications of the rechargeable battery.
Estimates battery life based on usage and image count.
Guidelines for using USB cables with the camera and PC.
Step-by-step guide for charging the camera's battery.
Visual guide for correctly inserting the battery.
Visual guide for correctly inserting a memory card.
Guide to selecting the camera's display language.
Procedure for setting the camera's date, time, and format.
How to choose different shooting modes.
Guide to using the camera's automatic shooting mode.
Instructions for using the Program shooting mode.
Guide to using the Digital Image Stabilisation mode.
How to use the Photo Help guide for better photography.
Using predefined scene modes for various shooting situations.
Instructions for recording video clips with the camera.
Steps to record movies without audio.
How to pause and resume movie recording.
Functionality of the camera's power button.
Operation of the shutter button for photos and videos.
Using the WIDE zoom function to zoom out.
Controlling digital zoom using the WIDE button.
Explains focus modes and ranges for different zoom levels.
Lists focusing methods available in various recording modes.
How to lock focus on a subject not in the center.
Guide to choosing different flash settings.
Displays icons and descriptions for flash modes.
Table showing flash mode availability across recording modes.
How to choose self-timer options (10s, 2s, Double, Motion).
Details on using the motion-activated self-timer.
Setting white balance for different lighting conditions.
Selecting ISO sensitivity for light and noise control.
Activating and using the face detection feature.
Applying visual styles and effects to images.
Adjusting image parameters like contrast and sharpness.
Manually adjusting exposure value for better lighting.
Guide to setting a custom white balance.
How to use face detection for focus and exposure.
Using the camera for self-portraits with automatic face detection.
Adjusting skin tone for brighter results in beauty shots.
Selecting appropriate image resolutions for various uses.
Enhancing skin clarity and beauty before shooting.
Setting image compression and video frame rates.
Choosing metering methods for accurate exposure.
Selecting shooting modes like single, continuous, and AEB.
Choosing autofocus methods for different shooting scenarios.
Applying visual styles and effects to images.
Adjusting image contrast, sharpness, and saturation.
Removing red-eye effects from captured images.
Adding voice recordings to still images.
Recording audio clips with the camera.
Managing voice recordings by pausing and resuming.
How to record video without capturing audio.
Adjusting audio levels for start-up, shutter, beep, and AF sounds.
Setting the sound played when the camera powers on.
Selecting the sound for the shutter release.
Enabling or disabling operational beep sounds.
Changing the camera's display language.
Enabling or disabling on-screen function descriptions.
Selecting a custom image displayed on startup.
Enabling brief image review after capture.
Adjusting the LCD screen brightness.
Configuring automatic LCD screen turn-off for power saving.
Guide to formatting memory cards to erase all data.
Restoring camera settings to default values.
Adjusting date, time, and date format.
Customizing how image files are named.
Adding date and time information to still images.
Setting the time before automatic power shutdown.
Choosing between NTSC and PAL video output signals.
Turning the AF assist lamp on or off.
Manually configuring USB connection mode for PC or printer.
How to view still images in playback mode.
How to play back video clips in playback mode.
Capturing still images from movie clips.
Playing back recorded audio files.
Playing back voice memos attached to still images.
Using buttons for thumbnail view and image zooming.
How to enlarge images and navigate zoomed views.
Extracting and saving parts of an image.
Changing the resolution (size) of images.
Rotating images by 90, 180 degrees.
Applying visual styles and effects to images.
Adjusting Red, Green, and Blue values for custom color effects.
Removing red-eye effects from captured images.
Adjusting the contrast of images.
Modifying the saturation level of images.
Initiating a slideshow of images with intervals and effects.
Choosing which images to include in the slideshow.
Applying screen effects and music to slideshows.
Defining the time interval between displayed images.
Adding background music to slideshows.
Removing unwanted images from the memory card.
Locking images to prevent accidental deletion.
Adding voice recordings to still images.
Embedding print order information for photo labs.
Setting up DPOF for printing quantity information.
Printing images in an index format.
Selecting print sizes for DPOF compatible printers.
Copying internal memory files to the memory card.
Connecting the camera to a PictBridge printer.
Printing images directly from the camera to a printer.
Specifying the number of copies for each selected image.
How to connect the camera to a computer for file transfer.
Steps to transfer images from camera to PC.
Using Samsung Master to download images from the camera.
Using Samsung Master to view stored images.
Editing still images using Samsung Master software.
Editing movie clips, adding narration and music with Samsung Master.
| Megapixel | 12.3 MP |
|---|---|
| Camera type | Compact camera |
| Sensor type | CCD |
| Image stabilizer | Yes |
| Image sensor size | 1/2.33 \ |
| Maximum image resolution | 4000 x 3000 pixels |
| Still image resolution(s) | 1024 x 768, 1800 x 1200, 1920 x 1080, 2048 x 1536, 2592 x 1728, 2592 x 1944, 3264 x 2448, 3968 x 2232, 3984 x 2656 |
| Digital zoom | 3 x |
| Focal length range | 6.3 - 18.9 mm |
| Digital SLR | No |
| Minimum RAM | 256 MB |
| Minimum processor | Pentium III, PowerG3 |
| Power supply type | DC |
| Aperture range (F-F) | 3.2 - 5.8 |
| Effective sensor resolution | 12.2 pixels |
| Minimum storage drive space | 250 MB |
| Minimum system requirements | USB CD-ROM |
| Compatible operating systems | Windows 2000/XP/Vista |
| Focal length (35mm film equivalent) | 35 - 105 mm |
| Focus | TTL |
| Focus adjustment | Auto |
| Normal focusing range | 0.8 m |
| Auto focusing (AF) modes | Centre weighted Auto Focus |
| Macro focusing range (tele) | 0.5 - 0.8 m |
| Macro focusing range (wide) | 0.1 - 0.8 m |
| Normal focusing range (wide) | 0.8 - ∞ m |
| Light metering | Centre-weighted, Spot |
| Flash modes | auto, fill-in, Flash off, Red-eye reduction, Slow synchronization |
| Flash range (tele) | 0.5 - 2 m |
| Flash range (wide) | 0.2 - 3.75 m |
| Flash recharging time | 4 s |
| Internal memory | 11 MB |
| Compatible memory cards | sd, sdhc |
| Maximum memory card size | 8 GB |
| Motion JPEG frame rate | 30 fps |
| Video formats supported | AVI |
| Maximum video resolution | 640 x 480 pixels |
| Display diagonal | 2.5 \ |
| Display resolution (numeric) | 230000 pixels |
| USB version | 2.0 |
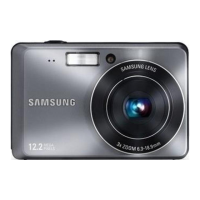
| Product color | Gray |
| Scene modes | Backlight, beach, Children, Close-up (macro), Documents, dusk, Fireworks, Night, Portrait, self-portrait, Sunset, Landscape (scenery) |
| Image editing | resizing, rotating, trimming |
| Photo effects | Negative film, Vivid |
| White balance | auto, Cloudy, custom modes, daylight, Fluorescent, Incandescent |
| Camera playback | movie, single image, slide show |
| Battery type | SLB-10A |
| Power requirements | 4.2 V |
| Operating temperature (T-T) | 0 - 40 °C |
| Operating relative humidity (H-H) | 5 - 85 % |
| Depth | 21.6 mm |
|---|---|
| Width | 90.4 mm |
| Height | 59 mm |
| Weight | 116 g |