42
Getting ready
Getting ready
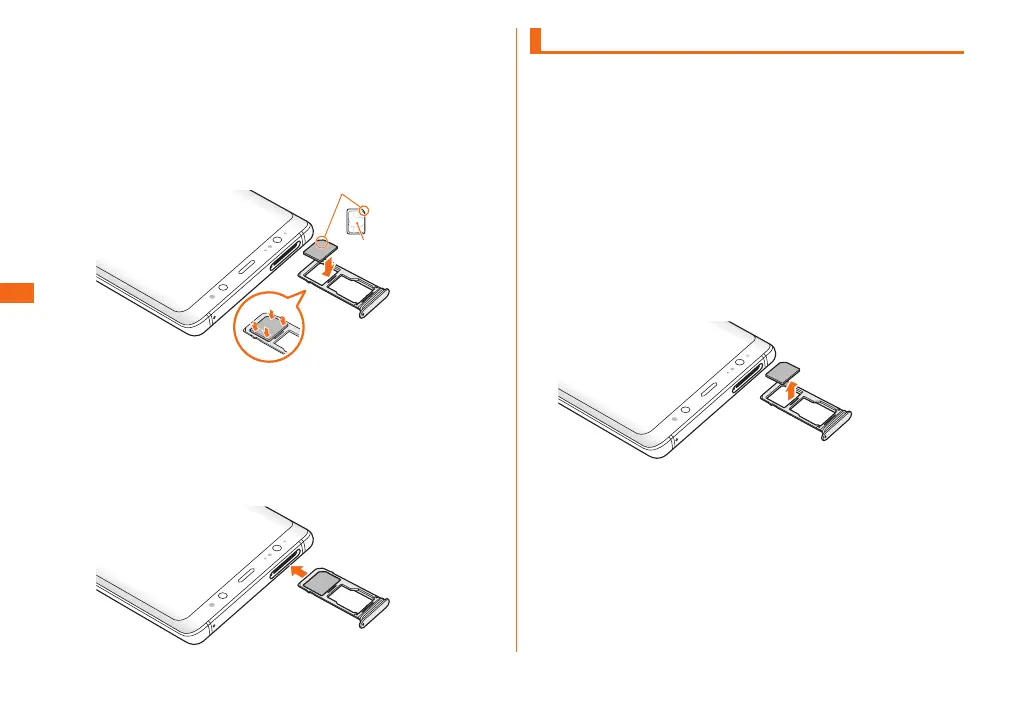
c
Place the IC (metallic) part of the au IC card
face down on the au IC card/microSD memory
card tray
• Take care to note the direction of the notch.
• Make sure that the au IC card is tted correctly in the au
IC card/microSD memory card tray. If the au IC card is not
tted correctly, the card may get jammed in the product
when you insert the tray.
IC(metallic)
part
d
Insert the au IC card/microSD memory card
tray in a straight line all the way into the au IC
card/microSD memory card slot as shown in the
diagram
• If you turn the au IC card/microSD memory card tray
upside down, the au IC card may be falled.
Removing the au IC card
a
Insert the tip of the SIM card removal tool
(sample) into the au IC card/microSD memory
card tray eject hole in a straight line
The au IC card/microSD memory card tray will slightly eject.
• Not inserting the tool in a straight line might result in
damage or a fault.
b
Pull out the au IC card/microSD memory card
tray in a straight line
• If you turn the au IC card/microSD memory card tray
upside down, the au IC card may be falled.
c
Remove the au IC card from the au IC card/
microSD memory card tray
d
Insert the au IC card/microSD memory card
tray in a straight line all the way into the au IC
card/microSD memory card slot as shown in the
diagram