45
Getting ready
Getting ready
◎ If charging with a PC or using the camera function or other
functions, charging time may increase.
◎ The product is compatible with quick charging when a TypeC
Common AC Adapter 02 (sold separately) is used. Quick
charging is possible when the power is o or the screen is o.
However, quick charging is not possible during a call even if the
screen is o.
◎ When battery level is 80% or more, charging speed by quick
charging may be slow.
◎ If the LED indicator continues to blink red even after it has been
charging for some time, check that the cable is connected
correctly. If the LED indicator then continues to blink, stop
charging the product and contact an au shop or the Repair and
Delivery Service Center.
◎ appears on the status bar during charging the product.
When charging is nished,
appears on the status bar.
◎ If the screen turns o during charging, press (Power key)
to display the lock screen. "Charging: XX%" is displayed on
the screen so you can check charge status. Also, if charging
nished, "Fully charged" is displayed on the lock screen and
is displayed on the status bar.
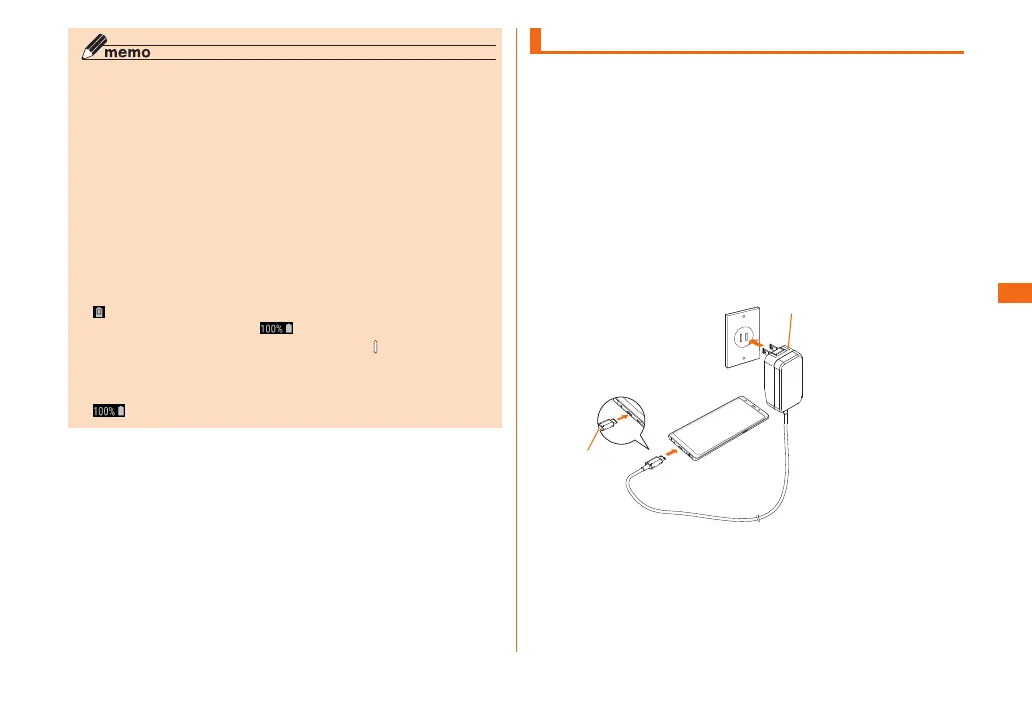
Charging with the AC adapter
The following describes how to charge the internal battery
using the TypeC Common AC Adapter 02 (sold separately).
a
Insert the power plug of the TypeC Common AC
Adapter 02 (sold separately) into the AC 100 V
outlet
b
With the engraved side up, insert the USB
Type-C plug of the TypeC Common AC Adapter
02 (sold separately) straight into the external
connection terminal of the product
USBType-C
plug
TypeCCommon
ACAdapter02
(soldseparately)
c
When the charging is nished, pull the USB
Type-C plug of the TypeC Common AC Adapter
02 (sold separately) straight out from the
product and the power plug out from the outlet