Do you have a question about the Samsung Galaxy Tab A6 and is the answer not in the manual?
Lists and identifies accessories included in the device packaging, such as power adapter and cables.
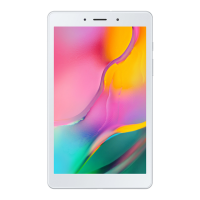
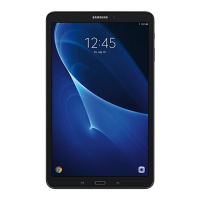
Diagram illustrating and labeling the various physical components of the Samsung Galaxy Tab A6.
Details on the SIM card, top-up card, and welcome booklet provided with the device.
Step-by-step guide on connecting the charger and powering on the device.
Instructions for turning on the device and what to do if it fails to start.
Guide to selecting the device's language, recommending English (UK).
Steps to connect the tablet to a Wi-Fi network using the network name and password.
Instructions on how to skip Wi-Fi setup, potentially using the SIM card instead.
Guidance on accepting the End User License Agreement and other device terms.
Managing location services and data sharing preferences for Google accounts.
Ensuring correct date and time settings for optimal device performance and updates.
Options for setting up a pattern, PIN, or password to secure the device.
Recommendation to defer Samsung account creation during initial setup.
How to adjust screen zoom and font size for improved readability.
Guide to removing the SIM from its card and identifying the correct size (nano).
Instructions to turn off the device before proceeding with SIM card insertion.
Detailed steps for opening the SIM tray, inserting the nano-SIM, and closing the tray.
Steps to power on the device and initiate the SIM activation process via network notification.
Instructions to tap 'Activate' and optionally register or manage an EE account.
How to test if the SIM is active by using the internet browser.
Steps to access the 'Add account' option through the device's settings menu.
Guidance for logging into an existing Google account, including security verification.
Instructions for creating a new Google account if one does not exist.
Inputting first name, last name, birthday, and gender for account creation.
Steps to set up a unique gmail.com email address for the Google account.
Guidelines for creating a strong, memorable password for account security.
Option to add a phone number for account recovery or skip this step.
Accepting Google's terms of service and configuring Google Drive backup preferences.
Information on how to manage or remove the Google account later via settings.
Preview of upcoming sections covering navigation, security, and troubleshooting.
Guidance on initial device navigation prompts and accessing the app drawer.
Steps to modify or change the device's screen lock pattern, PIN, or password.
Procedure to force restart the tablet by holding power and volume down keys.
How to turn the tablet on/off and use the screen lock for security.
Steps to take if the tablet screen becomes unresponsive to touch or swipes.
Instructions for restarting the tablet using power options or a force restart.
Steps to resolve a blank or non-responsive screen by charging and powering on.
Alert about data loss and necessary steps before performing a device reset.
Detailed instructions for factory resetting the tablet via recovery mode.
| Display Size | 10.1 inches |
|---|---|
| Resolution | 1920 x 1200 pixels |
| Rear Camera | 8 MP |
| Front Camera | 2 MP |
| Battery | 7300 mAh |
| Connectivity | Wi-Fi 802.11 a/b/g/n/ac, Bluetooth 4.2, GPS |
| Colors | Black, White |