
L
Linda TurnerAug 6, 2025
Why won't my Anynet+ device play on my Samsung LT20A350?
- NnelsoncherylAug 6, 2025
The play function cannot be used on your Samsung Monitor when Plug & Play (initial setup) is in progress.
Why won't my Anynet+ device play on my Samsung LT20A350?
The play function cannot be used on your Samsung Monitor when Plug & Play (initial setup) is in progress.
How to fix Anynet+ not working on my Samsung LT20A350?
If Anynet+ is not working on your Samsung Monitor, first ensure the device you are trying to connect is an Anynet+ compatible device, as the system only supports these devices. Check that only one receiver (home theatre) is connected. Verify the Anynet+ device's power cord, Video/Audio/HDMI cable connections are properly connected. Also, make sure Anynet+ (HDMI-CEC) is turned On in the System menu and that the TV remote control is in TV mode and is Anynet+ compatible. Note that Anynet+ may not function during certain operations like searching channels, using My Downloads, or during Plug & Play (initial setup). If you connect or disconnect the HDMI cable, search for devices again or power cycle your TV. Finally, ensure the Anynet+ Function of the Anynet+ device is enabled.
Why is the connected device not displayed on my Samsung LT20A350 Monitor?
If your Samsung Monitor doesn't display a connected device, verify that the device supports Anynet+ functions. Also, ensure the HDMI cable is properly connected and that Anynet+ (HDMI-CEC) is enabled in the System menu. Try rescanning for Anynet+ devices. Note that only HDMI cables can be used to connect Anynet+ devices, but some HDMI cables may not support Anynet+ functions. If the connection was interrupted due to a disconnected HDMI cable, power cord, or power failure, repeat the device scan.
How to start Anynet+ on Samsung Monitor?
To start Anynet+ on your Samsung Monitor, ensure the Anynet+ device is correctly connected to the TV and that Anynet+ (HDMI-CEC) is set to On in the System menu. Then, press the TOOLS button to bring up the Anynet+ menu and choose the desired option.
How to exit Anynet+ on Samsung LT20A350 Monitor?
To exit Anynet+ on your Samsung Monitor, select View TV in the Anynet+ menu. Alternatively, press the SOURCE button on the TV remote and select a device other than an Anynet+ device. You can also press < CH >, CH LIST, PRE-CH, and FAV.CH to switch to TV mode.
What to do if the message 'Connecting to Anynet+ device...' appears on the Samsung LT20A350?
If the message "Connecting to Anynet+ device..." appears on your Samsung Monitor, you won't be able to use the remote control while Anynet+ is configuring or switching view modes. Wait until the Anynet+ setting or view mode switch is complete before using the remote.
Essential safety guidelines for servicing, handling, and general use to prevent hazards.
Precautions for technicians, including disconnecting power and using proper testing equipment.
Checks to perform before returning the unit, focusing on preventing electrical shock and fire.
Notes on special safety characteristics of parts and potential hazards from incorrect replacements.
Guidelines for safe and correct procedures during monitor servicing to prevent damage.
Methods to prevent damage to sensitive electronic components from static electricity.
Safety measures and guidelines for correctly installing the monitor to prevent hazards.
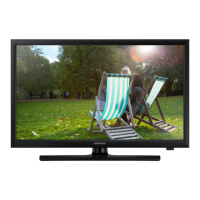
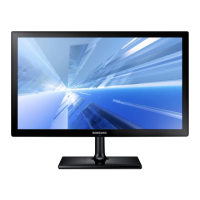
Detailed features and technical specifications for the LCD TV Monitor models.
Information on factory options and settings required when replacing main boards.
Specific factory option codes for panel, SMPS, and other components for certain models.
Specific factory option codes for panel, SMPS, and other components for other models.
List of included accessories with their respective model numbers and descriptions.
Explanation of advanced features like Anynet+ and My Contents.
Details on the Anynet+ function for controlling multiple Samsung devices with one remote.
Guide on using the My Contents feature to play media files from USB devices.
Step-by-step instructions and cautions for safely disassembling and reassembling the monitor.
General troubleshooting steps and initial checks before diagnosing issues.
Initial checks including cable connections and power input to the main board.
Diagnostic procedures and solutions for issues where the monitor does not power on.
Troubleshooting steps for no video output when using an analog PC signal.
Diagnostic guide for no video output from HDMI inputs.
Troubleshooting steps for no video when using the Tuner with CVBS signal.
Diagnostic procedures for no video output from the Tuner's DTV signal.
Troubleshooting steps for no video when using the Video CVBS input.
Diagnostic guide for no video output from Component inputs.
Troubleshooting steps for issues where video is present but there is no sound.
Basic instructions and precautions for performing monitor alignments and adjustments.
Basic guidelines for color monitor adjustments upon installation and general alignment procedures.
Procedures for entering the service or factory mode for advanced adjustments.
Procedures for entering the service or factory mode using the remote control.
Step-by-step guide on accessing the service mode for advanced adjustments.
Details on factory data settings, including panel type, tuner, and color options.
Overview of the calibration process for AV, Component, PC, and HDMI inputs.
Overview of the calibration process for AV, Component, PC, and HDMI inputs.
Specific adjustments for white balance (W/B) under low and high light conditions.
Procedure for adjusting white ratio in factory mode, including optimal values for different modes.
Information related to servicing procedures and firmware updates.
Instructions for upgrading the monitor's firmware and e-manual via USB.
Procedures for upgrading the sub-micom software for the monitor.
Procedure for upgrading sub-micom software using DDC Manager tool.
Alternative method for upgrading sub-micom software directly from the factory mode.
Diagrams showing mechanical dimensions and weight specifications of the monitors.
Mechanical dimensions and weight specifications for specific monitor models.
Mechanical dimensions and weight specifications for other monitor models.
Diagrams illustrating the Printed Circuit Board (PCB) layout and components.
Layout diagram of the main PCB, showing component and connector locations.
Overall block diagram illustrating connections between major internal components.
Pin assignments for various connectors on the main board and other modules.
Explanation of the functions of specific connectors and their signal transfers.
Identification and specifications for various internal cables used in the monitor.
| Resolution | 1600 x 900 |
|---|---|
| Panel Type | TN |
| Response Time | 5ms |
| Brightness | 250 cd/m² |
| Aspect Ratio | 16:9 |
| Screen Size | 20 inches |
| Contrast Ratio | 1000:1 |
| Viewing Angle | 170° (Horizontal), 160° (Vertical) |
| Input Ports | 1 x VGA |