Do you have a question about the Samsung ME9144ST and is the answer not in the manual?
Key safety guidelines for using the microwave oven.
Precautions to prevent harm from microwave energy.
Explains the mechanism and factors affecting microwave cooking.
Instructions for setting the oven's current time.
How to pause or stop cooking cycles and clear instructions.
How to add time to cooking cycles using the +30 sec button.
Guide for sensor cooking different types of food.
Step-by-step guide for defrosting various food types.
How to set cooking time and power level for a single stage.
How to set cooking time and power level for multiple stages.
How to adjust pre-set cooking times using More/Less buttons.
Guidelines for using appropriate microwave-safe cooking utensils.
Information on utensils with limited or cautious microwave use.
Technique for distributing heat evenly during cooking.
How to position food for even cooking.
Using foil to prevent overcooking of specific food areas.
How to turn food over midway through cooking.
Importance of standing time for food to finish cooking.
How the auto sensor adjusts cooking based on moisture.
Selecting appropriate containers and covers for sensor cooking.
Instructions for cooking various meat cuts in the microwave.
Instructions for cooking whole chicken and chicken pieces.
Troubleshooting problems with oven display, power, and cooking speed.
Troubleshooting sparks, turntable noise, and radio interference.
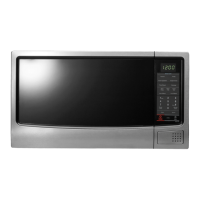
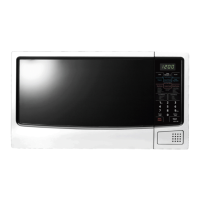
This document describes the ME9144ST and ME9144W Samsung microwave ovens, providing comprehensive instructions for their safe and effective use, maintenance, and troubleshooting.
The Samsung microwave oven is designed primarily for heating food using microwave energy. It operates by generating microwaves that are distributed uniformly as food rotates on a turntable, ensuring even cooking. Microwaves penetrate food up to about 1 inch (2.5 cm), with heat then dissipating throughout the food. Cooking times vary based on food quantity, density, water content, and initial temperature. The oven features various cooking modes, including Sensor Cook, Instant Cook, Rice/Pasta, Meat/Fish, Snack Bar, Auto Reheat, and Auto Defrost, allowing for automated cooking based on food type and weight. Users can also manually set cooking times and power levels for one-stage or multi-stage cooking.
The microwave oven offers a user-friendly control panel with dedicated buttons for different functions.
Setting the Clock: Upon power-up, "12:00" is displayed. To set the clock, press the "Clock" button, enter the current time using the number buttons (at least three digits, e.g., 5, 0, 0 for 5:00), and press "Clock" again. The time will blink, indicating it's set. The clock needs to be reset after a power interruption.
Pause / Cancel Button: This button clears entered instructions, pauses a cooking cycle, or stops cooking. Press once to pause and "Start" to resume. Press twice to stop cooking, erase instructions, and return to the time of day. It can also correct input mistakes by pressing it once and re-entering instructions.
+30 Sec Button: This button adds 30 seconds to the cooking time with each press. It can be used to add minutes to a program in progress by pressing it for each minute desired, followed by "Start."
Sensor Cook Buttons: The sensor cook feature automatically adjusts cooking time by detecting moisture released from food. Ensure the oven has been plugged in for at least 3 minutes. Use microwave-safe dishes with loose-fitting lids or plastic wrap with vents. Press the "Sensor Cook" button corresponding to the food (e.g., "Potato"), then "Start." The display will show "SC" and cooking will begin. The "Clock" button can be pressed to check the current time during cooking. Specific instructions are provided for popcorn, potatoes, fresh vegetables, and single entrees, including preparation and standing times.
Instant Cook Buttons: This feature allows for quick cooking of specific items. Press the "Instant Cook" button repeatedly to select the desired item (e.g., "Beverage"), then press "Start." The oven will beep when cooking is complete and then every minute thereafter. Items include pizza reheat (1-4 slices) and beverages (1/2 cup, 1 cup, 2 cups), with specific instructions for placement and stirring.
Rice / Pasta Buttons: To cook rice or pasta, press the "Rice/Pasta" button to select the item (e.g., "A-1" for white rice), then use number buttons (1, 2, or 3) to select the serving size, and finally press "Start." The chart provides details for white rice, dry pasta, and frozen pasta, including water amounts, preparation, and standing times.
Meat/Fish Buttons: Similar to rice/pasta, press the "Meat/Fish" button to select the item (e.g., "A-1" for chicken breast), then use number buttons (1, 2, or 3) for serving size, and press "Start." The chart includes instructions for chicken breast, fish fillet, seafood, casserole, and bacon, with details on preparation, covering, and standing times.
Snack Bar Buttons: For snack items, press the "Snack Bar" button to select the item (e.g., "A-1" for tortilla), then use number buttons (1, 2, or 3) for serving size (only "1" for tortilla), and press "Start." The chart covers tortillas, chicken wings, and frozen pies, with instructions for heating and standing.
Auto Reheat Button: This feature reheats food automatically based on dish type and number of servings. Press "Auto Reheat" repeatedly to select the dish, then use number buttons to increase serving size (up to four cups for casseroles and pasta, one serving for plate of food), and press "Start." The chart includes plate of food, casserole, pasta, rice, and tinned soup, with remarks on food type, covering, and stirring.
Auto Defrost Button: To thaw frozen food, press "Auto Defrost" (display shows "dF-1" and "ENTER" and "kg" flash). Press "Auto Defrost" repeatedly or use number buttons to enter the food weight (max 2 kg, except bread). Press "Start." The oven will beep to indicate when to turn the food over. Open the door, turn the food, and press "Start" to resume. The chart provides guidelines for meat, poultry, fish, seafood, and bread/cake, including shielding edges with foil and standing times.
Setting Cooking Times & Power Levels: The oven supports up to two cooking stages, each with adjustable time and power level (Warm (1) to High (0)).
More/Less Buttons: These buttons adjust pre-set cooking times in Instant Cook, Rice/Pasta, Meat/Poultry, Auto Reheat, Auto Steam Cook, and Time Cook modes. Press "More" (9) to add time or "Less" (1) to reduce time. In Time Cook and Kitchen Time modes, adjustments are in 10-second increments. This feature is not available for Sensor Cook or Auto Defrost.
Switching the Beeper On/Off: Press the "Sound" button. "On" will display. Press "Sound" again to turn off ("OFF" will display). Press "Start" to confirm.
Using the Kitchen Timer: Press the "Timer" button, use number buttons to set the desired time, and press "Start." The display counts down and beeps when the time elapses. The microwave does not operate when the timer is in use.
Setting the Child Protection Lock: To lock the oven, hold number buttons "0" and "2" simultaneously. "Loc" will display, and the oven cannot be used. Repeat the action to unlock.
Demonstration Mode: To see the oven operate without heating, hold number buttons "0" and "3" simultaneously. Cooking time runs faster in this mode. Repeat the action to turn off.
Care and Cleaning: Regular cleaning is essential for efficient operation and longevity.
Troubleshooting Guide: The manual provides a list of common problems and solutions:
For unresolved problems, contact your local dealer or Samsung after-sales service.
| Capacity | 1.4 cu. ft. |
|---|---|
| Power Output | 1000W |
| Turntable | Yes |
| Display | LED |
| Color | Stainless Steel |
| Cooking Presets | Yes |
| Voltage | 120V |
| Sensor Cooking | Yes |
| Child Lock | Yes |
| Type | Microwave Oven |
| Control Type | Touch |
| Warranty | 1 year limited |