Do you have a question about the Samsung NP960XGL and is the answer not in the manual?
Samsung is not liable for damage from unauthorized repairs or failure to follow instructions.
Explains ESD and recommends using anti-static equipment for repairs to protect electronic parts.
Defines icons used in the document to convey warnings, cautions, or notices regarding potential hazards or important information.
Instructions on how to install and update Samsung apps and drivers on the computer using the Samsung Update application.
Guide on restoring the computer to factory default settings or a previous backup point using the Samsung Recovery app.
Steps to back up the current system or user data to an alternate internal drive or external storage device.
Procedure to restore the computer to a specific backup point using saved backup images or data.
Process to create a disk image to transfer data to a new drive, often for drive replacement.
Steps to reinstall Windows using the built-in Windows recovery feature when Samsung Recovery is not supported.
Solutions for common problems, including app uninstallation and recovery area definition.
Explains discrepancies in HDD/SSD capacity reporting between manufacturer specs and Windows OS due to different calculation methods.
Defines a recovery image as a data image of the operating system, drivers, and software required for computer recovery.
Guides users to use the Windows recovery feature for restoring computers without the Samsung Recovery application.
Troubleshooting steps to re-enable the camera and microphone if they are disabled due to recording protect mode.
Explains that the display panel needs to be opened beyond a certain angle for automatic power-on.
Instruction to manually press the power button if the computer's LED does not light up automatically.
Introduces the Samsung PC Diagnostics app for testing hardware components and checking for issues on Samsung PCs.
A visual representation showing the internal components of the laptop and their assembly order with part numbers.
A detailed list of all internal components, their corresponding part numbers, and names.
Lists and describes essential tools and personal protective equipment required for safely disassembling and assembling the laptop.
Details specific adhesives and materials, like jigs and tapes, needed for the reassembly of certain components.
Step-by-step instructions for removing the rear cover of the laptop, including removing rubber feet and screws.
Instructions on how to safely disconnect the battery connector and remove the battery pack from the laptop.
Procedure for disconnecting and removing the cable that connects the main and sub Printed Circuit Boards (PCBs).
Steps for disconnecting and removing the Wi-Fi antenna connectors and cables from the motherboard.
Instructions for disconnecting the fingerprint button and speaker connectors from the motherboard.
Step-by-step guide for removing the Solid State Drive (SSD) module from its socket.
Instructions for removing the left side cooling fan from the laptop.
Procedure for removing the Main Printed Circuit Board Assembly (PBA) and the Sub PBA from the laptop.
Detailed steps for safely removing the laptop display assembly from the main body.
Guide on how to remove the fingerprint sensor bracket and module from the laptop case.
Instructions for removing the left and right speaker woofers and tweeters from the laptop.
Steps for removing the touchpad module, including disconnecting its cable and removing adhesive tapes.
Instructions for correctly installing the left and right speaker tweeters and woofers back into the laptop.
Guide on how to reassemble the fingerprint sensor module and bracket onto the laptop case.
Detailed steps for reassembling the touchpad using film jigs and adhesive tapes.
Instructions for reattaching the display assembly to the laptop case and securing the hinges.
Steps for correctly installing the main Printed Circuit Board Assembly (PBA) onto the laptop case.
Instructions for correctly installing the sub Printed Circuit Board Assembly (PBA) onto the laptop case.
Guide on how to reinstall the left and right cooling fans onto the laptop's case.
Steps for reconnecting the Wi-Fi antenna connectors and cables to the motherboard.
Instructions for reconnecting the cable between the main and sub Printed Circuit Boards (PCBs).
Steps for reinstalling the battery pack and connecting its power connector.
Instructions for reattaching the rear cover of the laptop and securing it with screws.
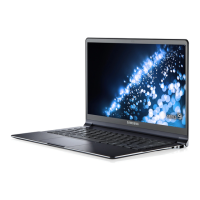
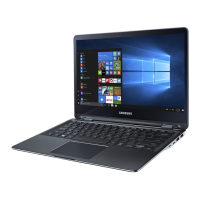
| Model | Samsung NP960XGL |
|---|---|
| Category | Laptop |
| RAM | 16 GB |
| Storage | 1 TB SSD |
| Display Size | 15.6 inches |
| Display Resolution | 3840 x 2160 |
| Display Type | AMOLED |
| Operating System | Windows 10 Home |
| Weight | 1.39 kg |
| Battery Life | Up to 18 hours |
| Processor | Intel Core i9 |
| CPU | Intel Core i9 |
| Ports | 2x Thunderbolt 4, 1x HDMI, 1x microSD card reader |
| Wireless | Wi-Fi 6E, Bluetooth |