Do you have a question about the Samsung QBR and is the answer not in the manual?
Lists all included accessories and components for initial setup.
Identifies key parts like remote sensor and power button for specific models.
Details specific parts for the QB98R model, including spacer logo and buttons.
Provides step-by-step instructions for attaching an anti-theft locking device.
Details available ports like USB, RJ45, HDMI, DP, and RS232C for specific models.
Lists port specifications for various QM43R-A through QM75R-B models.
Details the ports available on the QM32R model, including USB, HDMI, and RJ45.
Details port configurations for QM32R-A, QM32R-AN, and QM32R-B models.
Details the various ports available on the QB98R model and their functions.
Details ports for the QM32R-T, including USB, HDMI, RJ45, and touch-specific ports.
Details ports for QM43R-T/QM55R-T, including touch screen and PC connections.
Explains how to power off the product using the control menu.
Describes how to select the input source via the control menu.
Details operations like Volume, Home, Menu, Source selection, and Power off.
Specifies ventilation spacing and temperature for wall mounting.
Details product tilt angle and rotation for portrait mode.
Covers requirements for perpendicular and indented wall installations.
Advises referring to manufacturer's manual for non-Samsung wall mounts.
Discusses using the kit, professional installation, and liability.
Explains touchscreen operation and basic usage tips.
Lists essential safety and usage guidelines for the touchscreen.
Details the physical connection of the touch overlay cable.
Details connecting PCs via HDMI or HDMI-DVI cables.
Explains connecting laptops/tablets and troubleshooting touch.
Details size and display area for various Samsung display models.
Covers resolution, power supply, and operating/storage conditions.
Discusses Plug-and-Play, pixel variations, resolution, and energy labelling.
Details Dolby, HDMI, HEVC Advance, and Open Source Licence information.
This document serves as a user manual for Samsung Smart Signage displays across various models, including QBR, QBR-B, QER, QMR, QMR-A, QMR-AN, QMR-B, and QMR-T series. It provides comprehensive information on the setup, operation, and maintenance of these devices, with a particular focus on models supporting touchscreen functionality.
The manual begins with a "Preparations" section, detailing how to check the components included with the product. Users are advised to contact their vendor if any parts are missing. It notes that the appearance of components may vary, and a stand is not typically provided, requiring separate purchase if needed. The RS232C adapter is highlighted for its utility in connecting to other monitors using a D-SUB (9-pin) type RS232C cable.
The "Parts" section provides a visual and textual breakdown of the display's physical components. For Q32R/Q43R/Q49R/Q50R/Q55R/Q65R/Q75R/Q82R/Q85R models, it describes the remote sensor, power button, and speaker. The remote sensor allows users to control the display by pointing the remote at the sensor on the front. A key feature is the recommended operating distance of 2.5m to 4m from the sensor, within a 30° angle from the left and right. To improve IR receiver performance, an external IR cable (sold separately) can be connected to the IR IN port. The power button serves to turn the product on or off.
For the QB98R model, the "Parts" section details the spacer logo, remote sensor, and power button. The spacer logo should not be pulled with force to avoid damage. The remote sensor is located at the bottom of the product face, requiring the remote to be pointed there for function. The recommended operating distance for the remote control is 7m to 10m from the sensor, within a 30° angle from the left and right. Similar to other models, an external IR cable can enhance performance. The power button is a sliding mechanism, and users must ensure it is protruding from the bottom to operate. A warning is included about other display devices in the same space potentially being inadvertently controlled by the remote.
An "Anti-theft Lock" section is provided for the QB98R model, explaining how to secure the device in public places. It notes that the locking device shape and method depend on the manufacturer and advises referring to the device's user guide. The steps involve fixing the cable to a heavy object, looping one end through the other, inserting the locking device into the anti-theft lock slot at the back, and then locking it. Anti-theft locking devices are sold separately.
The "Ports" section offers a detailed description of the various input and output ports available on different models. For Q43R/Q49R/Q50R/Q55R/Q65R/Q75R/Q82R/Q85R models, it lists USB 1 (1.0A) for memory devices (with a caution about exceeding 1.0A current), RJ45 for MDC and Internet connection (recommending Cat7*STP Type cable), RS232C IN for MDC connection, DVI/MAGICINFO IN for source devices or network boxes, HDMI IN 1 (ARC) and HDMI IN 2 for source devices or connecting to other products, DP IN (DAISY CHAIN IN) for PCs, HDMI OUT (DAISY CHAIN OUT) for connecting to other products, USB 2 (0.5A) for memory devices (with a caution about exceeding 0.5A current), DVI/HDMI AUDIO IN for sound input, AUDIO OUT for sound output, IR IN for external IR cable, and RS232C OUT for MDC connection.
For QM43R-A/QM50R-A/QM55R-A/QM65R-A/QM75R-A/QM43R-B/QM50R-B/QM55R-B/QM65R-B/QM75R-B models, the ports are similar, including USB 1 (1.0A), RJ45, RS232C IN, HDMI IN 1 (ARC), HDMI IN 2, DP IN, USB 2 (0.5A), DVI/HDMI AUDIO IN, AUDIO OUT, IR IN, and RS232C OUT.
The QM32R model features USB 1 (1.0A), HDMI IN 1 (ARC), RJ45, RS232C IN, HDMI IN 2 (DAISY CHAIN IN), DP IN (DAISY CHAIN IN), HDMI OUT (DAISY CHAIN OUT), USB 2 (0.5A), AUDIO OUT, IR IN, and RS232C OUT.
QM32R-A/QM32R-AN/QM32R-B models include USB 1 (1.0A), HDMI IN 1 (ARC), RJ45, RS232C IN, HDMI IN 2, DP IN, USB 2 (0.5A), AUDIO OUT, IR IN, and RS232C OUT.
The QB98R model's ports are USB 1 (1.0A), DVI/MAGICINFO IN, RS232C IN, RS232C OUT, DVI/HDMI AUDIO IN, HDMI IN 1 (ARC), HDMI IN 2 (DAISY CHAIN IN), DP IN (DAISY CHAIN IN), HDMI OUT (DAISY CHAIN OUT), USB 2 (0.5A), AUDIO OUT, and IR IN.
For touchscreen models (QMR-T series), specifically QM32R-T, QM43R-T, and QM55R-T, additional ports are described: TOUCH OUT SCREEN and TOUCH OUT PC. These ports enable the touch function by connecting to a USB port on the product or a PC, respectively.
The "Control menu" section explains how to navigate the display's basic functions using the power button located at the bottom. A brief press displays the control menu, allowing users to move the cursor to "Power off" or "Source." Pressing and holding "Power off" turns the product off, while pressing and holding "Source" displays the input source screen, allowing selection of the desired input. The power button is limited to these two functions, and the menu automatically exits after 3 seconds of inactivity.
For supported touchscreen models (QMR-T), an "Administrator menu" is available, activated by touching and holding the screen when the product is on. If touchscreen control is unavailable, users can enable it via the remote control (System → Touch Control → Touch Control → On). If the administrator menu doesn't appear, it might be locked (System → Touch Control → Admin Menu Lock → Off). This menu is not displayed when using touch mode on a connected PC. The administrator menu provides options for adjusting "Volume," accessing the "Home" screen, displaying the OSD "Menu" for settings, selecting the input "Source," and initiating "Power" off.
"Precautions when handling the panel" emphasizes the fragility of the display panel. Users are warned not to stand the product upright as shown in an image, to lay it down for handling (using packaging), to use the handles on the back when moving it (for 85-inch models or more), and not to hold or grasp any area within 15mm from the front.
The "Before Installing the Product (Installation Guide)" section provides crucial information for safe installation. It stresses that the apparatus must be securely attached to the floor/wall by an authorized installation company to prevent injury. Users are advised to install the specified wall mount.
"Tilting Angle and Rotation" specifies that the product can be tilted up to 15° from a perpendicular wall surface. For Portrait mode, the display should be rotated clockwise until the power indicator is positioned as shown in the images. It explicitly states not to install the model on a ceiling, floor, or table.
"Ventilation" guidelines are provided, recommending a minimum of 40mm space between the product and a perpendicular wall for ventilation, with an ambient temperature kept below 35°C. For indented wall installations, specific minimum clearances are given: 40mm (A), 70mm (B), 50mm (C), and 50mm (D), with the same ambient temperature requirement.
"Installing the Wall Mount" advises referring to the wall mount manufacturer's manual for non-Samsung mounts. It notes that wall mount kit items may vary. The wall mount kit is sold separately, and the provided image is for reference. Users are encouraged to contact a technician for assistance, as Samsung is not responsible for self-installation damages or injuries.
"Wall Mount Kit Specifications (VESA)" instructs users to install the wall mount on a solid wall perpendicular to the floor, contacting an agency for other wall areas. Installing on a slanted wall can cause severe personal injury. It details that Samsung wall mount kits include a manual and all necessary parts. Users are warned against using screws longer than standard VESA specifications or fastening them too firmly, as this can damage the product or cause it to fall. Samsung is not liable for issues arising from non-VESA mounts or failure to follow instructions. The product should not be mounted at more than a 15-degree tilt. At least two people are needed for mounting (four or more for 82-inch and larger models). A table provides VESA screw hole specifications (A*B in millimeters), standard screw size (M8), and quantity (4) for various models. A final caution advises against installing the wall mount while the product is turned on to avoid electric shock.
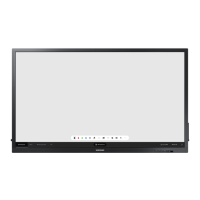
Chapter 02, "Using a touchscreen monitor (Supported models: QMR-T)," focuses on the interactive features. The "Touchscreen monitor" section explains that the screen functions by detecting minute electric current from a fingertip (capacitive). Users are advised to use the surface of their fingertip. "Read below before using the product" provides important usage precautions: avoid electrical substances on the screen, do not press hard or use sharp objects, avoid tapping with gloves or dirty fingers, keep the screen free from moisture, and switch off the screen when not in use to prevent afterimages.
"Connecting the touch overlay" clarifies that touch functions are not supported outside the OSD and administrator menus. It describes connecting the TOUCH OUT cable between TOUCH OUT SCREEN on the display and USB 1 (1.0A) or USB 2 (0.5A) on the product.
"Connecting the touchscreen monitor" details how to connect to a PC. First, connect the PC to the display using an HDMI or HDMI-DVI cable. Then, connect the power cable to the product. The display automatically detects and switches to the input source. If the screen is blank, power cycle the product. Finally, connect the TOUCH OUT PC port on the display to a USB port on the PC using the TOUCH OUT cable.
"Connecting to a laptop or tablet PC" follows the same method as connecting to a desktop PC. If touchscreen control is unavailable, ensure the HDMI or HDMI-DVI cable is connected before the TOUCH OUT cable. If issues persist, disconnect and reconnect the TOUCH OUT cable.
"Configuring the touchscreen monitor settings" guides users through setting up the touch function in Windows via "Tablet PC Settings." It advises connecting the touchscreen monitor first. It notes that the maximum number of simultaneously connected touchscreen monitors depends on the operating system and graphics card. If "Tablet PC Settings" is not found, search for it. For multi-screen setups, QMR-T should be configured as the main display.
"Calibration" instructions are provided for Windows 8 (applicable to Windows 7 and 10). Users may need to recalibrate after changing "Picture Size" in the OSD menu. If errors occur during calibration, reset and recalibrate in "Tablet PC Settings." The process involves selecting "Setup" under "Configure" in the "Display" tab, then tapping the screen as instructed. After calibration, users confirm saving the data. Resetting removes calibration data.
Chapter 04, "Appendix," includes "Licence" information. It states that the product is manufactured under license from Dolby Laboratories, with Dolby Audio, Pro Logic, and the double-D symbol being trademarks. HDMI and the HDMI Logo are trademarks of HDMI Licensing Administrator, Inc. An "Open Source Licence Notice" explains that open source licenses are available in the product menu and are in English. Users can contact Samsung Customer Centre or email oss.request@samsung.com for more information.
The manual also includes HEVCAdvance™ licensing information, stating that the product is sold with a limited license for personal use of HEVC content, not for sale, and created by the owner of the product. It prohibits use with third-party HEVC encoded content unless separate rights are granted. Acceptance of these terms is implied by using the product.
| Resolution | 3840 x 2160 (4K UHD) |
|---|---|
| Response Time | 8ms |
| Operating System | Tizen |
| Connectivity | HDMI |
| Screen Size | 55 inches |
| Panel Technology | LED |
| Speaker | 10W x 2 |
| VESA Mount | 400 x 400 mm |
| Contrast Ratio (Alternative) | 4000:1 |
| Viewing Angle | 178° / 178° |
| Dimensions (WxHxD) | Varies by screen size |
| Weight | Varies by screen size |