Do you have a question about the Samsung QM50R and is the answer not in the manual?
Lists all included accessories and parts for initial setup.
Explains the function and location of key product parts like the remote sensor and power button.
Instructions on how to secure the product using an anti-theft locking device.
Details the various input/output ports and their connectivity functions.
Explains how to access and use the basic control menu for power and source selection.
Guides on accessing and operating the administrator menu for advanced product settings.
Provides essential safety guidelines for handling the display panel to prevent damage or injury.
Instructions for product installation, including wall mounting, ventilation, and tilt angles.
Details VESA mounting standards, screw hole sizes, and quantity for wall mounting.
Explains capacitive touch function and essential usage precautions for the screen.
Describes how to connect the touch overlay using the TOUCH OUT cable.
Guides on connecting PCs, laptops, and tablets using HDMI/DVI for touch functionality.
Step-by-step instructions for calibrating the touchscreen monitor in Windows.
Provides physical dimensions, screen sizes, and display area for various models.
Lists supported video signal timing modes for optimal display performance.
Details licensing for Dolby Audio, HEVC, HDMI, and open source software notices.
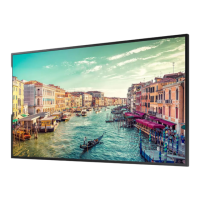
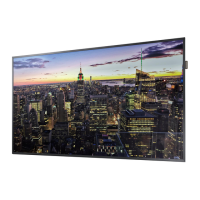
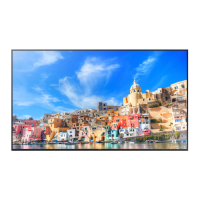
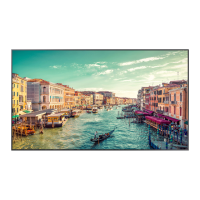
This document describes the Samsung Smart Signage, a series of display devices designed for various commercial applications. The manual covers several models, including QBR (QB43R, QB49R, QB50R, QB55R, QB65R, QB75R, QB85R, QB98R), QER (QE82R), QMR (QM32R, QM43R, QM49R, QM50R, QM55R, QM65R, QM75R, QM85R), and QMR-T (QM32R-T, QM43R-T, QM55R-T). The QMR-T models are specifically highlighted for their touchscreen capabilities.
The Smart Signage functions primarily as a display device, capable of connecting to various input sources such as PCs, laptops, and tablet PCs via HDMI, DVI, or DisplayPort cables. It supports network connectivity through an RJ45 LAN cable for MDC (Multi Display Control) and internet access, utilizing Cat7 STP Type cables for optimal connection. RS232C ports are available for connecting to MDC and other monitors, with an adapter provided for D-SUB (9-pin) RS232C cables. USB ports (USB 1 (1.0A) and USB 2 (0.5A)) allow for connecting USB memory devices. For audio, the devices feature DVI/HDMI AUDIO IN for receiving sound from a source device and AUDIO OUT for outputting sound to an external audio device. An IR IN port is included for connecting an external IR cable to enhance remote control signal reception.
For models with touchscreen functionality (QMR-T series), the device allows users to control a PC by tapping the screen, similar to using a mouse or keyboard. This capacitive touch screen detects minute electric currents from the user's fingertip. To enable touch functionality, a TOUCH OUT cable must be connected between the TOUCH OUT SCREEN port on the display and a USB port on the product, and also between the TOUCH OUT PC port on the display and a USB port on the PC. Calibration of the touchscreen is performed through the "Tablet PC Settings" in Windows, ensuring accurate touch response.
Usage features include a control menu accessible by pressing the power button when the product is on. This menu allows users to power off the product or select the input source. For QMR-T models, an administrator menu is displayed by touching and holding the screen when the product is on. This menu provides options for adjusting volume, accessing the Home screen, displaying the OSD (On-Screen Display) menu for settings changes, selecting input sources, and powering off the device. If touchscreen control is unavailable, the remote control can be used to navigate to "System → Touch Control" in the OSD menu to enable it or to unlock the Admin Menu if it's locked.
Maintenance features and precautions are outlined to ensure the longevity and proper functioning of the device. The manual emphasizes that the color and appearance of parts may vary, and specifications are subject to change without notice for performance improvement. For QBR models (excluding QB98R), QM32R-T, and QER models, the recommended daily use is less than 16 hours; exceeding this may void the warranty. An administration fee may be charged for service calls if no defect is found and the user manual has not been read.
When handling the panel, users are cautioned against standing the product upright as it is fragile. It is recommended to lay the product down, preferably using its packaging, especially for larger models (85 inches or more). Handles on the back should be used when moving the product. Users should avoid holding or grasping any area within 15 mm from the front of the product.
For installation, the product must be securely attached to a solid wall perpendicular to the floor by an authorized installation company. Tilting the product is allowed up to a maximum angle of 15° from a perpendicular wall surface. For Portrait mode, the product should be rotated clockwise until the power indicator is correctly positioned. Installation on ceilings, floors, or tables is not recommended. Proper ventilation is crucial; a minimum space of 40 mm (A) should be maintained between the product and the wall surface for perpendicular installations, and 40 mm (A), 70 mm (B), 50 mm (C), and 50 mm (D) for indented walls, with an ambient temperature kept below 35 °C (B/E).
Wall mount kit specifications (VESA) are provided, detailing screw hole dimensions and quantities for different models. Users are advised to use screws of standard length and VESA specifications to prevent damage. Over-tightening screws can also cause damage or lead to the product falling. Samsung disclaims liability for damage or injury resulting from non-VESA mounts or failure to follow installation instructions. The product should not be mounted at more than a 15-degree tilt. At least two people are required for mounting, with four or more for 82-inch and larger models. It is critical not to install the wall mount kit while the product is turned on to avoid electric shock.
For touchscreen models, specific care instructions include ensuring no electrical substances contact the screen to prevent static and improper function. Users should not press hard on the screen or use sharp objects, as this can cause damage. Tapping the screen with gloves, dirty fingers, or sharp objects like fingernails or ballpoint pens can impair functionality. Moisture contact should also be avoided as it can affect the touch sensor. To prevent screen degradation or stains, users should avoid displaying still images for extended periods and switch off the screen when not in use.
The device supports Plug-and-Play functionality, automatically optimizing monitor settings with compatible PC systems. However, users can customize installation settings if desired. The manual notes that approximately 1 pixel per million may appear brighter or darker due to manufacturing, which does not affect product performance. For optimal picture quality, the product should be set to the specified resolution for its screen size; using other resolutions may degrade quality. Detailed device specifications and energy labeling information can be found on the Samsung website or through the EPREL database for European models and a dedicated Samsung page for Turkey.
| Response time | 8 ms |
|---|---|
| Display diagonal | 50 \ |
| Display brightness | 500 cd/m² |
| Display technology | - |
| Native aspect ratio | 16:9 |
| LED backlighting type | Edge-LED BLU |
| Contrast ratio (typical) | 4000:1 |
| High Dynamic Range (HDR) supported | Yes |
| Dynamic contrast ratio marketing name | Mega Contrast |
| AC input voltage | 100 - 240 V |
| AC input frequency | 50 - 60 Hz |
| Power consumption (standby) | 0.5 W |
| Power consumption (typical) | 117 W |
| Processor model | A72 |
| Processor family | ARM Cortex |
| Processor frequency | 1.7 GHz |
| Purpose | Commercial |
| RMS rated power | 10 W |
| Number of built-in speakers | 2 |
| HDMI ports quantity | 3 |
| Package depth | 152 mm |
| Package width | 1269 mm |
| Package height | 784 mm |
| Package weight | 17600 g |
| Operating temperature (T-T) | 0 - 40 °C |
| Operating relative humidity (H-H) | 10 - 80 % |
| Mounting type | Wall |
| Product color | Black |
| Product design | Digital signage flat panel |
| Anti-glare screen | Always gives an optimal view, even in direct sunlight. |
| Placement supported | Indoor |
| Panel mounting interface | 200 x 200 mm |
| Display depth | 46.3 mm |
|---|---|
| Display width | 1121.4 mm |
| Display height | 643.9 mm |
| Display weight | 13400 g |